-
Book Overview & Buying
-
Table Of Contents

-
Feedback & Rating

Unity Cookbook
By :
Unity Cookbook
By:
Overview of this book
Unleash your game development potential with Unity Cookbook, 5th Edition, designed to equip you with the skills and knowledge needed to excel in Unity game development. With over 160 expertly crafted recipes empowering you to pioneer VR and AR experiences, excel in mobile game development, and become a master of audio techniques.
In this latest edition, we've meticulously curated a collection of recipes that reflect the latest advancements in Unity 2023, ensuring you stay at the forefront of game development. You'll discover dedicated recipes for First/Third Person (Core) templates, create engaging mobile games, delve into Virtual and Augmented Reality, and go further with audio by exploring advanced techniques. Additionally, the book has been fully updated to incorporate the new input system and TextMeshPro, essential elements for modern game development.
From exploring C# scripting to crafting stylish UIs, creating stunning visual effects, and understanding shader development through Shader Graph, every chapter is designed to take you closer to your goal of becoming a proficient Unity developer.
So, whether you're aiming to develop the next hit game, enhance your portfolio, or simply have fun building games, this book will be your trusted companion on your journey to Unity proficiency.
Table of Contents (22 chapters)
Preface

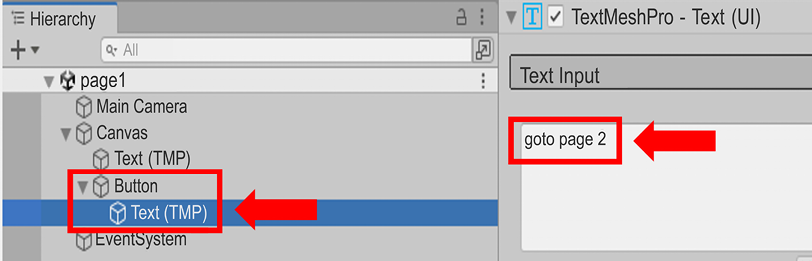
Displaying Data with Core UI Elements
 Free Chapter
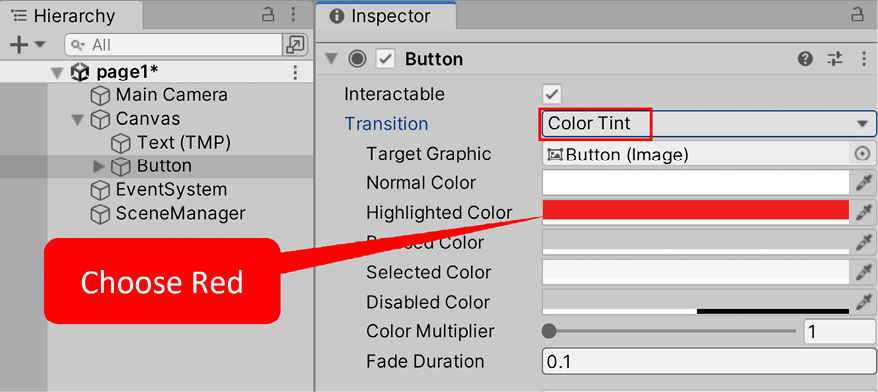
Responding to User Events for Interactive UIs
Inventory and Advanced UIs
Playing and Manipulating Sounds
Textures, Materials, and 3D Objects
Creating 3D Environments with Terrains
Creating 3D Geometry with ProBuilder
2D Animation and Physics
Animated Characters
Saving and Loading Data
Controlling and Choosing Positions
Navigation Meshes and Agents
Cameras, Lighting, and Visual Effects
Shader Graphs and Video Players
Particle Systems and Other Visual Effects
Mobile Games and Applications
Augmented Reality (AR)
Virtual and Extended Reality (VR/XR)
Advanced Topics – Gizmos, Automated Testing, and More
Other Books You May Enjoy
Index
Customer Reviews