


To animate a button for enlargement when the mouse is over it (the Highlighted state), do the following:
- Create a new Unity 2D project.
- Create a UI Button.
- In the Inspector Button (Script) component, set the Transition property to Animation.
- Click the Auto Generate Animation button (just below the Disabled Trigger property) for the Button (Script) component:
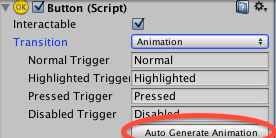
Figure 2.8 – Auto Generate Animation
- Save the new controller (in a new folder called Animations), naming it button-animation-controller.
- Ensure that the Button GameObject is selected in the Hierarchy window. Open Window | Animation | Animation. In the Animation window, select the Highlighted clip from the drop-down menu:
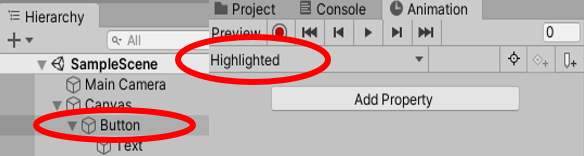
Figure 2.9 – Selecting the Button GameObject in the Hierarchy window
- In the Animation window, click on the red record circle button, and then click on the Add Property button, choosing to record changes to the Rect Transform | Scale property.
- Two keyframes will have been created. Delete the second one at 1:00 (since we don't want a "bouncing" button):
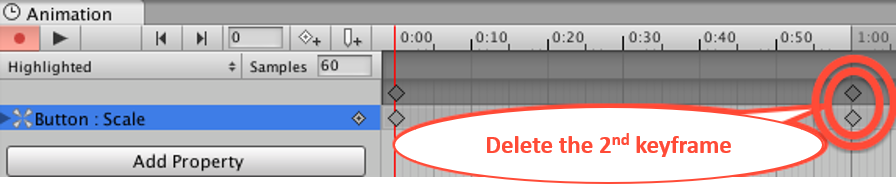
Figure 2.10 – Deleting the keyframe
- Select the frame at 1:00 by clicking one of the diamonds (both turn blue when selected), and then press the Backspace/Delete key.
- Select the first keyframe at 0:00 (the only one now!). In the Inspector window, set the X and Y scale properties of the Rect Transform component to (1.2, 1.2).
- Click on the red record circle button for the second time to stop recording the animation changes.
- Save and run your scene. You will see that the button smoothly animates and becomes larger when the mouse is over it, and then smoothly returns to its original size when the mouse has moved away.


