-
Book Overview & Buying
-
Table Of Contents

-
Feedback & Rating

Realistic Asset Creation with Adobe Substance 3D
By :
Realistic Asset Creation with Adobe Substance 3D
By:
Overview of this book
Adobe Substance 3D is a comprehensive suite complete with everything an artist needs to create stunning 3D digital materials. Getting a grip on the ecosystem of apps can be challenging for beginners, which is where Realistic Asset Creation with Adobe Substance 3D comes in!
This practical guide doesn't bombard you with reams of textual information. Instead, you get an interactive, project-based book that’ll help you gain sound knowledge of Adobe Substance 3D and set you on the right path toward a career in 3D design. You’ll start off with the rudiments of Adobe Substance 3D Painter, which will enable you to acquire the skills needed to work with layers, masks, shelves, textures, and more. Next, you’ll move on to Adobe Substance 3D Designer and become well-acquainted with this node-based design tool as you progress through the chapters. The final section is devoted to Adobe Substance 3D Stager, which teaches you to build complex 3D scenes and visualize your edits in real time.
By the end of this Adobe book, you’ll have gained a solid understanding of Adobe Substance 3D and developed the skills to build a comprehensive portfolio of work, setting you up for a lucrative career in 3D design.
Table of Contents (17 chapters)
Preface

Chapter 1: Getting Started with Adobe Substance 3D Painter
 Free Chapter
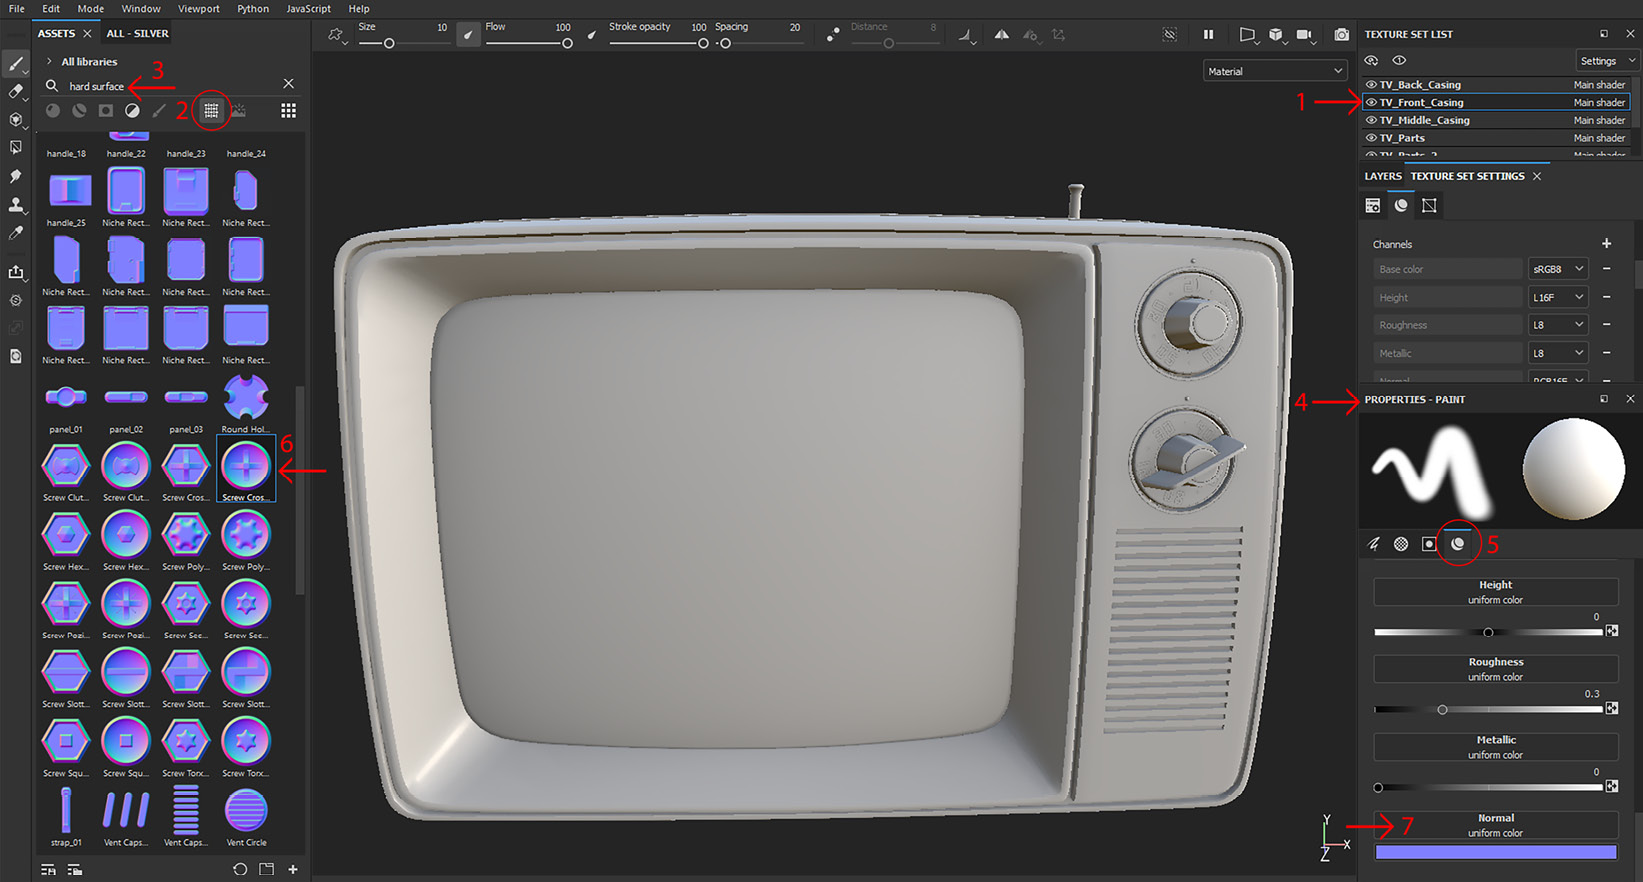
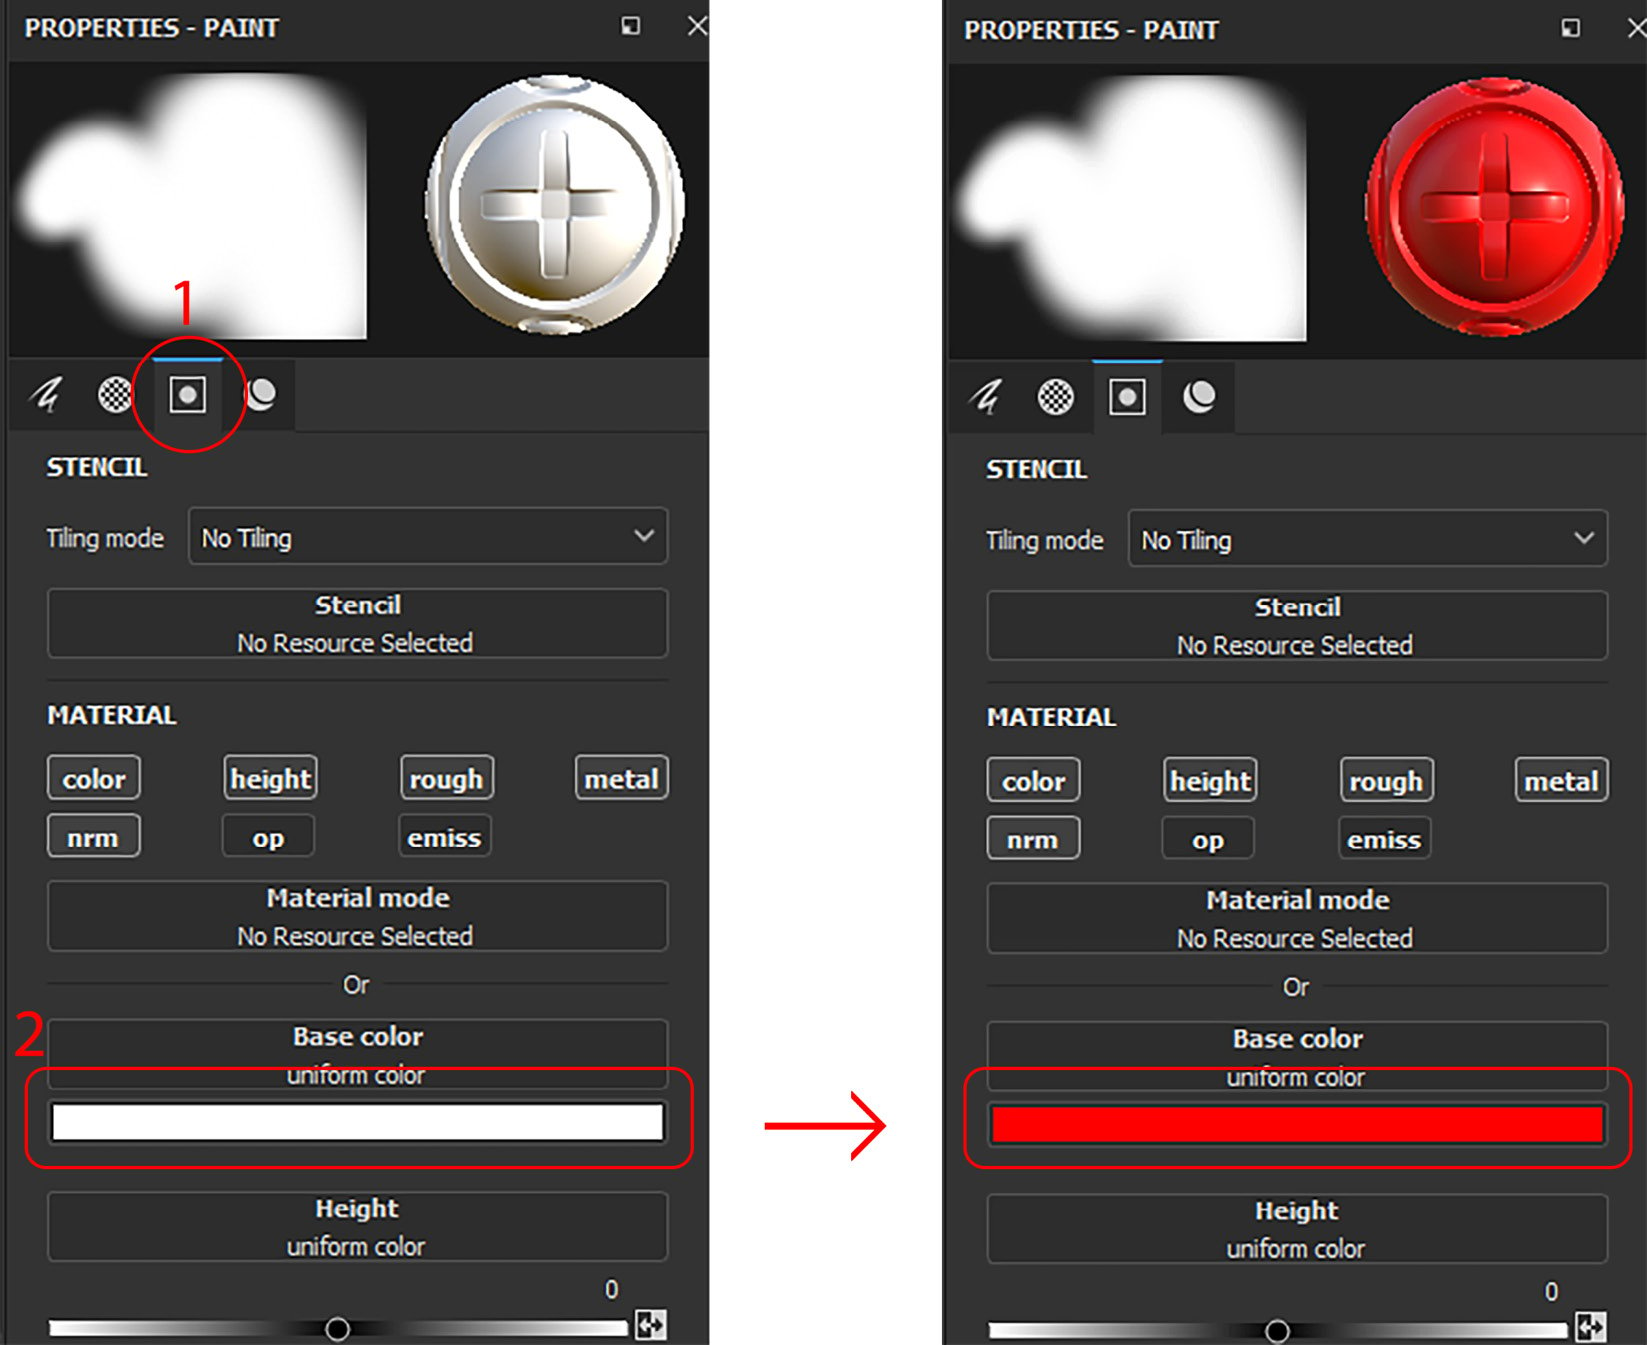
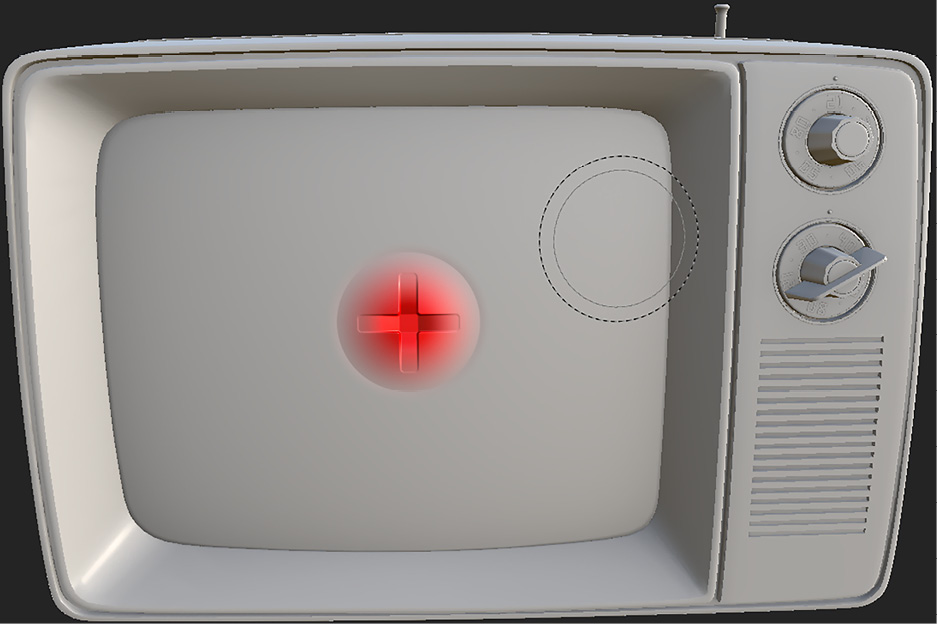
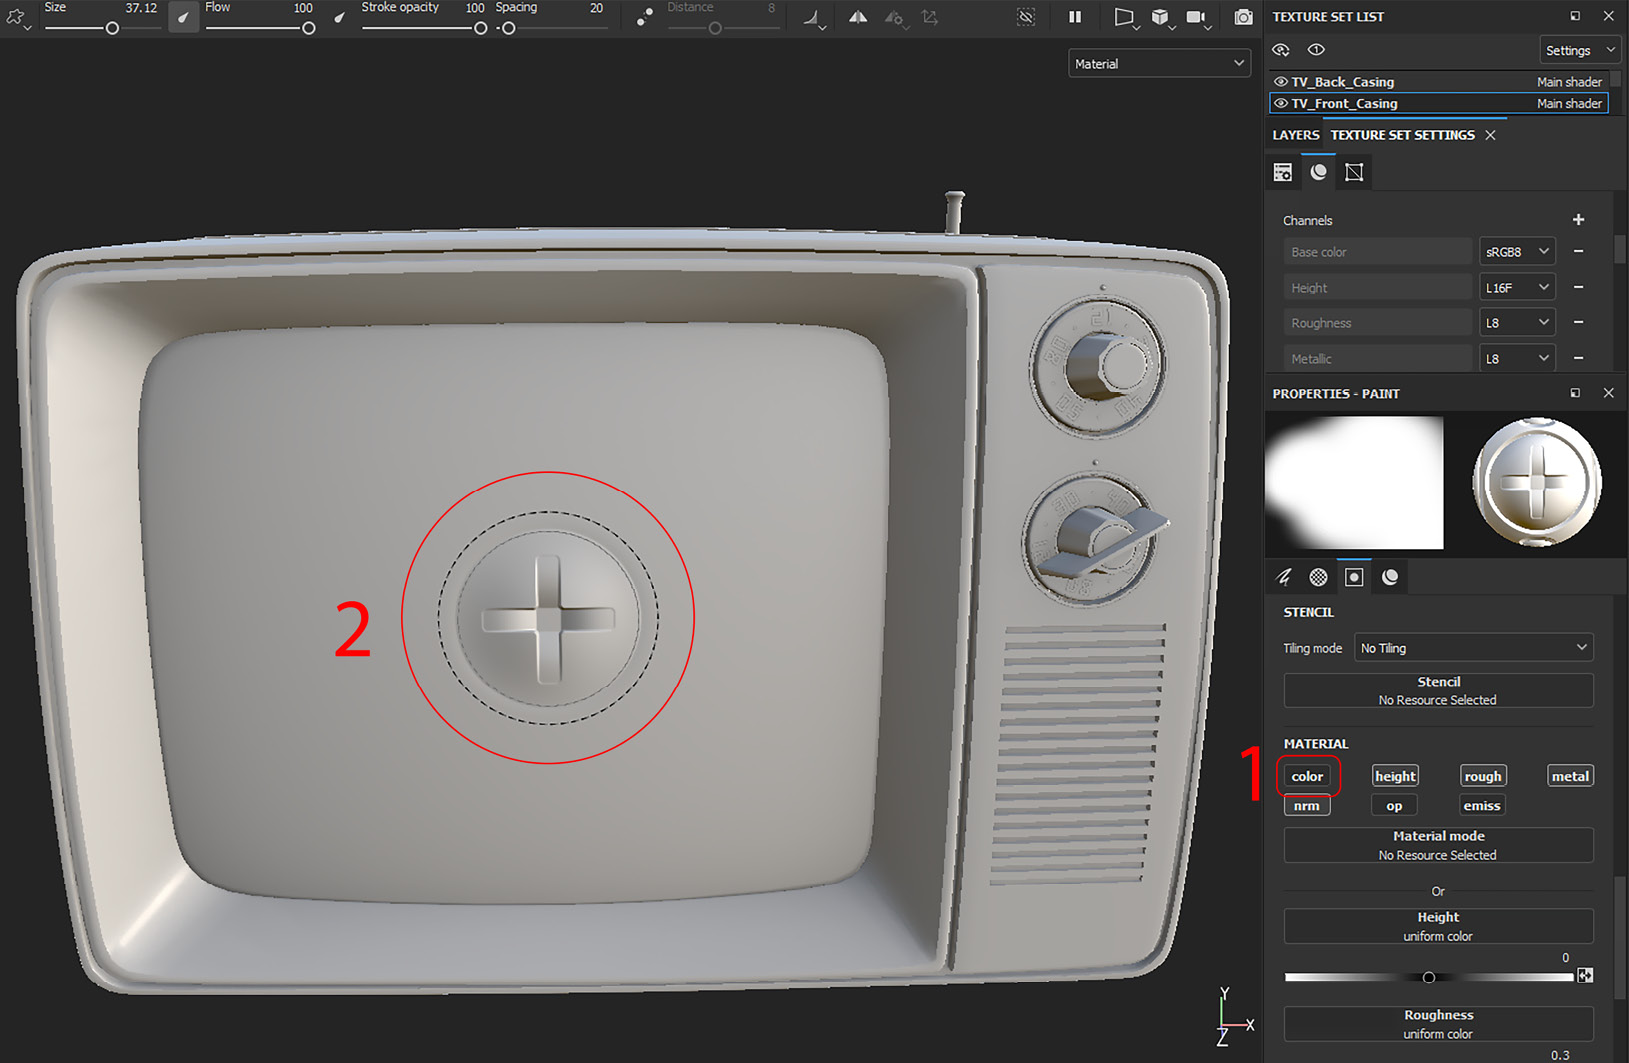
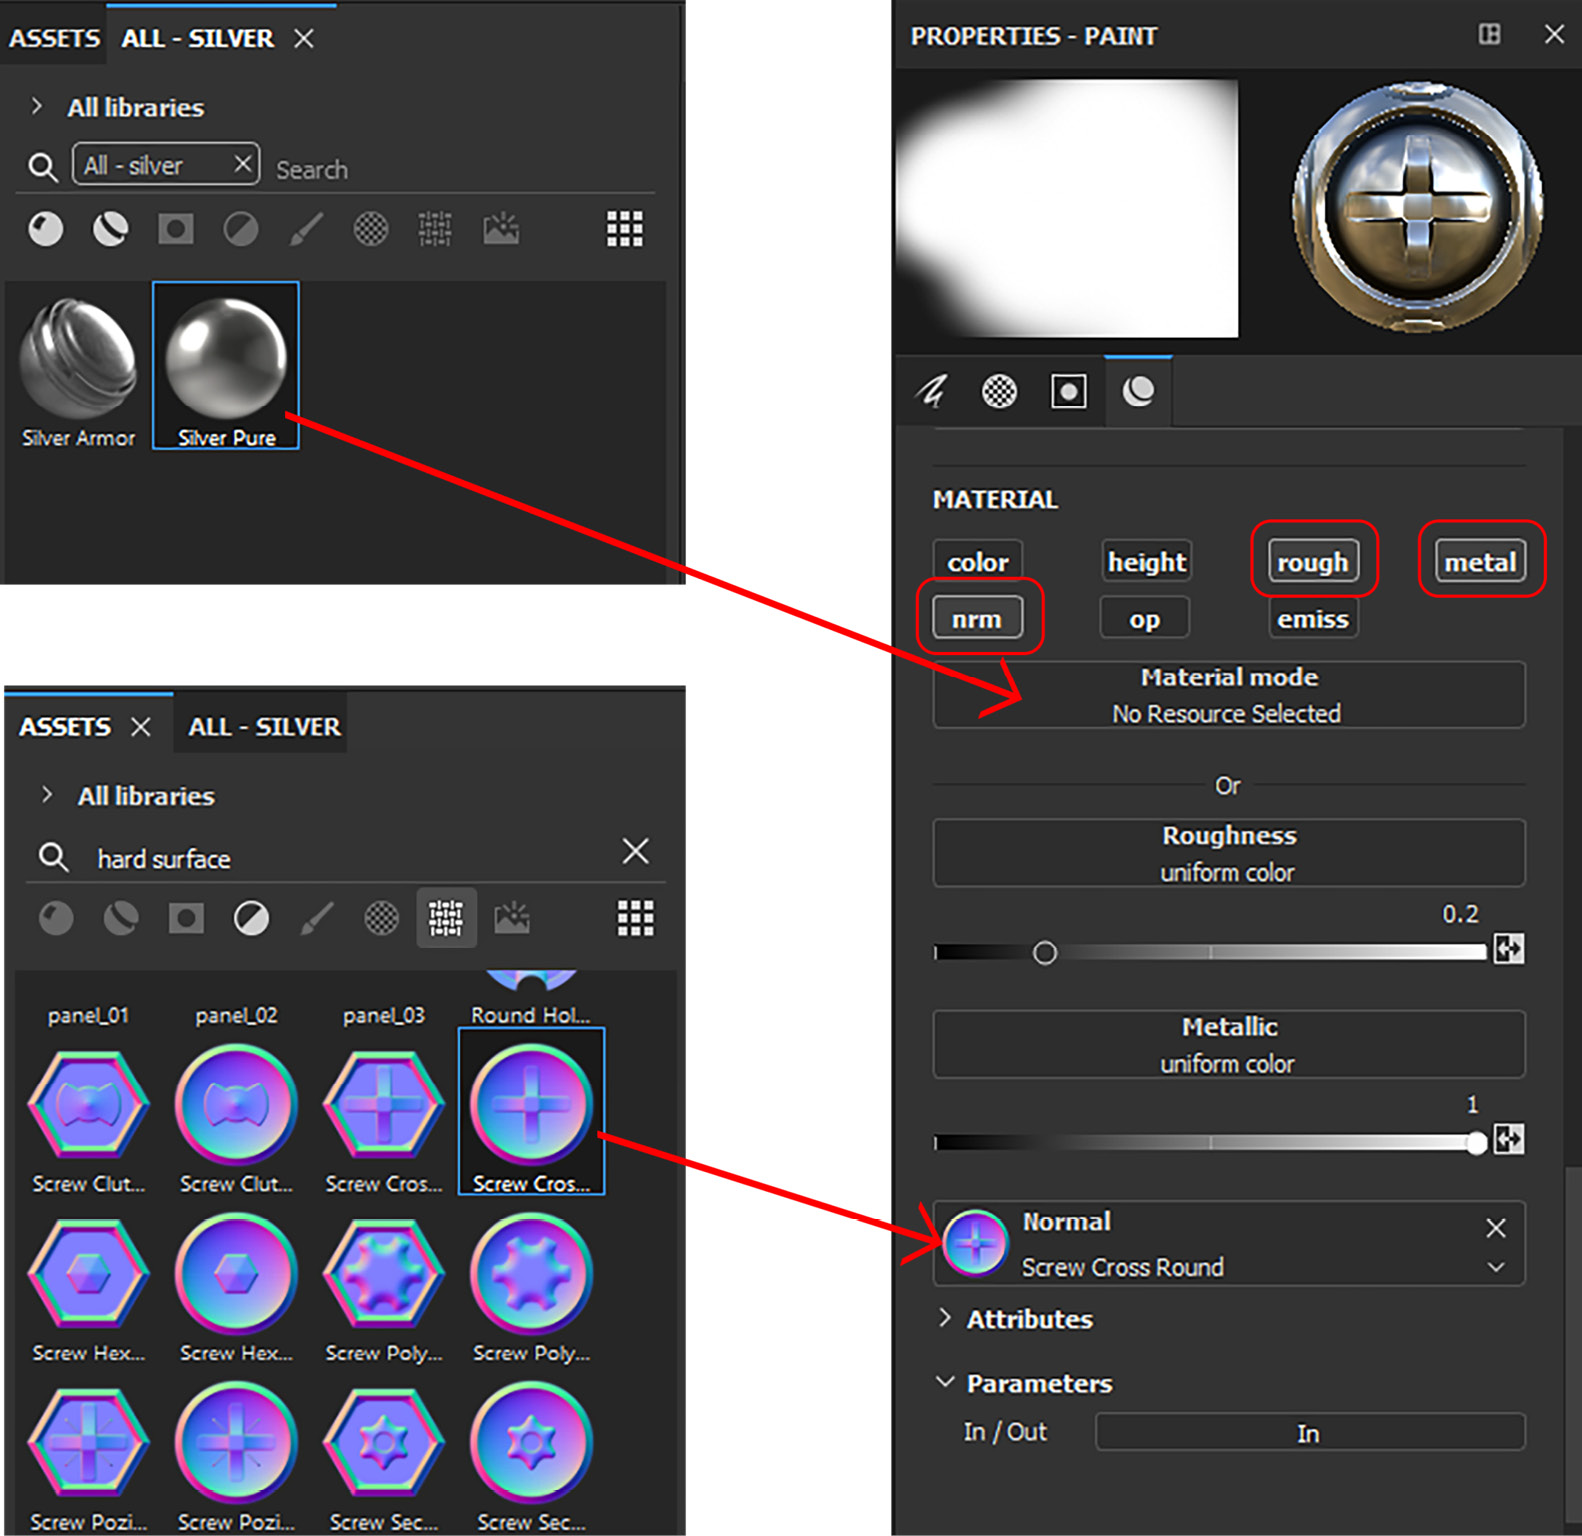
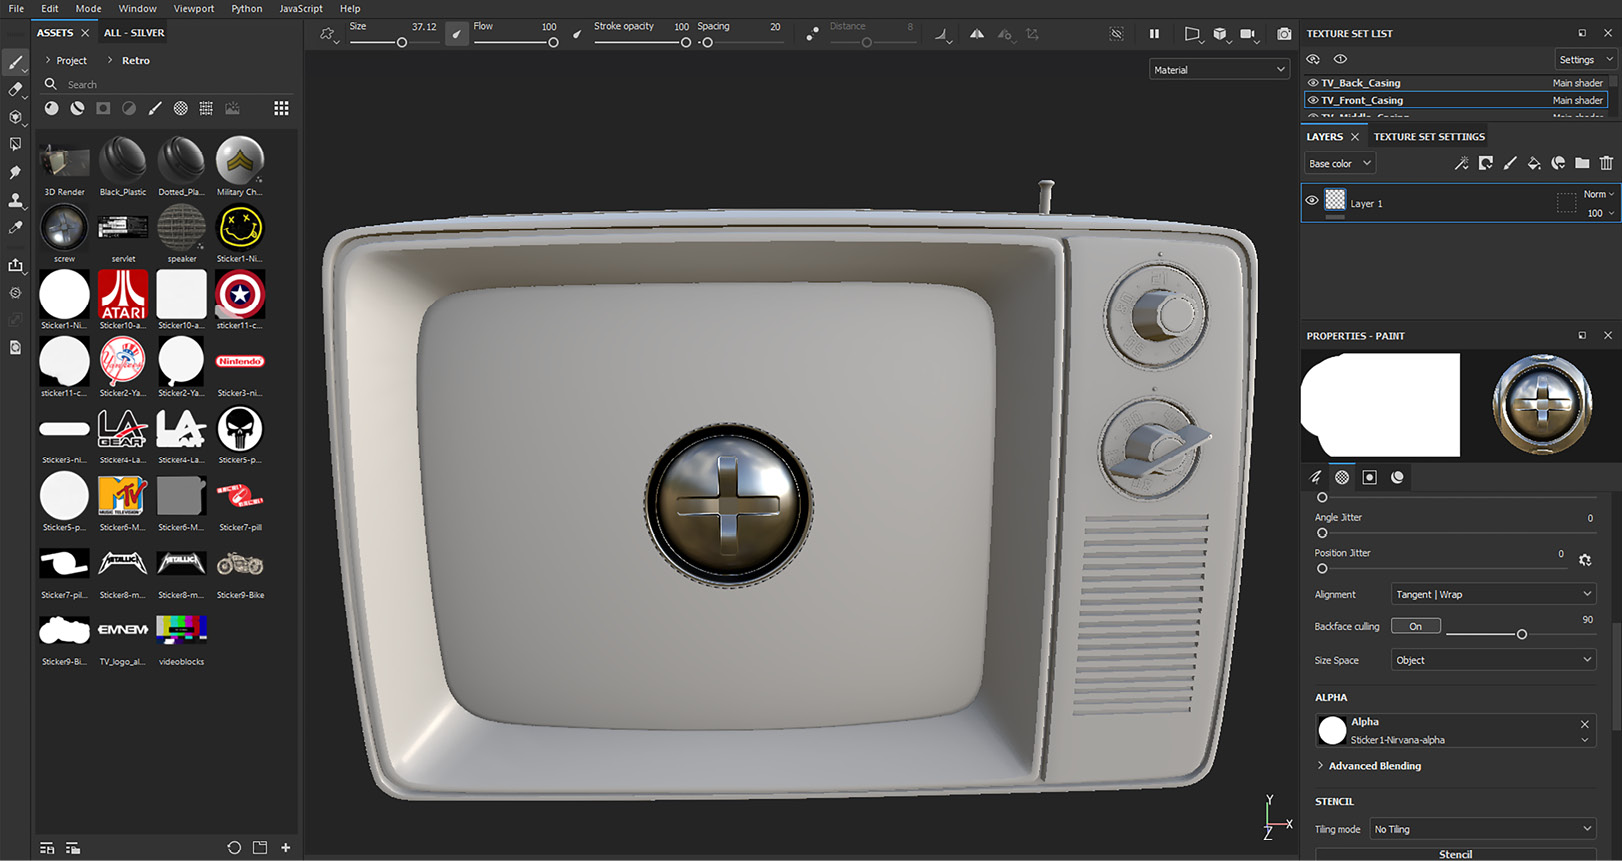
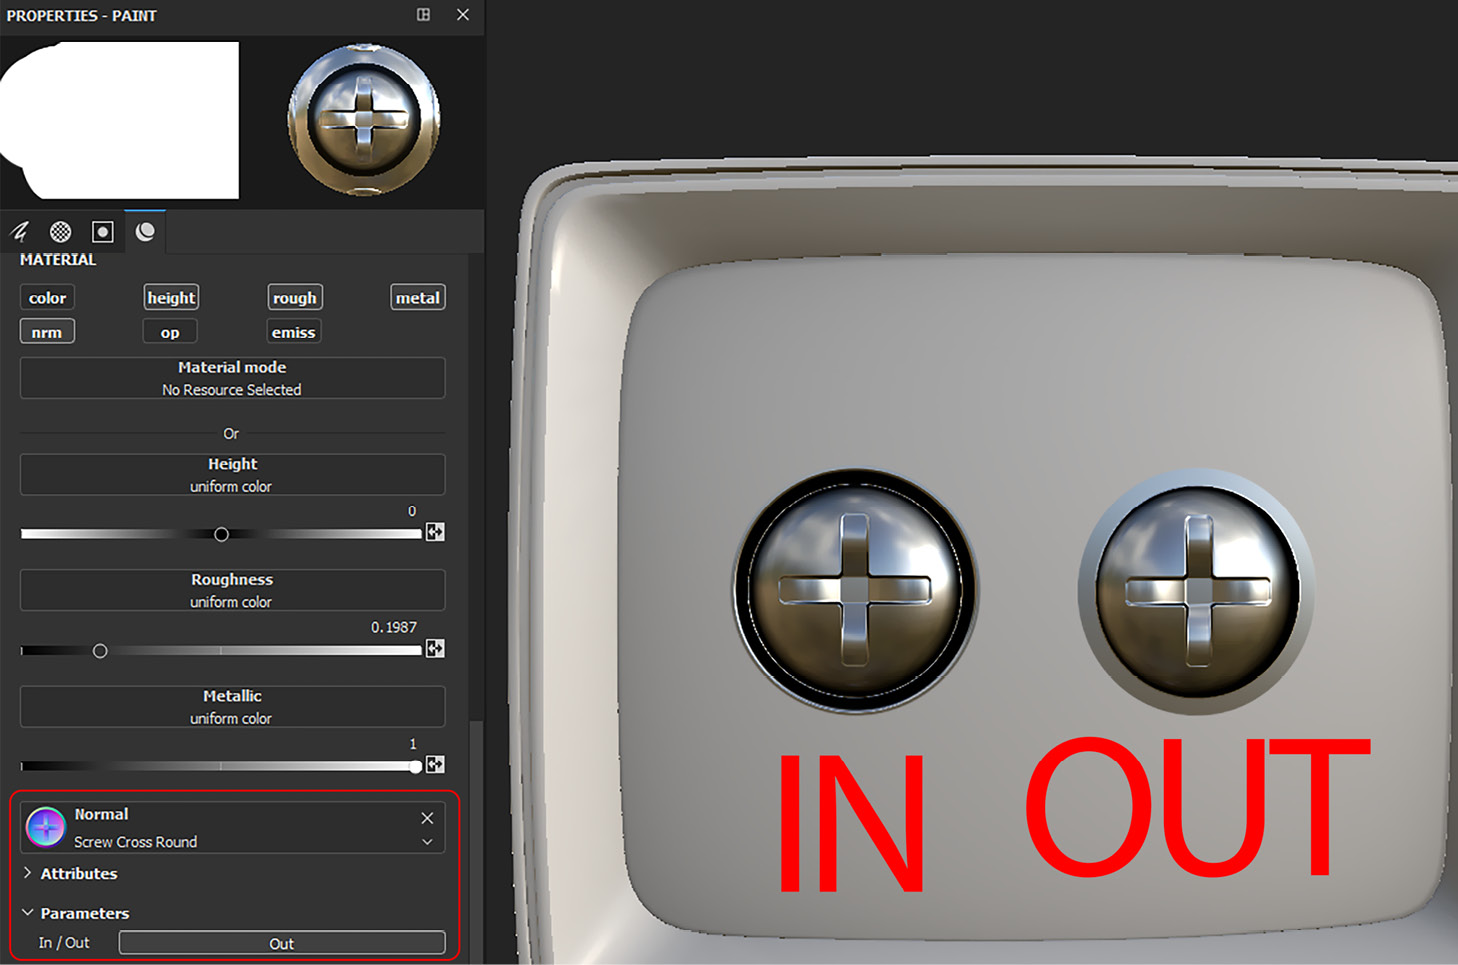
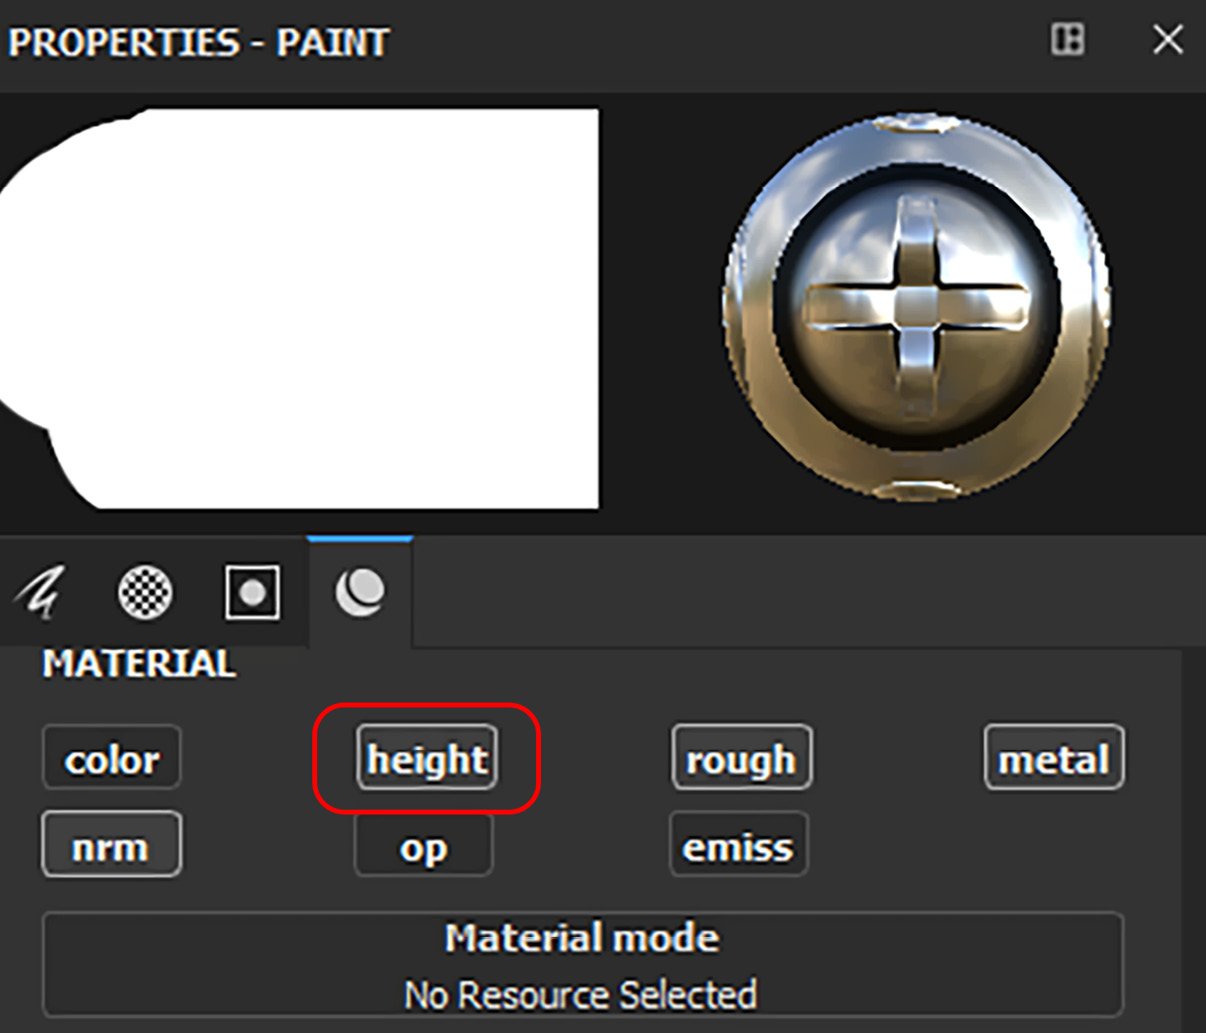
Chapter 2: Working with Assets in Adobe Substance 3D Painter
Chapter 3: Working with Layers and Maps in Adobe Substance 3D Painter
Chapter 4: Working with Masks in Adobe Substance 3D Painter
Chapter 5: Working with Advanced Tools in Adobe Substance 3D Painter
Chapter 6: Working with Materials and Smart Materials in Adobe Substance 3D Painter
Chapter 7: Getting Started with Adobe Substance 3D Designer
Chapter 8: Nodes in Adobe Substance 3D Designer
Chapter 9: Blending Modes in Adobe Substance 3D Designer
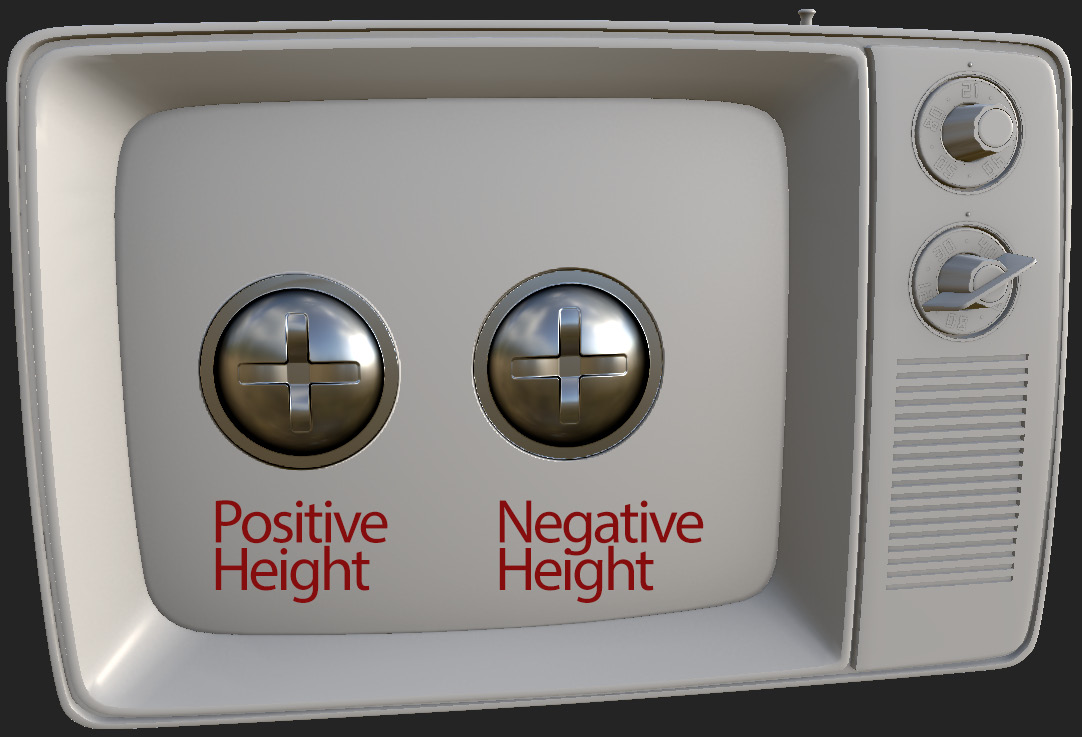
Chapter 10: Creating a Television Shelf in Adobe Substance 3D Designer
Chapter 11: Adobe 3D Sampler at a Glance
Chapter 12: Getting Started with Adobe Substance 3D Stager
Chapter 13: Models, Materials, and Lights in Adobe Substance 3D Stager
Chapter 14: Cameras and Rendering inside Adobe Substance 3D Stager
Index
Customer Reviews