Sign In Start Free Trial
Account

Add to playlist

Create a Playlist

Modal Close icon
You need to login to use this feature.
  • Book Overview & Buying Photorealistic Materials and Textures in Blender Cycles
  • Table Of Contents Toc
  • Feedback & Rating feedback
Photorealistic Materials and Textures in Blender Cycles

Photorealistic Materials and Textures in Blender Cycles

By : Arijan Belec
4.5 (15)
close
close
Photorealistic Materials and Textures in Blender Cycles

Photorealistic Materials and Textures in Blender Cycles

4.5 (15)
By: Arijan Belec

Overview of this book

Blender is one of the most versatile tools in the 3D software industry, and with a growing audience and constantly expanding set of features, it has become more powerful, useful, and in demand than ever before. This updated fourth edition of Photorealistic Materials and Textures in Blender Cycles is an all-inclusive guide to procedural texturing, rendering, and designing materials in Blender, covering all aspects of the 3D texturing workflow. The book begins by introducing you to Blender’s material nodes and material property functions, and then helps you create photorealistic textures by understanding texture maps and mapping them to 3D models. As you advance, you’ll learn to design high-quality environments and lighting using HDRIs and Blender’s lighting options. By exploring, breaking down, and studying the underlying mechanics that allow you to develop these elements, you’ll create any material, texture, or environment and use it to improve your artwork and present them in a professional way. Finally, you’ll discover how to correctly set up scenes and render settings, and get to grips with the key elements of achieving realism. By the end of this book, you’ll have gained a solid understanding of materials, textures, shading, lighting, rendering, and all the critical aspects of achieving the highest quality with your 3D artwork.
Table of Contents (21 chapters)
close
close
Free Chapter
1
Part 1: Materials in Cycles
5
Part 2: Understanding Realistic Texturing
9
Part 3: UV Mapping and Texture Painting
14
Part 4: Lighting and Rendering

Unwrapping basic shapes

We will now learn how to cut and UV-unwrap 3D shapes to create UV maps. In the following few steps, we will create and unwrap a basic cube. Although Blender typically automatically unwraps a default cube, it is important that we know how to do this manually since lots of 3D objects will need to be manually unwrapped like a cube, and Blender will not be able to do it automatically:
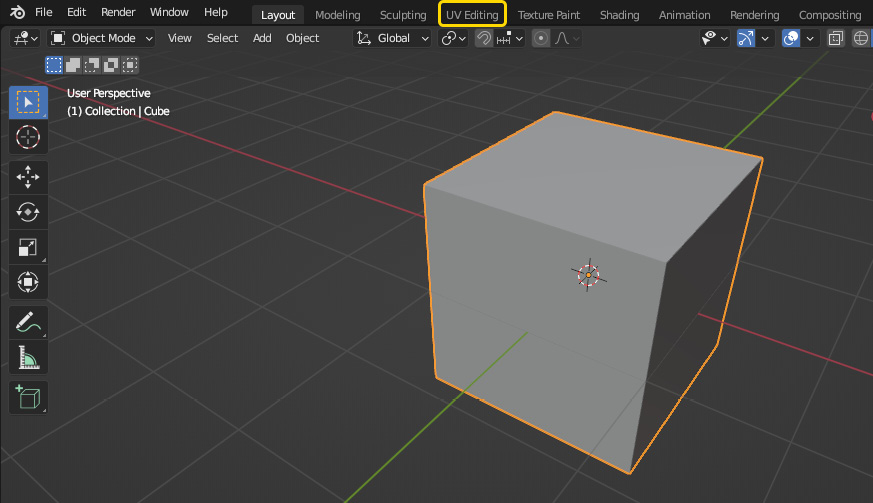
  1. Open the UV Editing workspace from the top of the screen.
Figure 7.5 – Opening the UV Editing workspace

Figure 7.5 – Opening the UV Editing workspace

The screen is now split into two areas: the UV Editor on the left and the 3D View on the right, as shown in Figure 7.6. This allows us to see the 3D model and the UV map at the same time, as we are working. In Figure 7.6, we can see that the default cube, like all other shapes that can be added from the Add menu, is already unwrapped.
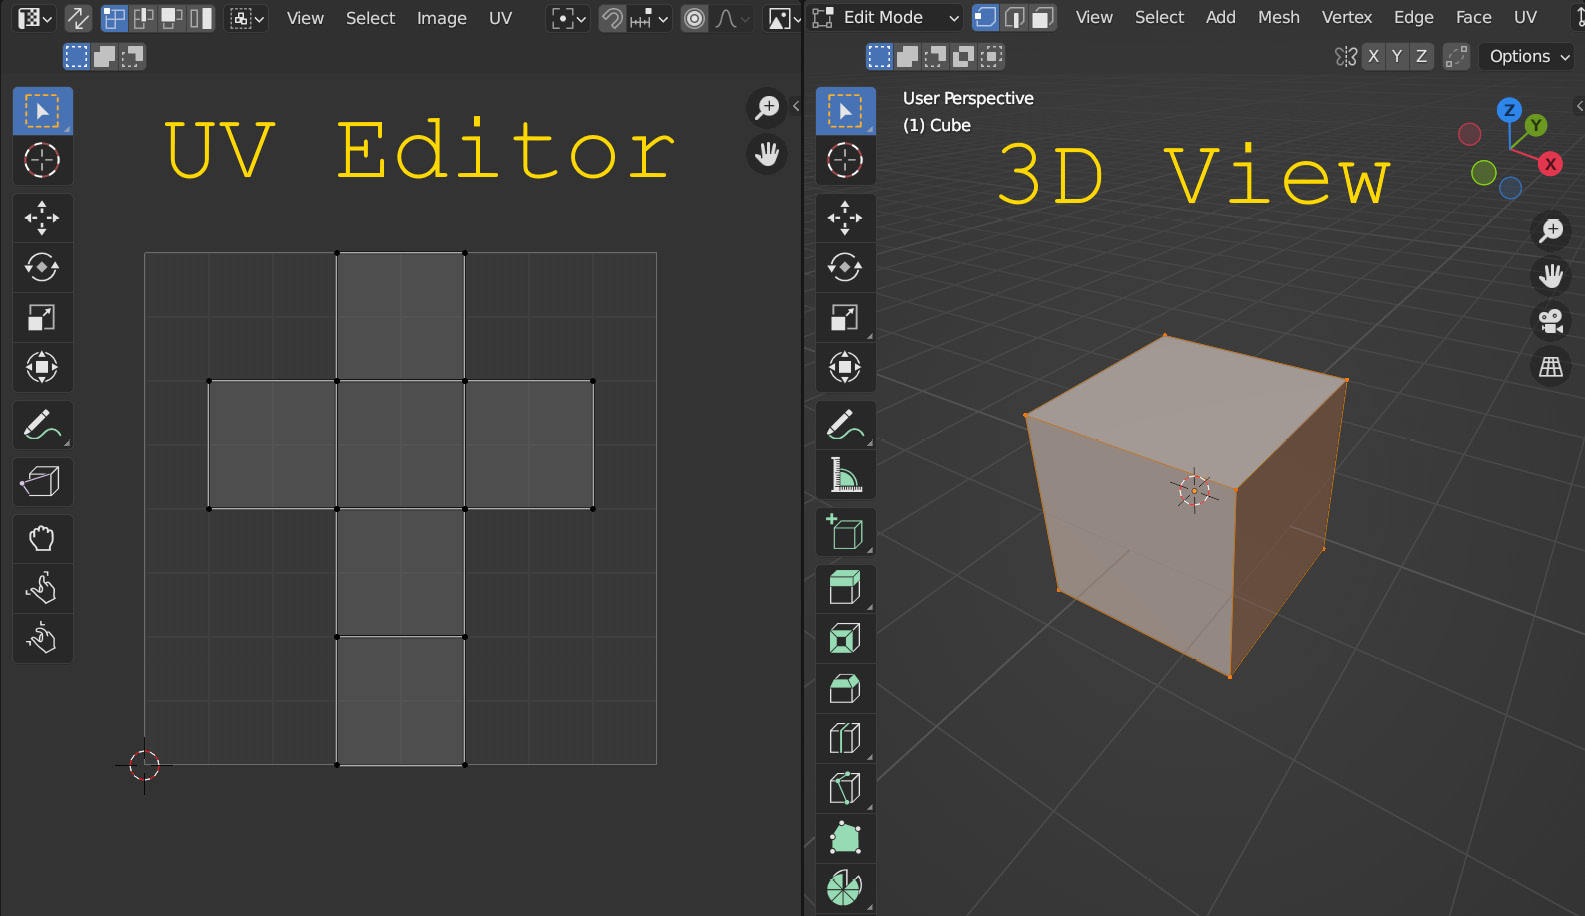
Figure 7.6 – A UV-unwrapped cube in the UV Editing workspace

Figure 7.6 – A UV-unwrapped cube in the UV Editing workspace

...

Unlock full access

Continue reading for free

A Packt free trial gives you instant online access to our library of over 7000 practical eBooks and videos, constantly updated with the latest in tech
bookmark search playlist font-size

Change the font size

margin-width

Change margin width

day-mode

Change background colour

Close icon Search
Country selected

Close icon Your notes and bookmarks

Delete Bookmark

Modal Close icon
Are you sure you want to delete it?
Cancel
Yes, Delete

Confirmation

Modal Close icon
claim successful

Buy this book with your credits?

Modal Close icon
Are you sure you want to buy this book with one of your credits?
Close
YES, BUY