Sign In Start Free Trial
Account

Add to playlist

Create a Playlist

Modal Close icon
You need to login to use this feature.
  • Book Overview & Buying Designing the Adobe InDesign Way
  • Table Of Contents Toc
  • Feedback & Rating feedback
Designing the Adobe InDesign Way

Designing the Adobe InDesign Way

By : Andy Gardiner
4.6 (10)
close
close
Designing the Adobe InDesign Way

Designing the Adobe InDesign Way

4.6 (10)
By: Andy Gardiner

Overview of this book

Adobe InDesign is the leading desktop publishing and layout software for producing brochures, magazines, flyers, books, posters, and a wide range of digital documents. It allows you to rapidly draft your documents with precise control over typography, images, positioning, alignment, color, and other interactive features. However, InDesign’s interface, tools, and workflows can be a bit challenging to get to grips with. This cookbook will assist you in building unparalleled InDesign workflows with tried and tested recipes. With Designing the Adobe InDesign Way, you’ll learn how to add and edit content, create color swatches, and use features such as tables, all while applying software best practices and techniques to ensure that your work is fast, efficient, and easily maintained. Additionally, you’ll explore advanced InDesign features such as text styles, parent pages, tables of contents, and pre-flighting. Finally, you’ll take a closer look at the many export options in InDesign and ways to truly maximize its capabilities. By the end of this book, you’ll be well equipped to draft and design your own projects while ensuring your work is compatible with industry standards for print and digital documents.
Table of Contents (17 chapters)
close
close
Appendix: InDesign Tools Panel at a Glance

Creating text frames and adding placeholder text

When you work within InDesign, everything sits inside a frame. In this recipe, we will look at how to create text frames in InDesign for including type within your documents. You will learn how to add placeholder text (sometimes known as lorem ipsum text), in order to give you some dummy content to work on.

We will then look at how to reposition your text frames, as well as how to resize the frames independently of the text and together with the text.

Getting ready

In order to complete this recipe, simply open InDesign on your system and create a new document with 12 pages, as shown in the Creating a new document recipe in Chapter 1.

How to do it…

In order to create text frames, add placeholder text, and then reposition and resize your text frames, follow these steps:

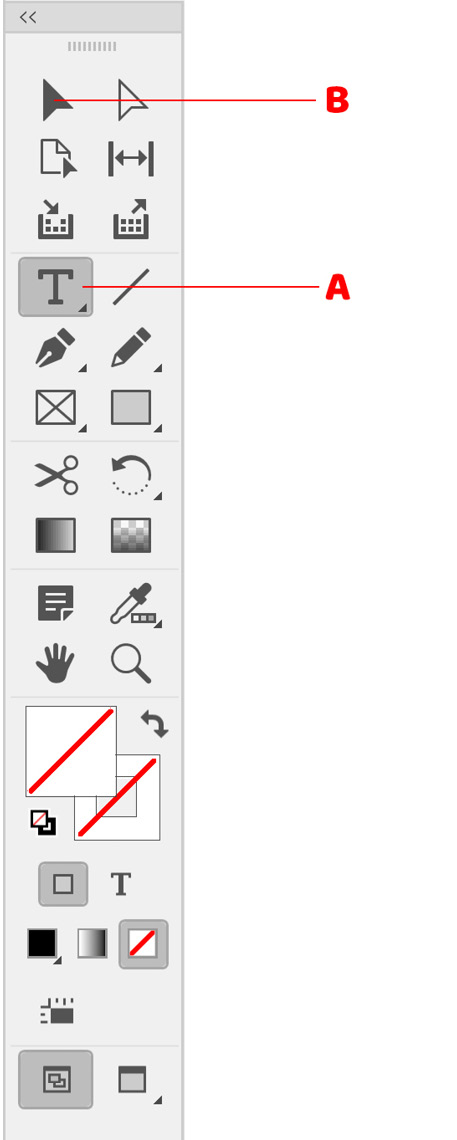
  1. Select the Type tool from the toolbar, marked as A in Figure 2.1.
  2. With the Type tool selected, simply click and drag (while holding the mousing button down) to create a rectangular shape on the page, at whatever size you stipulate. If you wish to create a perfect square rather than a rectangle, simply hold down the Shift key at the same time, and let go of the mouse before releasing the Shift key:
Figure 2.1: The InDesign toolbar

Figure 2.1: The InDesign toolbar

Tip

If you hold down the space bar during the frame creation process while still holding down the mouse button, you can temporarily move the mouse to reposition the frame. If you then release the space bar, you can continue creating your frame again.

  1. When you create a new text frame, the cursor can be seen blinking at the top left of the frame, and if you type on the keyboard, you will see the text appear in the frame; however, we want to generate placeholder text automatically. To automatically generate placeholder text in the frame, either go to the Type menu and select Fill with Placeholder Text or you can right-click on the text frame with the mouse and select Fill with Placeholder text from the pop-up menu that appears.
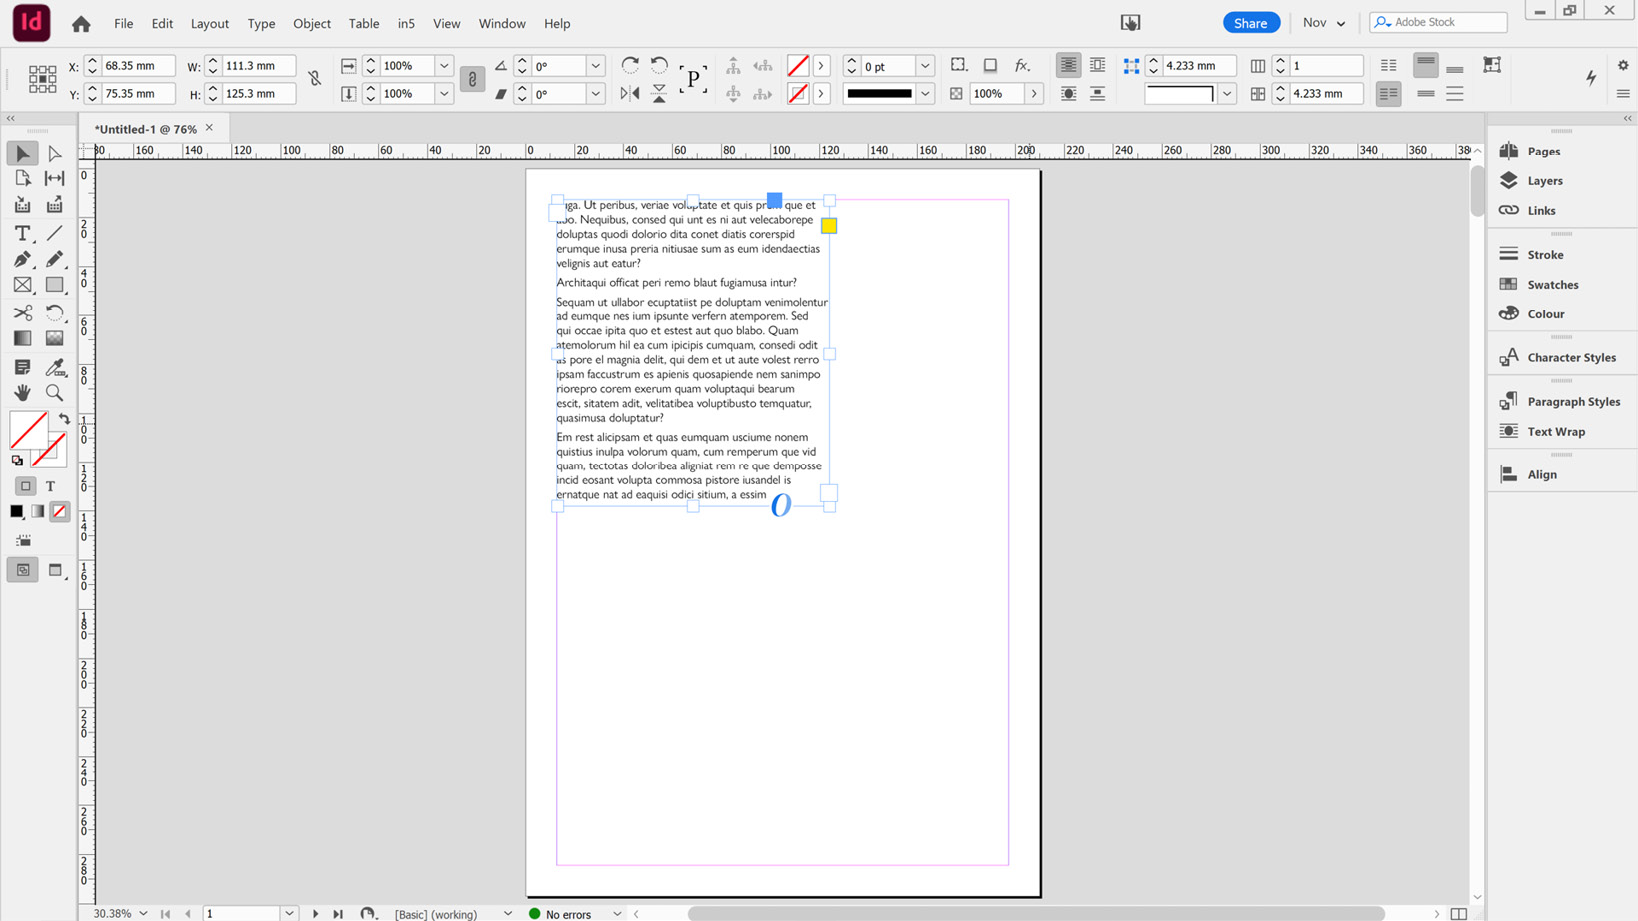
  2. Having created a text frame and added placeholder text you may now wish to reposition the text frame within your document. To do this, you will need to select the Selection tool, marked as B in Figure 2.1. Using this tool, you can now click on the text frame and drag it around within the document to the place you want it. In this instance, we will drag it so that the text frame touches the top and left margins, as shown in Figure 2.2:
Figure 2.2: Repositioning a text frame so that it is aligned with the top and left margins

Figure 2.2: Repositioning a text frame so that it is aligned with the top and left margins

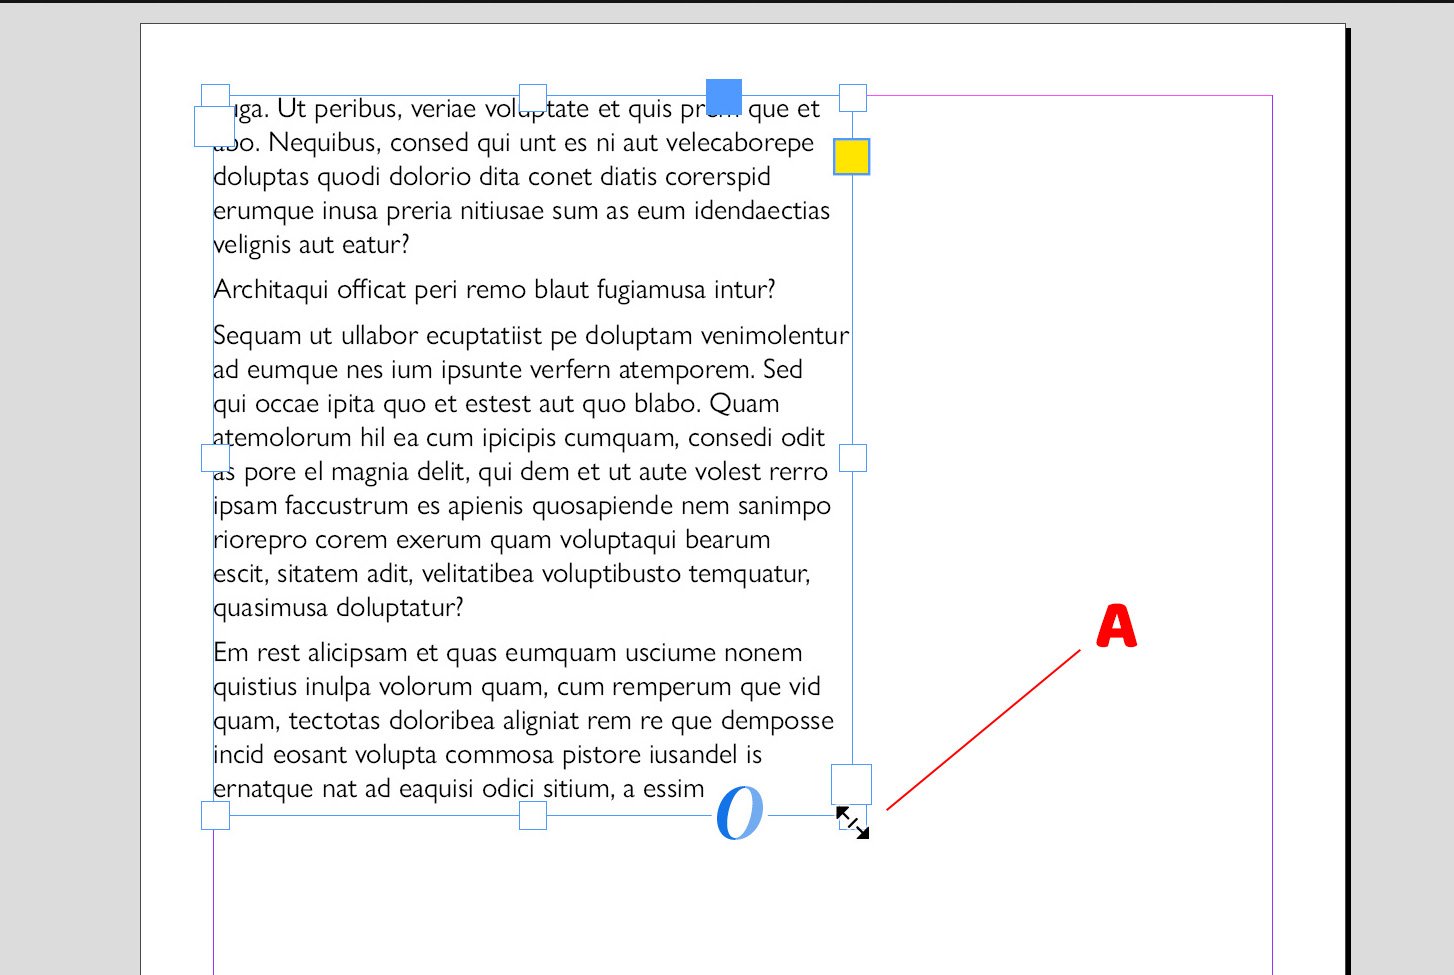
  1. Having repositioned the frame so that it aligns with the top and left margins, we will now resize it so that it also aligns with the bottom and right margins. To resize a text frame, select the frame with the Selection tool, and then move the cursor to hover over the bottom right-hand corner of the frame. As you do this, you should see the cursor change to two little arrows (shown by A in Figure 2.3). When you see the two little arrows, click and hold down the mouse button, then drag the corner of the frame down to align it with the bottom and right-hand margins before releasing the mouse button.

While we have resized the object from the bottom-right corner, it is worth noting that you can resize objects in this way from any of the corners of the object, as well as from halfway through the four sides of the object:

Figure 2.3: A text frame selected and ready to be resized

Figure 2.3: A text frame selected and ready to be resized

bookmark search playlist font-size

Change the font size

margin-width

Change margin width

day-mode

Change background colour

Close icon Search
Country selected

Close icon Your notes and bookmarks

Delete Bookmark

Modal Close icon
Are you sure you want to delete it?
Cancel
Yes, Delete

Confirmation

Modal Close icon
claim successful

Buy this book with your credits?

Modal Close icon
Are you sure you want to buy this book with one of your credits?
Close
YES, BUY