Sign In Start Free Trial
Account

Add to playlist

Create a Playlist

Modal Close icon
You need to login to use this feature.
  • Book Overview & Buying Hands-On Unity 2022 Game Development
  • Table Of Contents Toc
  • Feedback & Rating feedback
Hands-On Unity 2022 Game Development

Hands-On Unity 2022 Game Development

By : Nicolas Alejandro Borromeo
4.7 (22)
close
close
Hands-On Unity 2022 Game Development

Hands-On Unity 2022 Game Development

4.7 (22)
By: Nicolas Alejandro Borromeo

Overview of this book

Unity is a cross-platform game engine that provides you with powerful but simple-to-use features to solve the most common problems in Game Development, such as rendering, animation, physics, sound, and effects. You’ll learn to use these features to create simple but complete games (and all the nuances needed to handle Unity). Complete with hands-on tutorials and projects, this book will teach you to use the Unity game engine, create C# and visual scripts, integrate graphics, sound, and animations, and manipulate physics to create interesting mechanics for your game. You’ll then code a simple AI agent to challenge the user and work with profiling tools to ensure code efficiency. Finally, you'll work with Unity's AR tools to create AR experiences for 3D apps and games before publishing them to the world. If you are interested in creating impressive, commercial-quality games that are playable on a variety of platforms, then you’ve come to the right place.
Table of Contents (23 chapters)
close
close
Free Chapter
1
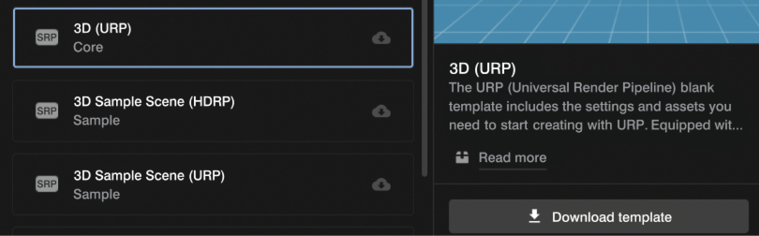
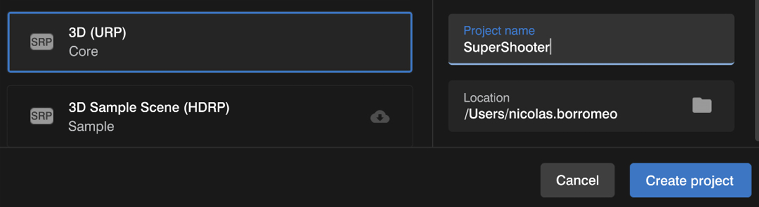
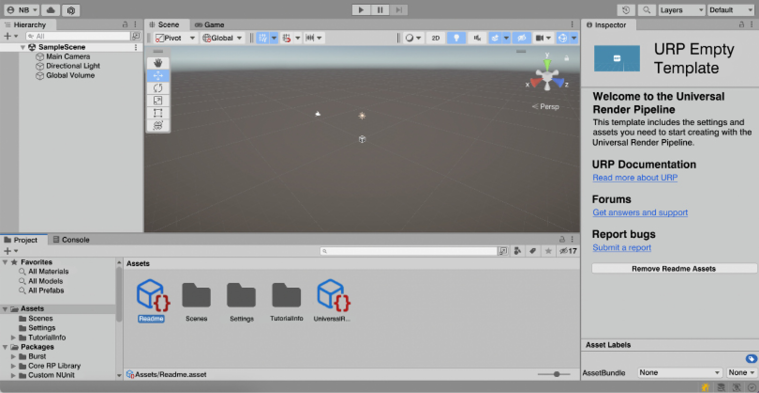
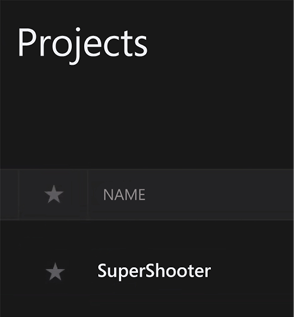
Creating a Unity Project
chevron up
21
Other Books You May Enjoy
22
Index

Creating projects

Now that we have Unity installed, we can start creating our game. To do so, we first need to create a project, which is basically a folder containing all the files that your game will be composed of. These files are called assets and there are different types of them, such as images, audio, 3D models, script files, and so on. In this section, we will see how to manage a project, addressing the following concepts:

  • Creating a project
  • Project structure

Let’s learn first how to create a blank project to start developing our project.

Creating a project

As with Unity installations, we will use the Unity Hub to manage projects. We need to follow these next steps to create one:

  1. Open the Unity Hub and click on the Projects button, and then click on New project:

Figure 1.17: Creating a new project in Unity Hub

  1. Pick the 3D (URP) template as we will be creating a 3D game with simple graphics, prepared to run on every device Unity can be executed on, so the Universal Render Pipeline (or URP) is the better choice for that. In Chapter 10, Materials and Effects with URP and Shader Graph, we will be discussing exactly why.
  2. If you see a Download template button, click it; if not, that means you already have the template:

Figure 1.18: Downloading the 3D URP template

  1. Choose a Project name and a Location, and click Create project:

Figure 1.19: Selecting the Universal Render Pipeline template

  1. Unity will create and automatically open the project. This can take a while, but after that you will see a window similar to the one in the following image. You might see the dark-themed editor instead, but for better clarity we will use the light theme throughout the book. Feel free to keep the dark theme:

Figure 1.20: The Unity Editor window

  1. Close the window, then go back to Unity Hub and pick the project from the list to open it again:

Figure 1.21: Reopening the project

Now that we have created the project, let’s explore its structure.

Project structure

We have just opened Unity, but we won’t start using it until the next chapter. Now, it’s time to see how the project folder structure is composed. To do so, we need to open the folder in which we created the project. If you don’t remember where this is, you can do the following:

  1. Right-click the Assets folder in the Project panel, located at the bottom part of the editor.
  2. Click the Show in Explorer option (if you are using a Mac, the option is called Reveal in Finder). The following screenshot illustrates this:

Figure 1.22: Opening the project folder in Explorer

  1. Then, you will see a folder structure similar to this one (some files or folders may vary):

Figure 1.23: Unity project folder structure

If you want to move this project to another PC or send it to a colleague, you can just compress all those files and send it to them as a ZIP file, but not all the folders are necessary all of the time. The important folders are Assets, Packages, and ProjectSettings. Assets will hold all the files we will create and use for our game, so this is a must. We will also configure different Unity systems to tailor the engine to our game; all the settings related to this are in the ProjectSettings and UserSettings folders. Finally, we will install different Unity modules or packages to expand its functionality, so the Packages folder will hold which ones we are using.

It’s not necessary to copy the rest of the folders if you need to move the project elsewhere or add it to any versioning system, but let’s at least discuss what the Library folder is, especially considering it’s usually a huge size. Unity needs to convert the files we will use to its own format in order to operate, and an example would be audio and graphics. Unity supports MPEG Audio Layer 3 (MP3), Waveform Audio File Format (WAV), Portable Network Graphics (PNG), and Joint Photographic Experts Group (JPG) files (and much more), but prior to using them, they need to be converted to Unity’s internal formats, a process called Importing Assets. Those converted files will be in the Library folder. If you copy the project without that folder, Unity will simply take the original files in the Assets folder and recreate the Library folder entirely. This process can take time, and the bigger the project, the more time involved.

Keep in mind that you want to have all the folders Unity created while you are working on the project, so don’t delete any of them while you work on it, but if you need to move an entire project, you now know exactly what you need to take with you.

Create a Note

Modal Close icon
You need to login to use this feature.
notes
bookmark search playlist download font-size

Change the font size

margin-width

Change margin width

day-mode

Change background colour

Close icon Search
Country selected

Close icon Your notes and bookmarks

Delete Bookmark

Modal Close icon
Are you sure you want to delete it?
Cancel
Yes, Delete

Delete Note

Modal Close icon
Are you sure you want to delete it?
Cancel
Yes, Delete

Edit Note

Modal Close icon
Write a note (max 255 characters)
Cancel
Update Note

Confirmation

Modal Close icon
claim successful

Buy this book with your credits?

Modal Close icon
Are you sure you want to buy this book with one of your credits?
Close
YES, BUY