


In Qt Creator, select New File or Project from the File menu. Qt Creator will present you with the New File or Project wizard, which lets you choose the kind of project you want to create, give it a name, and so on. To create your first application, perform the following steps:
- Select New File or Project if you haven't done so already.
- Qt Creator presents you with a dialog that has a dizzying array of project choices. Choose Application, then Qt Console Application, and then click on Choose....
- Qt Creator asks you for a name and a path to the directory where you want to store the files for the project. For the name, enter HelloWorldConsole and choose a path that makes sense to you (or accept the default). Then, click on Next.
- Qt Creator asks you for the build system you want to use for your project. Just keep the default option, qmake, if you don't have any specific requirements for this. Then, click on Next:
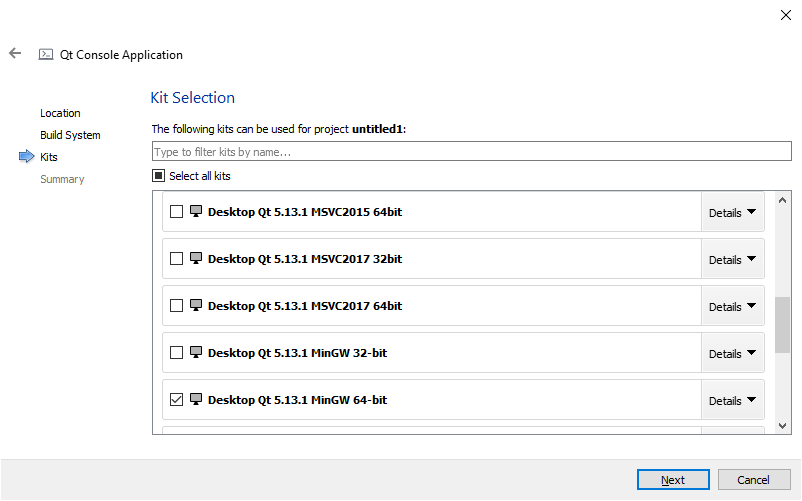
- Qt Creator can support various kits and libraries against which you can build an application. Select the desktop Qt Kit, which should have been installed by default. If you're running Qt on Windows, please make sure that you select the desktop Qt Kit with MinGW, as it is installed by default. Make sure that you have installed Microsoft Visual Studio beforehand if you pick the desktop Qt MSVC Kit. Then, click on Next.
- In the next step, Qt Creator prompts you about the version control system for your project. Qt Creator can use your installed version control clients to perform change tracking for your project. For now, skip this and leave Add to version control set to None. Then, click on Finish.
Qt Creator creates your project and switches to the Edit view. In the source code editor for the main.cpp file, enter the highlighted code:
#include <QCoreApplication>
#include <iostream>

using namespace std;

int main(int argc, char *argv[])
{
    QCoreApplication a(argc, argv);
    cout << "Hello world!";

    return a.exec();
}
The QCoreApplication task handles the entire system startup for an application, and every Qt Console app needs to create one and call its exec method as part of your main method. It sets up Qt's event handler and provides a bunch of porting helpers to determine things such as your application directory, library paths, and other details.
For a console application, that's all you need; you can freely mix and match Qt classes with the C++ standard library and Standard Template Library (STL) although once you master Qt's foundation classes, many STL constructs might feel somewhat limiting.
Next, let's compile and run the application. There are several ways to do this:
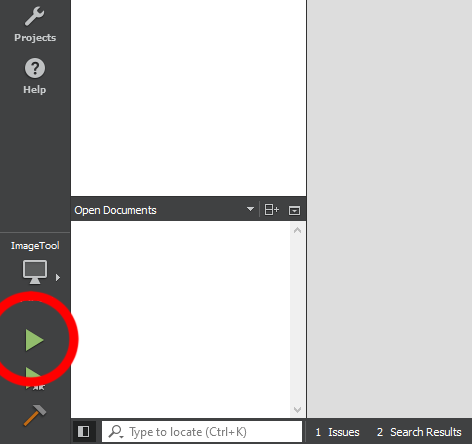
- Click on the green run arrow underneath the Help view button on the left to run the application, as follows:
- Hit F5 to build and run your application in the debugger.
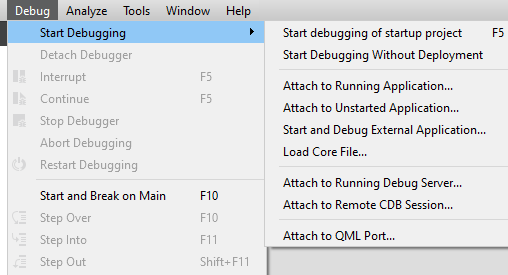
- Click on Start Debugging from the Debug menu, as follows:
- Click on the green run arrow with the bug over the arrow in order to debug the application on the left.
- Choose Run from the Build menu (or hit Ctrl + R).
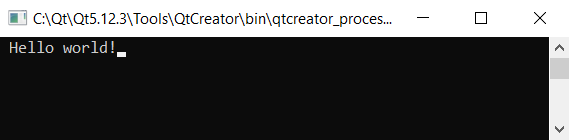
Once the application starts, you'll see the Hello world! message in a console view, as follows:
When you choose one of these options, Qt Creator invokes the compiler and the linker to build your application. If you choose the Debug option, Qt Creator switches to the Debug view (which we will discuss in detail in Chapter 2, Building Applications with Qt Creator) as it starts your application.


