Sign In Start Free Trial
Account

Add to playlist

Create a Playlist

Modal Close icon
You need to login to use this feature.
  • Book Overview & Buying Design Better and Build Your Brand in Canva
  • Table Of Contents Toc
  • Feedback & Rating feedback
Design Better and Build Your Brand in Canva

Design Better and Build Your Brand in Canva

By : Laura Goodsell 
4.4 (10)
close
close
Design Better and Build Your Brand in Canva

Design Better and Build Your Brand in Canva

4.4 (10)
By: Laura Goodsell 

Overview of this book

If you're constantly frustrated by how long it takes to create a design in Canva, then you've come to the right place. This book will get you up and running quickly with creating professional branded graphics in Canva. You’ll learn how to set up a Canva account, both free and pro and create a brand kit while understanding the importance of branding. Next, you’ll discover all the features and tools as well as how to put everything together to build a brand you love and graphics that work for your business. As you progress, the chapters will show you how to organize your account, create presentations, use videos and animation within your marketing materials and more. By the end of this book, you’ll have a solid understanding of what Canva is and what it does and be able to confidently and easily create a branded design from scratch.
Table of Contents (18 chapters)
close
close
1
Part 1: Getting Started, Templates, and Features
6
Part 2: Creating Your Brand and Design Tips
10
Part 3: Let’s Get Creating

Grouping elements

Grouping multiple elements together allows you to move and position them quickly, keeping them all in the same place. The grouping option appears once you have selected an element, text box, or image. You can move individual images around or group them, but if you’ve placed images into a grid, then you cannot group grids together.

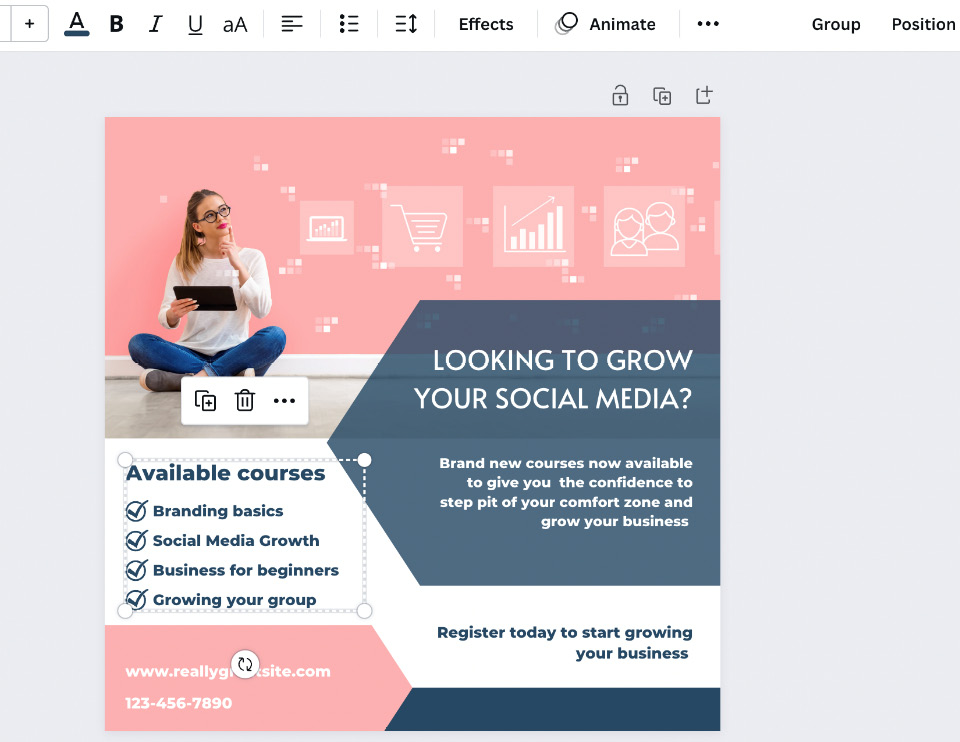
In this example, I have highlighted the Available courses text box and the text boxes underneath. Canva will automatically group them together for you, but once you click off, they ungroup. To leave them grouped, highlight all required text boxes and select the Group option in the top bar, to the right, next to the Position option.

Figure 4.1 – Grouped text boxes

Figure 4.1 – Grouped text boxes

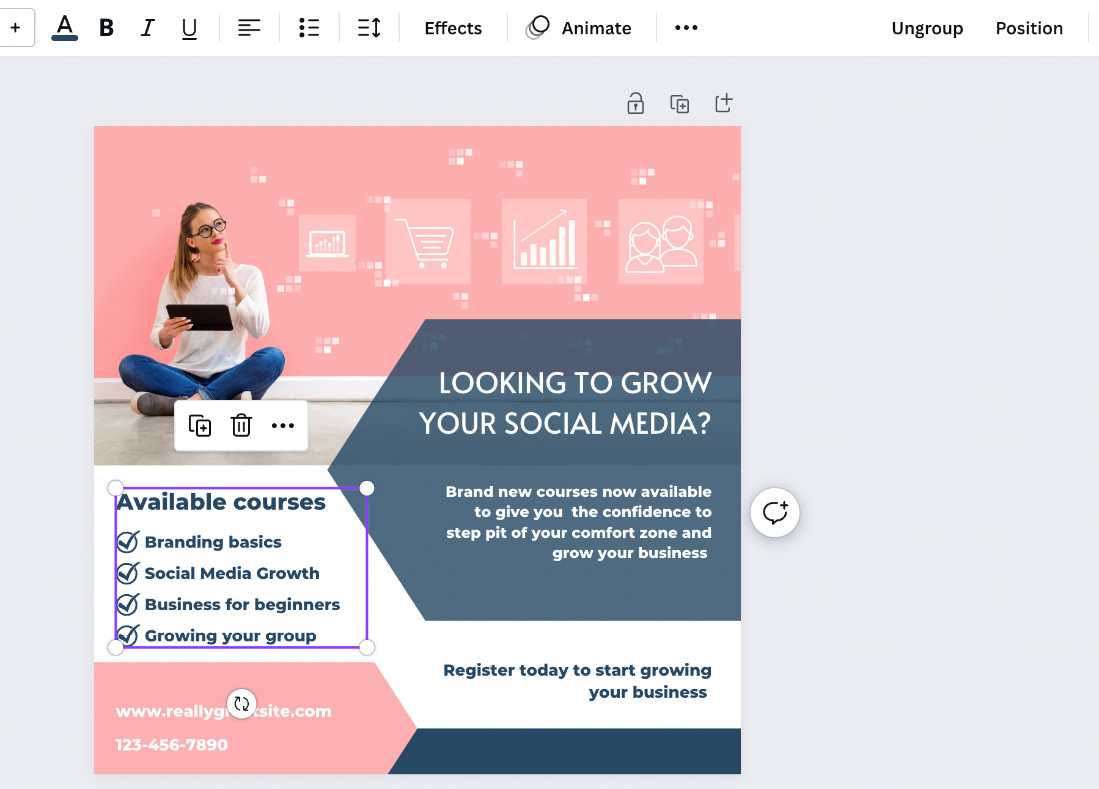
They will now stay grouped until you select to ungroup them by selecting the same option on the top bar, as seen in the following screenshot:

Figure 4.2 – Text boxes grouped with the Ungroup option now available

Figure 4.2 – Text boxes grouped with the Ungroup option...

Unlock full access

Continue reading for free

A Packt free trial gives you instant online access to our library of over 7000 practical eBooks and videos, constantly updated with the latest in tech
bookmark search playlist font-size

Change the font size

margin-width

Change margin width

day-mode

Change background colour

Close icon Search
Country selected

Close icon Your notes and bookmarks

Delete Bookmark

Modal Close icon
Are you sure you want to delete it?
Cancel
Yes, Delete

Confirmation

Modal Close icon
claim successful

Buy this book with your credits?

Modal Close icon
Are you sure you want to buy this book with one of your credits?
Close
YES, BUY