-
Book Overview & Buying

-
Table Of Contents

-
Feedback & Rating

Jira 8 Essentials
By :
Jira 8 Essentials
By:
Overview of this book
This new and improved sixth edition comes with the latest Jira 8.21 Data Center offerings, with enhanced features such as clustering, advanced roadmaps, custom field optimization, and tools to track and manage tasks for your projects. This comprehensive guide to Jira 8.20.x LTS version provides updated content on project tracking, issue and field management, workflows, Jira Service Management, and security.
The book begins by showing you how to plan and set up a new Jira instance from scratch before getting you acquainted with key features such as emails, workflows, and business processes. You’ll also get to grips with Jira’s data hierarchy and design and work with projects. Since Jira is used for issue management, this book will help you understand the different issues that can arise in your projects. As you advance, you’ll create new screens from scratch and customize them to suit your requirements. Workflows, business processes, and guides on setting up incoming and outgoing mail servers will be covered alongside Jira’s security model and Jira Service Management. Toward the end, you’ll learn how Jira capabilities are extended with third-party apps from Atlassian marketplace.
By the end of this Jira book, you’ll have understood core components and functionalities of Jira and be able to implement them in business projects with ease.
Table of Contents (18 chapters)
Preface

Part 1: Introduction to Jira
 Free Chapter
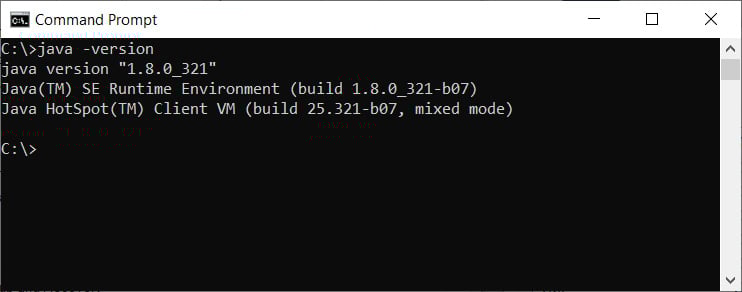
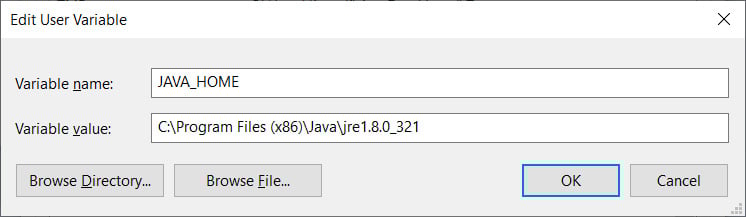
Chapter 1: Getting Started with Jira Data Center
Chapter 2: Using Jira for Business Projects
Part 2: Jira in Action
Chapter 3: Using Jira for Agile Projects
Chapter 4: Working with Issues
Chapter 5: Field Management
Chapter 6: Screen Management
Part 3: Advanced Jira
Chapter 7: Workflow and Business Process
Chapter 8: Emails and Notifications
Chapter 9: Securing Jira
Chapter 10: Searching, Reporting, and Analysis
Chapter 11: Jira Service Management
Chapter 12: Jira and Third Party Apps
Index
Customer Reviews