-
Book Overview & Buying
-
Table Of Contents

-
Feedback & Rating

Enterprise LMS with Adobe Captivate Prime
By :
Enterprise LMS with Adobe Captivate Prime
By:
Overview of this book
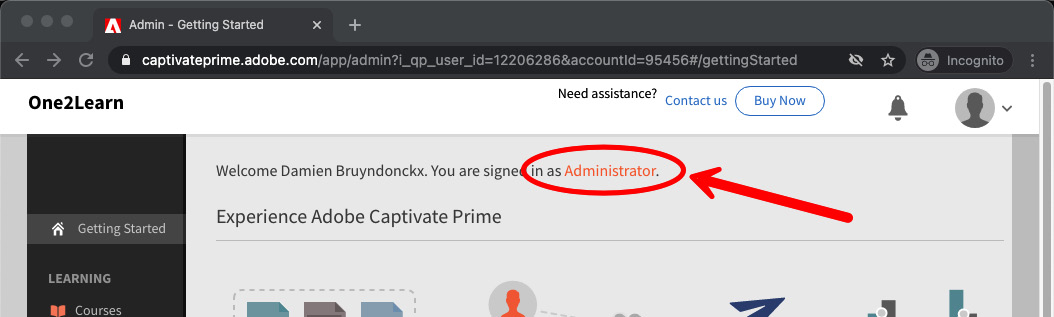
Adobe Captivate Prime is an enterprise learning management system (LMS) that enables organizations to deliver, manage, and track engaging learning experiences for employees, partners, and customers. This book will help you unlock the full potential of this platform to deliver world-class learning experiences.
Complete with walkthroughs, examples, and strategies to fully understand Captivate Prime, this book will set you on the path to becoming an administrator, author, or teacher and see you experiment with Captivate Prime from different perspectives. You'll gain an in-depth understanding of how the features relate to one another and to your business.
After setting up the platform, you'll learn how to push learning content online and arrange it to build an online course that provides a blended learning experience. You'll be able to deploy your content to different devices and explore Captivate Prime's features for monitoring your students' progress on a daily basis. Finally, you'll see how to organize and maintain your course catalog and take the learner experience to the next level.
By the end of the book, you’ll be able to implement your organization’s training strategy and provide engaging learning experiences while building meaningful reports to monitor their effectiveness.
Table of Contents (22 chapters)
Preface

Section 1: Publishing Learning Content
 Free Chapter
Chapter 1: Introduction to Adobe Captivate Prime
Chapter 2: Customize the Look and Feel of Captivate Prime
Chapter 3: Uploading Learning Content and Managing the Content Library
Chapter 4: Creating Skills and Courses
Section 2: Managing and Tracking Students' Learning
Chapter 5: Managing Users
Chapter 6: Enrolling Learners to Courses
Chapter 7: Reviewing the Learner Experience
Chapter 8: Exploring the Instructor Role
Chapter 9: Configuring and Using Feedback
Chapter 10: Reporting in Captivate Prime
Section 3: Enhancing the Learner Experience
Chapter 11: Badges and Gamification
Chapter 12: Enabling and Managing Social Learning
Chapter 13: AI-Powered Recommendations for Learners
Section 4: Administering the Platform
Chapter 14: Working with Catalogs and Peer Accounts
Chapter 15: Working With Messages and Announcements
Chapter 16: Exploring the Integration Admin Role
Other Books You May Enjoy
Customer Reviews