Sign In Start Free Trial
Account

Add to playlist

Create a Playlist

Modal Close icon
You need to login to use this feature.
  • iOS 13 Programming for Beginners
  • Toc
  • feedback
iOS 13 Programming for Beginners

iOS 13 Programming for Beginners

By : Ahmad Sahar, Craig Clayton
3.8 (15)
close
iOS 13 Programming for Beginners

iOS 13 Programming for Beginners

3.8 (15)
By: Ahmad Sahar, Craig Clayton

Overview of this book

iOS 13 comes with features ranging from Dark Mode and Catalyst through to SwiftUI and Sign In with Apple. If you're a beginner and are looking to experiment and work with these features to create your own apps, then this updated fourth edition gets you off to a strong start. The book offers a comprehensive introduction for programmers who are new to iOS, covering the entire process of learning the Swift language, writing your own apps, and publishing them on the App Store. This edition is updated and revised to cover the new iOS 13 features along with Xcode 11 and Swift 5. The book starts with an introduction to the Swift programming language, and how to accomplish common programming tasks with it. You'll then start building the user interface (UI) of a complete real-world app, using the latest version of Xcode, and also implement the code for views, view controllers, data managers, and other aspects of mobile apps. The book will then help you apply the latest iOS 13 features to existing apps, along with introducing you to SwiftUI, a new way to design UIs. Finally, the book will take you through setting up testers for your app, and what you need to do to publish your app on the App Store. By the end of this book, you'll be well versed with how to write and publish apps, and will be able to apply the skills you've gained to enhance your apps.
Table of Contents (33 chapters)
close
1
Section 1: Swift
10
Section 2: Design
15
Section 3: Code
26
Section 4: Features

Using an iOS 13 device for development

Although you'll be able to go through most of the exercises in this book using the Simulator, it is recommended to build and test your apps on an actual iOS device, as the Simulator will not be able to simulate some hardware components and software APIs.

For a comprehensive look at all the differences between the Simulator and an actual device, see this link:
https://help.apple.com/simulator/mac/current/#/devb0244142d.

In addition to your device, you'll need an Apple ID or a paid Apple Developer account to build and run your app on your device. You'll use the same Apple ID that you used in the App Store for now:

  1. Use the USB cable to connect the iOS device to your Mac.
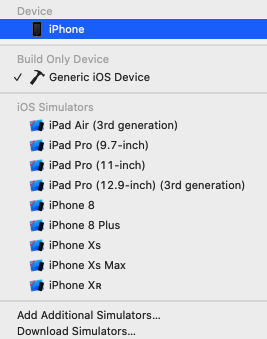
  2. In the Scheme menu, choose your device (iPhone in this case):
  1. Wait for Xcode to finish indexing and processing, which will take a while. Once complete, Ready will be displayed in the status window.
  2. Run the project by hitting the Play button (or use command + R). You will get the following error: Signing for "Exploring Xcode" requires a development team:

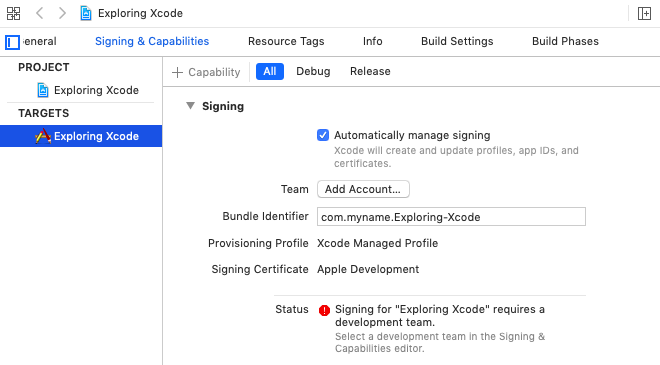
This is because a digital certificate is required to run the app on an iOS 13 device, and you need to add an Apple ID or a Developer account to Xcode so the digital certificate can be generated.

Certificates ensure that the only apps that run on your device are the ones you authorize. This helps to protect against malware. You can also learn more about them at this link: https://help.apple.com/xcode/mac/current/#/dev60b6fbbc7.
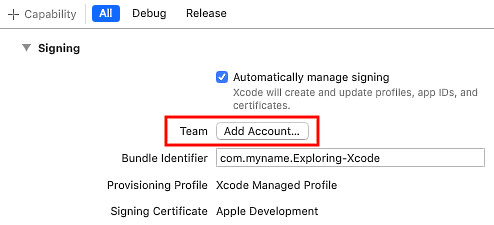
  1. Click the Add Account... button:
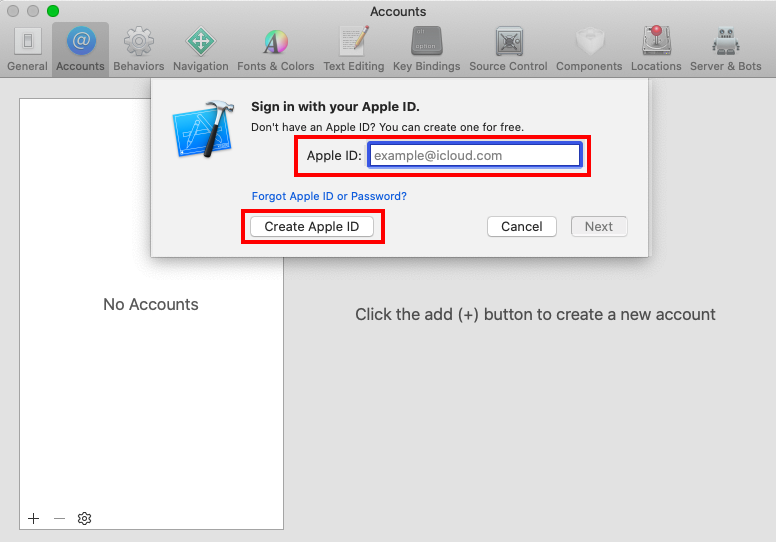
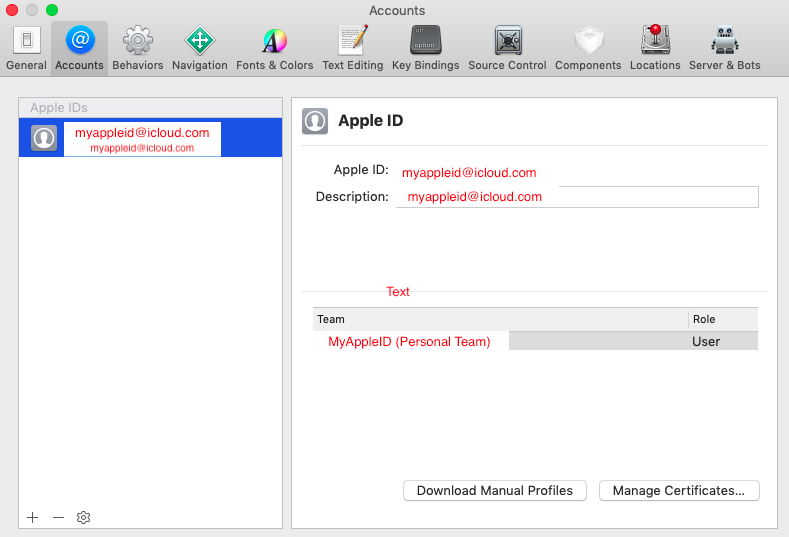
  1. The Xcode Preferences window appears with the Accounts pane selected. Enter your Apple ID and click Next. Note that you can create a different Apple ID if you wish using the Create Apple ID button:
  1. Enter your password when prompted. After a few minutes, the Accounts pane will display your account settings:
  1. Close the Preferences window when you're done by clicking the red button in the top-left corner.
  1. In Xcode's editing area, Click Signing & Capabilities. Make sure Automatically manage signing is ticked and Personal Team is selected from the Team pop-up menu:
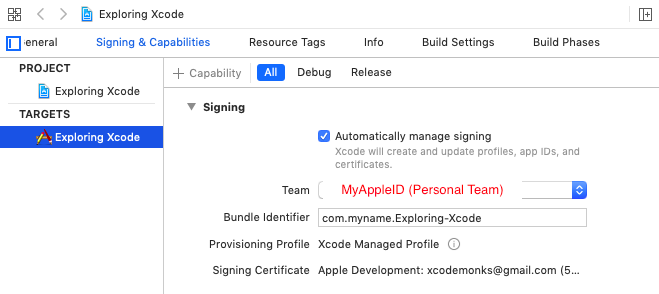
  1. If you still see errors in this screen, try changing your Bundle Identifier by typing some random characters into it, for example, com.12345myname.Exploring-Xcode.
  2. Everything should work now when you build and run, and your app will be installed on your iOS device. However, it will not launch and you will see the following message:

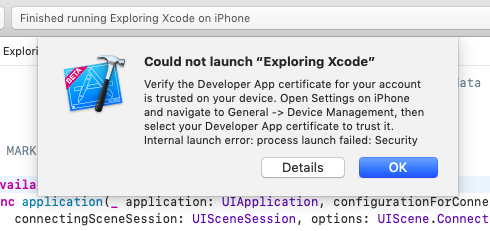
This means you need to trust the certificate that has been installed on your device.

You can also access Xcode preferences by choosing Preferences in the Xcode menu.

In the next section, we will see how to do that.

Trusting the Developer App certificate on your iOS device

A Developer App certificate is a special file that gets installed on your iOS device along with your app. Before your app can run, you need to trust it. Let's do that now:

  1. On your iOS 13 device, tap Settings.
  2. Tap General.
  3. Tap Device Management:
  1. Tap Apple Development:
  1. Tap Trust "Apple Development: ":
  1. Tap Trust:
  1. You should see the following, which shows the app is now trusted:
  1. Click the Play button in Xcode to build and run again. You'll see your app launch and run on your iOS device.

Congratulations! Note that you have to connect your iOS 13 device to your Mac using the USB cable to build and run your app, so in the next section we'll see how we can connect over Wi-Fi.

Connecting an iOS device wirelessly

Unplugging and replugging your iOS device using USB gets pretty cumbersome after a while, so you'll configure Xcode to connect to your iOS device over Wi-Fi as follows:

  1. Make sure your Mac and iOS device are on the same wireless network.
  2. Choose Window | Devices and Simulators from the menu bar:
  1. Click on the checkbox marked Connect via network:

Awesome! Your iOS device is now connected wirelessly to Xcode, and you no longer need the USB cable connected.

bookmark search playlist download font-size

Change the font size

margin-width

Change margin width

day-mode

Change background colour

Close icon Search
Country selected

Close icon Your notes and bookmarks

Delete Bookmark

Modal Close icon
Are you sure you want to delete it?
Cancel
Yes, Delete