In the previous recipe, we launched a Cloud9 environment. In this recipe, we will be preparing the expected file and directory structure inside this environment. This will help us prepare and test our train and serve scripts before running them inside containers and before using these with the SageMaker Python SDK:
Figure 2.31 – Expected file and directory structure inside /opt/ml
We can see the expected directory structure in the preceding diagram. We will prepare the expected directory structure inside /opt/ml. After that, we will prepare the hyperparameters.json, inputdataconfig.json, and training_data.csv files. In the succeeding recipes, we will use these files when preparing and testing the train and serve scripts.
Getting ready
Here are the prerequisites for this recipe:
- This recipe continues from Launching and preparing the Cloud9 environment.
- We will need the S3 bucket from the Preparing the Amazon S3 bucket and the training dataset for the linear regression experiment recipe of Chapter 1. We will also need the
training_data.csv file inside this S3 bucket. After performing the train-test split, we uploaded the CSV file to the S3 bucket in the Training your first model in Python recipe of Chapter 1. If you skipped this recipe, you can upload the training_data.csv file from this book's GitHub repository (https://github.com/PacktPublishing/Machine-Learning-with-Amazon-SageMaker-Cookbook) to the S3 bucket instead.
How to do it…
In the first set of steps in this recipe, we will use the Terminal to run the commands. We will continue where we left off in the previous Launching and preparing the Cloud9 environment recipe:
- Use the
pwd command to see the current working directory:pwd
- Navigate to the
/opt directory:cd /opt
- Create the
/opt/ml directory using the mkdir command. Make sure that you are inside the /opt directory before running the sudo mkdir ml command. Modify the ownership configuration of the /opt/ml directory using the chown command. This will allow us to manage the contents of this directory without using sudo over and over again in the succeeding steps:sudo mkdir -p ml
sudo chown ubuntu:ubuntu ml
- Navigate to the
ml directory using the cd Bash command. Run the following commands to prepare the expected directory structure inside the /opt/ml directory. Make sure that you are inside the ml directory before running these commands. The -p flag will automatically create the required parent directories first, especially if some of the directories in the specified path do not exist yet. In this case, if the input directory does not exist, the mkdir -p input/config command will create it first before creating the config directory inside it:cd ml
mkdir -p input/config
mkdir -p input/data/train
mkdir -p output/failure
mkdir -p model
As we will see later, these directories will contain the files and configuration data that we'll pass as parameter values when we initialize the Estimator.
Important note
Again, if you are wondering why we are creating these directories, the answer is that we are preparing an environment where we can test and iteratively build our custom scripts first, before using the SageMaker Python SDK and API. It is hard to know if a script is working unless we run it inside an environment that has a similar set of directories and files. If we skip this step and use the custom training script directly with the SageMaker Python SDK, we will spend a lot of time debugging potential issues as we have to wait for the entire training process to complete (at least 5-10 minutes), before being able to fix a scripting bug and try again to see if the fix worked. With this simulation environment in place, we will be able to test our custom script and get results within a few seconds instead. As you can see, we can iterate rapidly if we have a simulation environment in place.
The following is the expected directory structure:
Figure 2.32 – Expected file and folder structure after running the mkdir commands
Here, we can see that there are /config and /data directories inside the /input directory. The /config directory will contain the hyperparameters.json file and the inputdataconfig.json file, as we will see later. We will not be using the /output directory in the recipes in this chapter, but this is where we can create a file called failure in case the training job fails. The failure file should describe why the training job failed to help us debug and adjust it in case the failure scenario happens.
- Install and use the
tree command:sudo apt install tree
tree
We should get a tree structure similar to the following:
Figure 2.33 – Result of the tree command
Here, we can see the expected directory structure.
- Create the
/home/ubuntu/environment/opt directory using mkdir and create two directories inside it called ml-python and ml-r:mkdir -p /home/ubuntu/environment/opt
cd /home/ubuntu/environment/opt
mkdir -p ml-python ml-r
- Create a soft symbolic link to make it easier to manage the files and directories using the AWS Cloud9 interface:
sudo ln -s /opt/ml /home/ubuntu/environment/opt/ml
Given that we are performing this step inside a Cloud9 environment, we will be able to easily create and modify the files using the visual editor, instead of using vim or nano in the command line. What this means is that changes that are made inside the /home/ubuntu/environment/opt/ml directory will also be reflected inside the /opt/ml directory. This will allow us to use a visual editor to easily create and modify files:
Figure 2.34 – File tree showing the symlinked /opt/ml directory
We should see the directories inside the /opt/ml directory in the file tree, as shown in the preceding screenshot.
The next set of steps focus on adding the dummy files to the experimentation environment.
- Using the file tree, navigate to the
/opt/ml/input/config directory. Right-click on the config directory and select New File:Figure 2.35 – Creating a new file inside the config directory
- Name the new file
hyperparameters.json. Double-click the new file to open it in the Editor pane:Figure 2.36 – Empty hyperparameters.json file
Here, we have an empty hyperparameters.json file inside the /opt/ml/input/config directory.
- Set the content of the
hyperparameters.json file to the following line of code:{"a": 1, "b": 2}Your Cloud9 environment IDE's file tree and Editor pane should look as follows:
Figure 2.37 – Specifying a sample JSON value to the hyperparameters.json file
Make sure to save it by clicking the File menu and then clicking Save. You can also use Cmd + S or Ctrl + S to save the file, depending on the operating system you are using.
- In a similar fashion, create a new file called
inputdataconfig.json inside /opt/ml/input/config. Open the inputdataconfig.json file in the Editor pane and set its content to the following line of code:{"train": {"ContentType": "text/csv", "RecordWrapperType": "None", "S3DistributionType": "FullyReplicated", "TrainingInputMode": "File"}}Your Cloud9 environment IDE's file tree and Editor pane should look as follows:
Figure 2.38 – The inputdataconfig.json file
In the next set of steps, we will download the training_data.csv file from Chapter 1, Getting Started with Machine Learning Using Amazon SageMaker, to the experimentation environment. In the Training your first model in Python recipe from Chapter 1, Getting Started with Machine Learning Using Amazon SageMaker, we uploaded a training_data.csv file to an Amazon S3 bucket:
Figure 2.39 – The training_data.csv file inside the S3 bucket
In case you skipped these recipes in Chapter 1, make sure that you check out this book's GitHub repository (https://github.com/PacktPublishing/Machine-Learning-with-Amazon-SageMaker-Cookbook) and upload the training_data.csv file to the S3 bucket. Note that the recipes in this chapter assume that the training_data.csv file is inside s3://S3_BUCKET/PREFIX/input, where S3_BUCKET is the name of the S3 bucket and PREFIX is the folder's name. If you have not created an S3 bucket yet, follow the steps in the Preparing the Amazon S3 bucket and the training dataset for the linear regression experiment recipe of Chapter 1 as we will need this S3 bucket for all the chapters in this book.
- In the Terminal of the Cloud9 IDE, run the following commands to download the
training_data.csv file from S3 to the /opt/ml/input/data/train directory:cd /opt/ml/input/data/train
S3_BUCKET="<insert bucket name here>"
PREFIX="chapter01"
aws s3 cp s3://$S3_BUCKET/$PREFIX/input/training_data.csv training_data.csv
Make sure that you set the S3_BUCKET value to the name of the S3 bucket you created in the Preparing the Amazon S3 bucket and the training dataset for the linear regression experiment recipe of Chapter 1.
- In the file tree, double-click the
training_data.csv file inside the /opt/ml/input/data/train directory to open it in the Editor pane:Figure 2.40 – The training_data.csv file inside the experimentation environment
As shown in the preceding screenshot, the training_data.csv file contains the y values in the first column and the x values in the second column.
In the next set couple of steps, we will install a few prerequisites in the Terminal.
- In the Terminal, run the following scripts to make the R recipes work in the second half of this chapter:
sudo apt-get -y update
sudo apt-get install -y --no-install-recommends wget
sudo apt-get install -y --no-install-recommends r-base
sudo apt-get install -y --no-install-recommends r-base-dev
sudo apt-get install -y --no-install-recommends ca-certificates
- Install the command-line JSON processor; that is,
jq:sudo apt install -y jq
In the last set of steps in this recipe, we will create the files inside the ml-python and ml-r directories. In the Building and testing the custom Python algorithm container image and Building and testing the custom R algorithm container image recipes, we will copy these files inside the container while building the container image with the docker build command.
- Right-click on the
ml-python directory and then click New File from the menu to create a new file, as shown here. Name the new file train:Figure 2.41 – Creating a new file inside the ml-python directory
Perform this step two more times so that there are three files inside the ml-python directory called train, serve, and Dockerfile. Take note that these files are empty for now:
Figure 2.42 – Files inside the ml-python directory
The preceding screenshot shows these three empty files. We will work with these later in the Python recipes in this chapter.
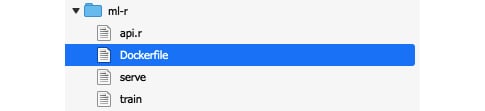
- Similarly, create four new files inside the
ml-r directory called train, serve, api.r, and Dockerfile:
Figure 2.43 – Files inside the ml-r directory
The preceding screenshot shows these four empty files. We will be working with these later in the R recipes in this chapter.
Let's see how this works!
How it works…
In this recipe, we prepared the experimentation environment where we will iteratively build the train and serve scripts. Preparing the train and serve scripts is an iterative process. We will need an experimentation environment to ensure that the scripts work before using them inside a running container. Without the expected directory structure and the dummy files, it would be hard to test and develop the train and serve scripts in a way that seamlessly translates to using these with SageMaker.
Let's discuss and quickly describe how the train script should work. The train script may load one or more of the following:
hyperparameters.json: Contains the hyperparameter configuration data set in Estimatorinputdataconfig.json: Contains the information where the training dataset is stored<directory>/<data file>: Contains the training dataset's input (for example, train/training.csv)
We will have a closer look at preparing and testing train scripts in the Preparing and testing the train script in Python and Preparing and testing the train script in R recipes in this chapter.
Now, let's talk about the serve script. The serve script expects the model file(s) inside the /opt/ml/model directory. Take note that one or more of these files may not exist, and this depends on the configuration parameters and arguments we have set using the SageMaker Python SDK. This also depends on what we write our script to need. We will have a closer look at preparing and testing serve scripts in the Preparing and testing the serve script in Python and Preparing and testing the serve script in R recipes later in this chapter.
There's more…
As we are about to work on the recipes specific to Python and R, we need to have a high-level idea of how these all fit together. In the succeeding recipes, we will build a custom container image containing the train and serve scripts. This container image will be used during training and deployment using the SageMaker Python SDK. In this section, we will briefly discuss what happens under the hood when we run the fit() function while using a custom container image. I believe it would be instructive to reiterate here that we built those directories and dummy files to create the train and serve scripts that the fit() and deploy() commands will run.
If you are wondering what the train and serve script files are for, these script files are executed inside a container behind the scenes by SageMaker when the fit() and deploy() functions from the SageMaker Python SDK are used. We will write and test these scripts later in this chapter. When we use the fit() function, SageMaker starts the training job. Behind the scenes, SageMaker performs the following set of steps:
Preparation and configuration
- One or more ML instances are launched. The number and types of ML instances for the training job depend on the
instance_count and instance_type arguments specified when initializing the Estimator class:container="<insert image uri of the custom container image>"
estimator = sagemaker.estimator.Estimator(
container,
instance_count=1,
instance_type='local',
...
)
estimator.fit({'train': train})
- The hyperparameters specified using the
set_hyperparameters() function are copied and stored as a JSON file called hyperparameters.json inside the /opt/ml/input/config directory. Take note that our custom container will not have this file at the start, and that SageMaker will create this file for us automatically when the training job starts.
Training
- The input data we have specified in the
fit() function will be loaded by SageMaker (for example, from the specified S3 bucket) and copied into /opt/ml/input/data/. For each of the input data channels, a directory containing the relevant files will be created inside the /opt/ml/input/data directory. For example, if we used the following line of code using the SageMaker Python SDK, then we would expect the /opt/ml/input/data/apple and /opt/ml/data/banana directories when the train script starts to run: estimator.fit({'apple': TrainingInput(...),'banana': TrainingInput(...)})
- Next, your custom
train script runs. It loads the configuration files, hyperparameters, and the data files from the directories inside /opt/ml. It then trains a model using the training dataset and, optionally, a validation dataset. The model is then serialized and stored inside the /opt/ml/model directory.Note
Do not worry if you have no idea how the train script looks like as we will discuss the train script in detail later, in the succeeding recipes.
- SageMaker expects the model output file(s) inside the
/opt/ml/model directory. After the training script has finished executing, SageMaker automatically copies the contents of the /opt/ml/model directory and stores it inside the target S3 bucket and path (inside model.tar.gz). Take note that we can specify the target S3 bucket and path by setting the output_path argument when initializing Estimator with the SageMaker Python SDK.
- If there is an error running the script, SageMaker will look for a failure file inside the
/opt/ml/output directory. If it exists, the text output stored in this file will be loaded when the DescribeTrainingJob API is used.
- The created ML instances are deleted. The billable time is returned to the user.
Deployment
When we use the deploy() function, SageMaker starts the model deployment step. The assumption when running the deploy() function is that the model.tar.gz file is stored inside the target S3 bucket path.
- One or more ML instances are launched. The number and types of ML instances for the deployment step depend on the
instance_count and instance_type arguments specified when using the deploy() function:predictor = estimator.deploy(
initial_instance_count=1,
instance_type='local',
endpoint_name="custom-local-py-endpoint")
- The
model.tar.gz file is copied from the S3 bucket and the files are extracted inside the /opt/ml/model directory.
- Next, your custom serve script runs. It uses the model files inside the
/opt/ml/model directory to deserialize and load the model. The serve script then runs an API web server with the required /ping and /invocations endpoints.
Inference
- After deployment, the
predict() function calls the /invocations endpoint to use the loaded model for inference.
This should give us a better idea and understanding of the purpose of the files and directories we have prepared in this recipe. If you are a bit overwhelmed by the level of detail in this section, do not worry as things will become clearer as we work on the next few recipes in this chapter!


 Free Chapter