-
Book Overview & Buying

-
Table Of Contents

-
Feedback & Rating

The Ultimate Guide to Building a Google Cloud Foundation
By :
The Ultimate Guide to Building a Google Cloud Foundation
By:
Overview of this book
From data ingestion and storage, through data processing and data analytics, to application hosting and even machine learning, whatever your IT infrastructural need, there's a good chance that Google Cloud has a service that can help. But instant, self-serve access to a virtually limitless pool of IT resources has its drawbacks. More and more organizations are running into cost overruns, security problems, and simple "why is this not working?" headaches.
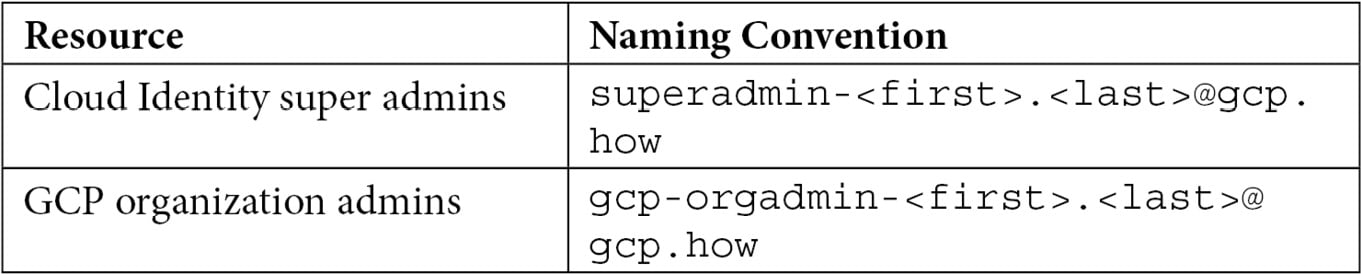
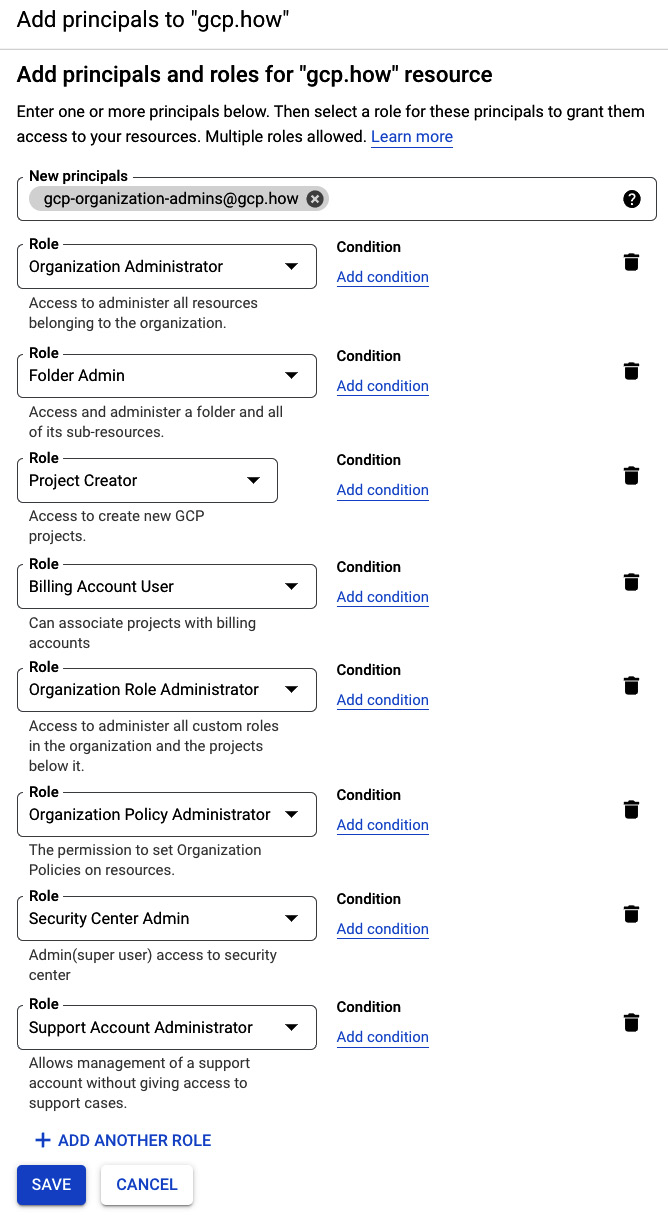
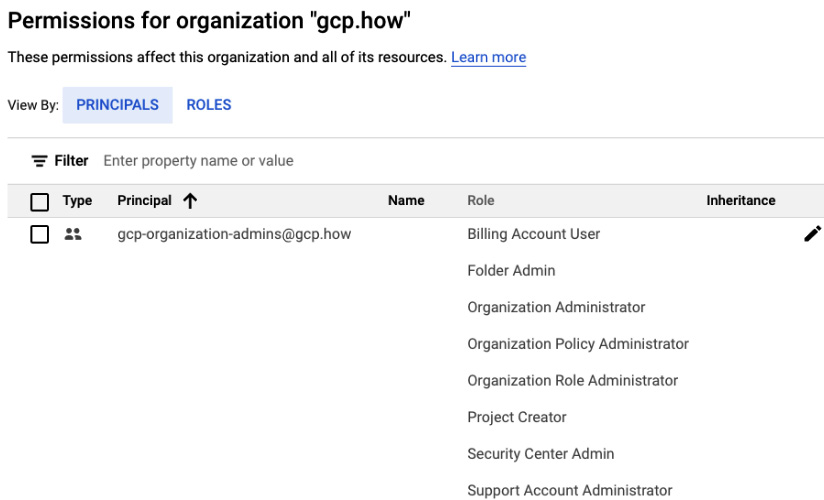
This book has been written by one of Google’s top trainers as a tutorial on how to create your infrastructural foundation in Google Cloud the right way. By following Google’s ten-step checklist and Google’s security blueprint, you will learn how to set up your initial identity provider and create an organization. Further on, you will configure your users and groups, enable administrative access, and set up billing. Next, you will create a resource hierarchy, configure and control access, and enable a cloud network. Later chapters will guide you through configuring monitoring and logging, adding additional security measures, and enabling a support plan with Google.
By the end of this book, you will have an understanding of what it takes to leverage Terraform for properly building a Google Cloud foundational layer that engenders security, flexibility, and extensibility from the ground up.
Table of Contents (10 chapters)
Preface

Chapter 1: Getting to Know Google’s Cloud
 Free Chapter
Chapter 2: IAM, Users, Groups, and Admin Access
Chapter 3: Setting Up Billing and Cost Controls
Chapter 4: Terraforming a Resource Hierarchy
Chapter 5: Controlling Access with IAM Roles
Chapter 6: Laying the Network
Chapter 7: Foundational Monitoring and Logging
Chapter 8: Augmenting Security and Registering for Support
Other Books You May Enjoy
Customer Reviews