-
Book Overview & Buying
-
Table Of Contents

-
Feedback & Rating

Mastering Flask Web and API Development
By :
Mastering Flask Web and API Development
By:
Overview of this book
Flask is a popular Python framework known for its lightweight and modular design. Mastering Flask Web and API Development will take you on an exhaustive tour of the Flask environment and teach you how to build a production-ready application.
You’ll start by installing Flask and grasping fundamental concepts, such as MVC and ORM database access. Next, you’ll master structuring applications for scalability through Flask blueprints. As you progress, you’ll explore both SQL and NoSQL databases while creating REST APIs and implementing JWT authentication, and improve your skills in role-based access security, utilizing LDAP, OAuth, OpenID, and databases. The new project structure, managed by context managers, as well as ASGI support, has revolutionized Flask, and you’ll get to grips with these crucial upgrades. You'll also explore out-of-the-box integrations with technologies, such as RabbitMQ, Celery, NoSQL databases, PostgreSQL, and various external modules. The concluding chapters discuss enterprise-related challenges where Flask proves its mettle as a core solution.
By the end of this book, you’ll be well-versed with Flask, seeing it not only as a lightweight web and API framework, but also as a potent problem-solving tool in your daily work, addressing integration and enterprise issues alongside Django and FastAPI.
Table of Contents (18 chapters)
Preface

Part 1:Learning the Flask 3.x Framework
 Free Chapter
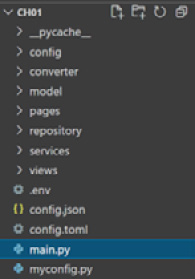
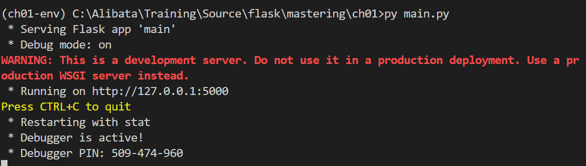
Chapter 1: A Deep Dive into the Flask Framework
Chapter 2: Adding Advanced Core Features
Chapter 3: Creating REST Web Services
Chapter 4: Utilizing Flask Extensions
Part 2:Building Advanced Flask 3.x Applications
Chapter 5: Building Asynchronous Transactions
Chapter 6: Developing Computational and Scientific Applications
Chapter 7: Using Non-Relational Data Storage
Chapter 8: Building Workflows with Flask
Chapter 9: Securing Flask Applications
Part 3:Testing, Deploying, and Building Enterprise-Grade Applications
Chapter 10: Creating Test Cases for Flask
Chapter 11: Deploying Flask Applications
Chapter 12: Integrating Flask with Other Tools and Frameworks
Index
Customer Reviews