Sign In Start Free Trial
Account

Add to playlist

Create a Playlist

Modal Close icon
You need to login to use this feature.
  • Book Overview & Buying Learning Salesforce Lightning Application Development
  • Table Of Contents Toc
  • Feedback & Rating feedback
Learning Salesforce Lightning Application Development

Learning Salesforce Lightning Application Development

By : Mohit Shrivatsava
4.1 (13)
close
close
Learning Salesforce Lightning Application Development

Learning Salesforce Lightning Application Development

4.1 (13)
By: Mohit Shrivatsava

Overview of this book

Built on the Salesforce App Cloud, the new Salesforce Lightning Experience combines three major components: Lightning Design System, Lightning App Builder, and Lightning Components, to provide an enhanced user experience. This book will enable you to quickly create modern, enterprise apps with Lightning Component Framework. You will start by building simple Lightning Components and understanding the Lightning Components architecture. The chapters cover the basics of Lightning Component Framework semantics and syntax, the security features provided by Locker Service, and use of third-party libraries inside Lightning Components. The later chapters focus on debugging, performance tuning, testing using Lightning Testing Services, and how to publish Lightning Components on Salesforce AppExchange.
Table of Contents (17 chapters)
close
close

Setting up a Salesforce developer organization to enable the building of Lightning Components

Before we start building Lightning Components, there are some things that need to be done to your developer organization.

If you have not signed up for a Developer organization yet, you can get one for free at https://developer.Salesforce.com/signup
  1. Enabling My domain is a necessary step, and if you have not enabled it, then it's not possible to test your Lightning Component. To enable My domain, the navigation path is Setup | Company Settings | My Domain. Register for a domain name, walk through the wizard, and make sure you deploy the new domain to all users. The following screenshot shows the navigation path and also the end result once My Domain is enabled:
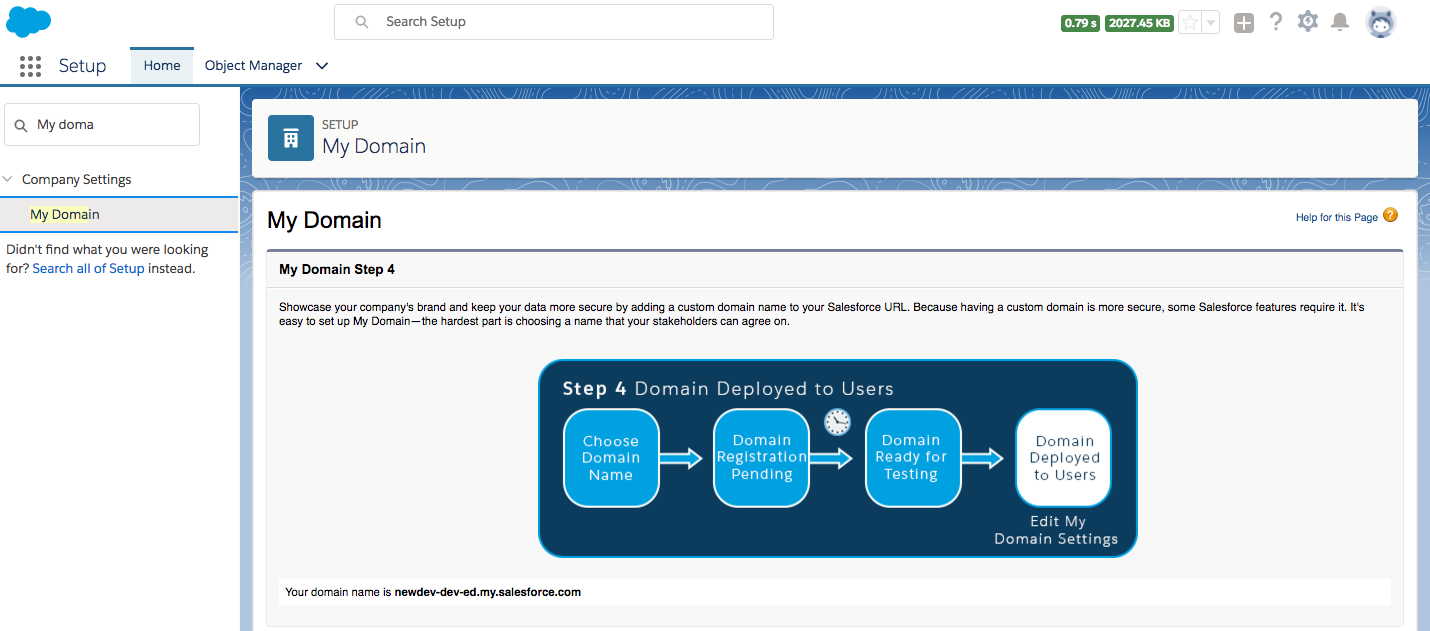
The preceding screen is for deploying My Domain to users
  1. Disabling caching for development purposes is very important. Lightning Experience performs caching to improve performance, and this may interfere with the testing of Lightning Components because your code changes might not immediately reflect upon page reload.
  2. The navigation path to disable caching is Setup| Security | Session Settings. The following screenshot shows the checkbox that needs to be unchecked:
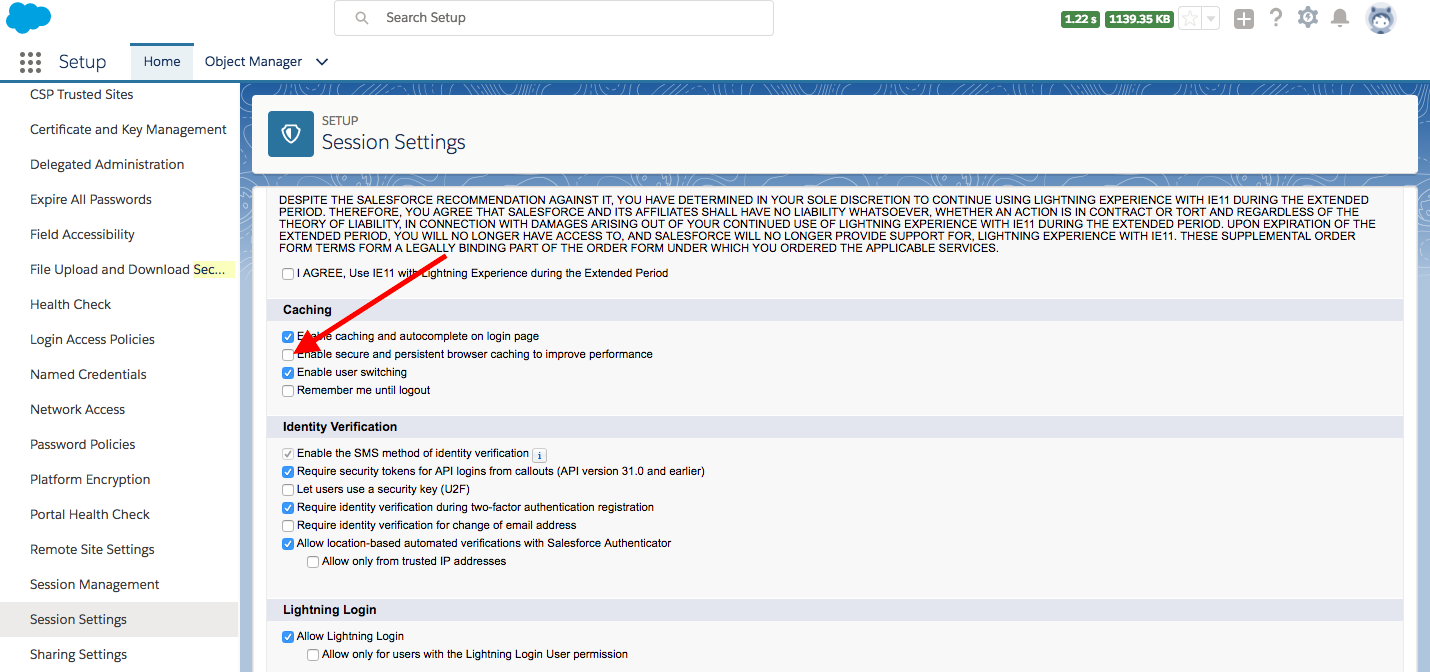
This is how you can disable persistent cache in salesforce environment for Lightning Component development Purpose
For production, these settings need to be enabled to improve performance.

Creating a simple hello world Lightning Component

The aim of the section is to demonstrate how to build a simple Lightning Component via the Salesforce Developer Console. We will also explore how to create a simple application to test our component.

The simplest way to create a Lightning Component is to use the Salesforce Developer Console. In later chapters, we will get familiar with source-driven development and the use of an Integrated Development Editor (IDE). For now, let's use the Salesforce Developer Console:

  1. Open the Salesforce Developer Console:
  1. Use the File menu to create a new Lightning Component:
  1. Name the component. Let's name it HelloWorld for now.
  2. Enter the following code in the component markup and save it (command + S):
<aura:component > 
HelloWorld
</aura:component>
  1. Let's test this on the browser. To test this, we will need to create a Lightning Application. Go to the File menu, as we did in step 2, to create a Lightning Application. Let's name the application HelloWorldApp, enter the following code, and save it (command + S). Notice we have used the HelloWorld component in the aura:application tag to reference the component.
<aura:application >
<c:HelloWorld/>
</aura:application>
  1. Click on Preview in the application and make sure the browser renders HelloWorld. The following screenshot shows the preview and the application:
  1. You will see that there was a unique URL generated as Salesforce_domain/c/HelloWorldApp.appNotice that c is the default namespace. For a managed package application, your organization may have a namespace and then the namespace is used in the URL generated instead of c. Also, note that Salesforce_domain is the domain name of your Salesforce instance. The following screenshot shows how the component markup is rendered on the browser:

Create a Note

Modal Close icon
You need to login to use this feature.
notes
bookmark search playlist download font-size

Change the font size

margin-width

Change margin width

day-mode

Change background colour

Close icon Search
Country selected

Close icon Your notes and bookmarks

Delete Bookmark

Modal Close icon
Are you sure you want to delete it?
Cancel
Yes, Delete

Delete Note

Modal Close icon
Are you sure you want to delete it?
Cancel
Yes, Delete

Edit Note

Modal Close icon
Write a note (max 255 characters)
Cancel
Update Note

Confirmation

Modal Close icon
claim successful

Buy this book with your credits?

Modal Close icon
Are you sure you want to buy this book with one of your credits?
Close
YES, BUY