Setting up Android Studio
Before being able to build an Android application, we have to download and install Android Studio on our computer. It is still possible to download and use Eclipse with the Android Development Tools (ADT) plugin, but Google no longer supports it and they recommend that we migrate to Android Studio. In order to be aligned with this, we will only focus on Android Studio in this book. For more information on this, visit
http://android-developers.blogspot.com.es/2015/06/an-update-on-eclipse-android-developer.html.
Getting the right version of Android Studio
The latest stable version of Android Studio can be found at http://developer.android.com/sdk/index.html.
If you are among the bravest developers, and you are not afraid of bugs, you can always go to the Canary channel and download the latest version. The Canary channel is one of the preview channels available on the Android tools download page (available at http://tools.android.com/download/studio) and contains weekly builds.
The following are other preview channels available at that URL:
- The Canary channel contains weekly builds. These builds are tested but they might contain some issues. Just use a build from this channel if you need or want to see the latest features.
- The Dev channel contains selected Canary builds.
- The Beta channel contains the beta milestones for the next version of Android Studio.
- The Stable channel contains the most recent stable builds of Android Studio.
The following screenshot illustrates the Android Tools download page:
Note
It is not recommended to use an unstable version for production. To be on the safe side, always use the latest stable version. In this book, we will use the 2.2 preview version. Although it is a beta version at this moment, we will have the main version quite soon.
Installing Android Studio
Android Studio requires JDK 6 or higher: JDK 7 is required as a minimum if you aim to develop for Android 5.0 and higher. You can easily check which version you have installed by running this on your command line:
javac -version
If you don't have any version of the JDK or you have an unsupported version, please install or update your JDK before proceeding to install Android Studio.
Refer to the official documentation for a more comprehensive installation guide and details on all platforms (Windows, Linux, and Mac OSX) at http://developer.android.com/sdk/installing/index.html?pkg=studio.
Once you have JDK installed, unpack the package you have just downloaded from the Internet and proceed with the installation. For example, let's use Mac OSX. If you download the latest stable version, you will get a .dmg file that can be mounted on your filesystem. Once mounted, a new Finder window will appear and will ask us to drag the Android Studio icon to the Applications folder. Just doing this simple step will complete the basic installation.
If you have downloaded a preview version, you will have a ZIP file that once unpacked will contain the Android Studio Application directly (it can be just dragged to the Applications folder using Finder).
For other platforms, refer to the official installation guide provided by Google at the web address mentioned earlier.
Once you have finished installing Android Studio, it is time to run it for the first time. On the first execution (at least if you have downloaded version 2.2), it will let you configure some options and install some SDK components if you choose the custom installation type. Otherwise, both these settings and SDK components can be configured or installed later.
The first option you will be able to choose is the UI theme. We have the default UI theme or the Darcula theme, which basically is a choice of light or dark backgrounds, respectively.
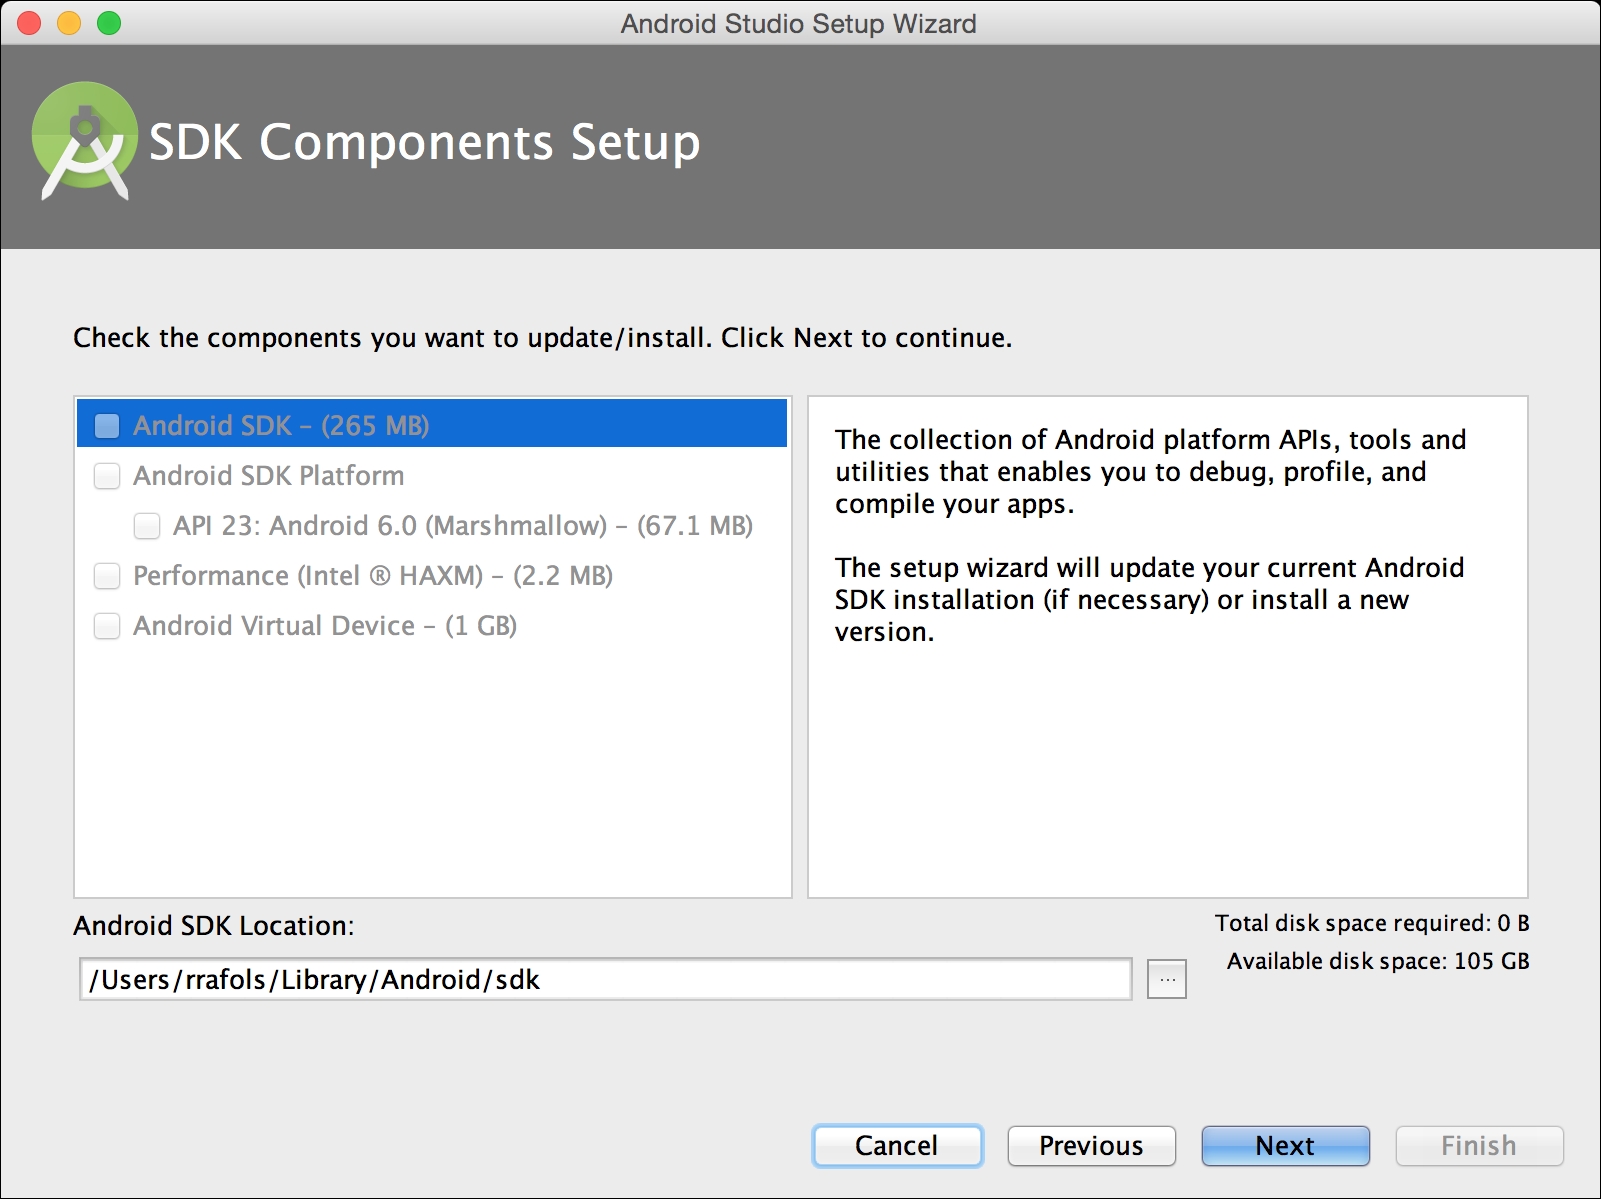
After this step, the next window will show the SDK Components Setup where the installation process will let you choose some components to automatically download and install. On Mac OS, there is a bug in some versions of Android Studio 2.0 that sometimes does not allow selecting any option if the target folder does not exist. If that happens, follow these steps for a quick fix:
- Copy the contents of the Android SDK Location field, just the path or something like
/Users/<username>/Library/Android/sdk, to the clipboard. - Open the terminal application.
- Create the folder manually as
mkdir /Users/<username>/Library/Android/sdk. - Go back to Android Studio, press the Previous button, and then the Next button to come back to this screen. Now, you will be able to select the components that you would like to install.
- If that still does not work, cancel the installation process, ensuring that you checked the option to rerun the setup on the next installation. Quit Android Studio and rerun it.


 Free Chapter