-
Book Overview & Buying
-
Table Of Contents

-
Feedback & Rating

Mastering Adobe Photoshop Elements 2021
By :
Mastering Adobe Photoshop Elements 2021
By:
Overview of this book
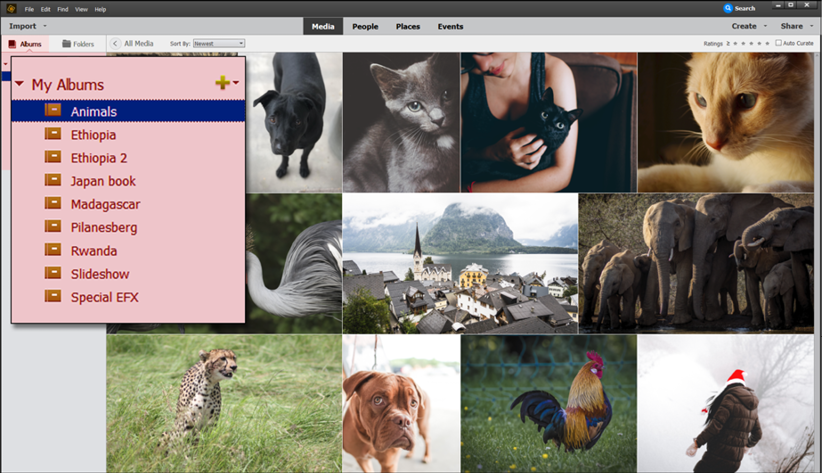
Managing thousands of images while producing perfectly edited results is now a must-have skill for online bloggers, influencers, vloggers, social media users, and photography enthusiasts. Photoshop Elements helps you to manage this easily and boost your creative output.
This third edition is updated with Elements 2021’s latest features and focuses on Adobe's AI-powered features along with the entire creative workflow. Each chapter is designed to help you get the most out of your image files in an easy way. You’ll learn how to add significant visual improvements to your work using no more than a few one-click edits with AI-driven features and manual adjustments. The book is filled with useful instructions to guide you seamlessly through the often complex processes, tools, and features in Photoshop Elements. Finally, you’ll cover everything from developing your organizational skills through to creating remarkable special effects, complex text, image combinations, and eye-popping visual techniques using both AI-driven features as well as manually operated tools.
By the end of this Photoshop Elements book, you'll have learned how to leverage the impressive tools available in Photoshop Elements 2021, and use them to greatly improve your photo editing and image retouching skills.
Table of Contents (13 chapters)
Preface

Chapter 1 Photoshop Elements Features Overview
 Free Chapter
Chapter 2 Setting Up Photoshop Elements from Scratch
Chapter 3 The Basics of Image Editing
Chapter 4 Easy Creative Projects
Chapter 5 Advanced Techniques - Layers and Masking
Chapter 6 Advanced Techniques: Retouching, Selections, and Text
Chapter 7 Additional Tools and Features
Chapter 8 Advanced Drawing and Painting Techniques
Chapter 9 Exporting the Finished Work
Chapter 10 Troubleshooting
Chapter 11 Feature Appendix
Other Books You May Enjoy
Customer Reviews