Sign In Start Free Trial
Account

Add to playlist

Create a Playlist

Modal Close icon
You need to login to use this feature.
  • Blender 3D Printing by Example
  • Toc
  • feedback
Blender 3D Printing by Example

Blender 3D Printing by Example

By : Somma
4.3 (15)
close
Blender 3D Printing by Example

Blender 3D Printing by Example

4.3 (15)
By: Somma

Overview of this book

Blender is an open-source modeling and animation program popular in the 3D printing community. 3D printing brings along different considerations than animation and virtual reality. This book walks you through four projects to learn using Blender for 3D Printing, giving you information that you need to know to create high-quality 3D printed objects. The book starts with two jewelry projects-- a pendant of a silhouette and a bracelet with custom text. We then explore architectural modeling as you learn to makes a figurine from photos of a home. The final project, a human hand, illustrates how Blender can be used for organic models and how colors can be added to the design. You will learn modeling for 3D printing with the help of these projects. Whether you plan to print at-home or use a service bureau, you’ll start by understanding design requirements. The book begins with simple projects to get you started with 3D modeling basics and the tools available in Blender. As the book progresses, you’ll get exposed to more robust mesh modeling techniques, modifiers, and Blender shortcuts. By the time you reach your final project, you’ll be ready for organic modeling and learning how to add colors. In the final section, you’ll learn how to check for and correct common modeling issues to ensure the 3D printer can make your idea a reality!
Table of Contents (16 chapters)
close

Adding a background image

When working with 3D objects, you don't want just one side to look good, you want the whole object to look good. Therefore, it is beneficial to review your work from varying perspectives. Blender has some preset viewpoints already defined to help you navigate from side to side. You can reach those by clicking on the View menu at the bottom of the screen.

There, you can change your perspective and view your design from the Top, Bottom, Left, Right, Front, and Back:

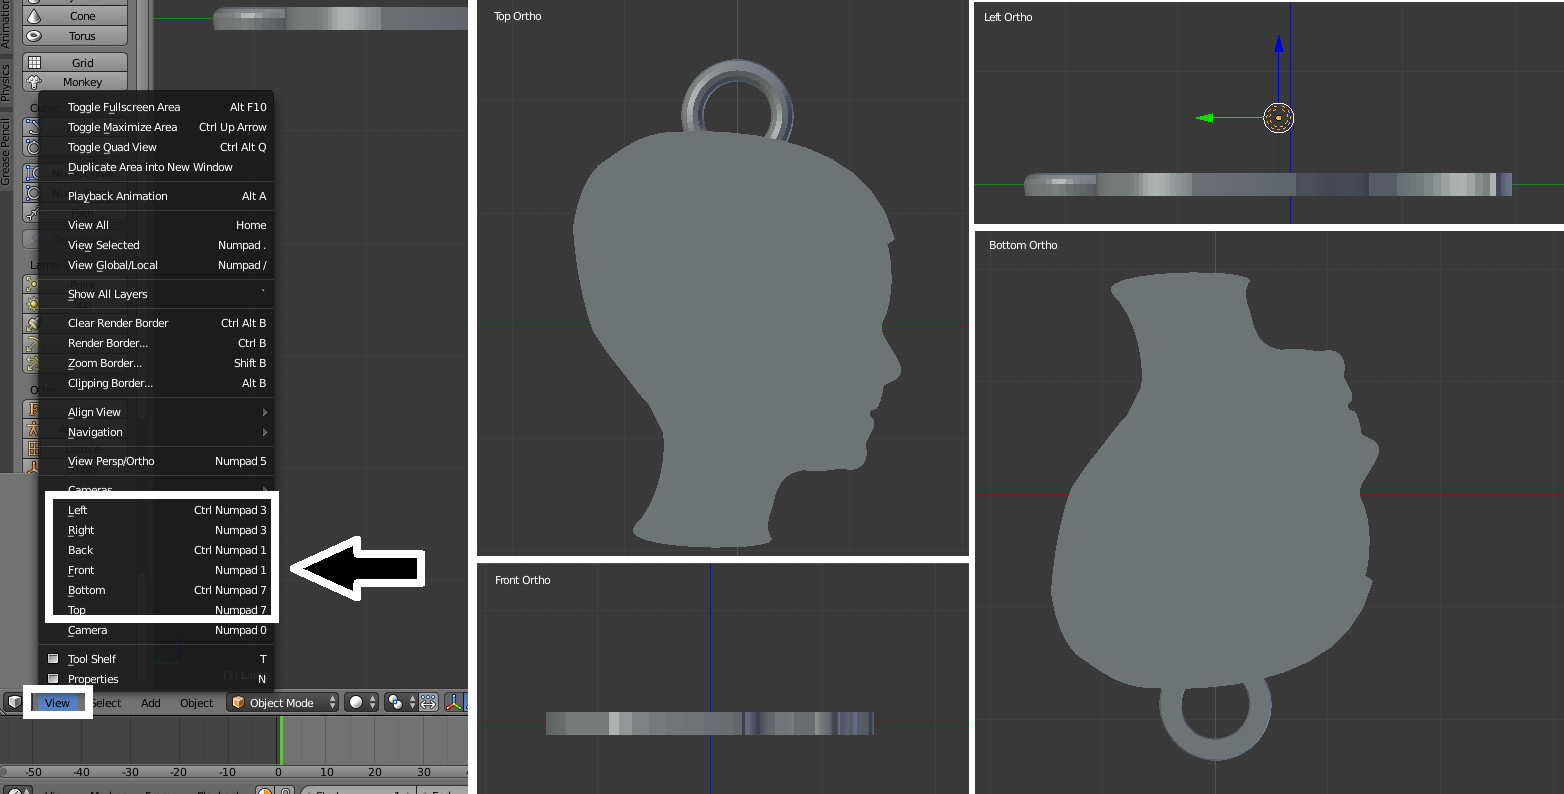
Under the View menu, you can use shortcuts to view your work from various perspectives

For each of those predetermined viewpoints, you can tell Blender to display a background image of your choosing. In this chapter, you'll be adding a background image to the Top view; this means when you are looking down on your object from the top, your image will be visible.

Navigating in the 3D...
bookmark search playlist download font-size

Change the font size

margin-width

Change margin width

day-mode

Change background colour

Close icon Search
Country selected

Close icon Your notes and bookmarks

Delete Bookmark

Modal Close icon
Are you sure you want to delete it?
Cancel
Yes, Delete