With everything we’ve discussed so far, this section will take us through a standard pipeline with a web application every developer should be familiar with: the ASP.NET Core web application.
If you have a web application of your own, you’ll be able to follow along and make the modifications to your web application as well.
In this section, we’ll demonstrate what a pipeline consists of by considering a sample application and walking through all of the components that will make it a successful build.
Preparing the Application
Before we move forward, we need to confirm whether the application in our version control is ready for a pipeline:
- Does the application compile and clone without errors?
- Do all the unit tests that accompany the application pass?
- Do you have the correct environment settings in your application? (For example,
appsettings.json, appsettings.qa.json, and so on.)
- Will you deploy this application to a Docker container? If so, confirm you have a Dockerfile in the root of your application.
Again, the Dockerfile is optional, but most companies include one since they have numerous environments running on different operating systems. We’ll include the Dockerfile in our web application to complete the walkthrough.
Once everything has been confirmed in our checklist, we can move forward and create our pipeline.
Introducing Azure Pipelines
Azure Pipelines is a free service for developers to use to automate, test, and deploy their software to any platform.
Since Azure is user-specific, you’ll have to log in to your Azure Pipelines account or create a new one at https://azure.microsoft.com/en-us/products/devops/pipelines/. Don’t worry – it’s free to sign up and create pipelines:
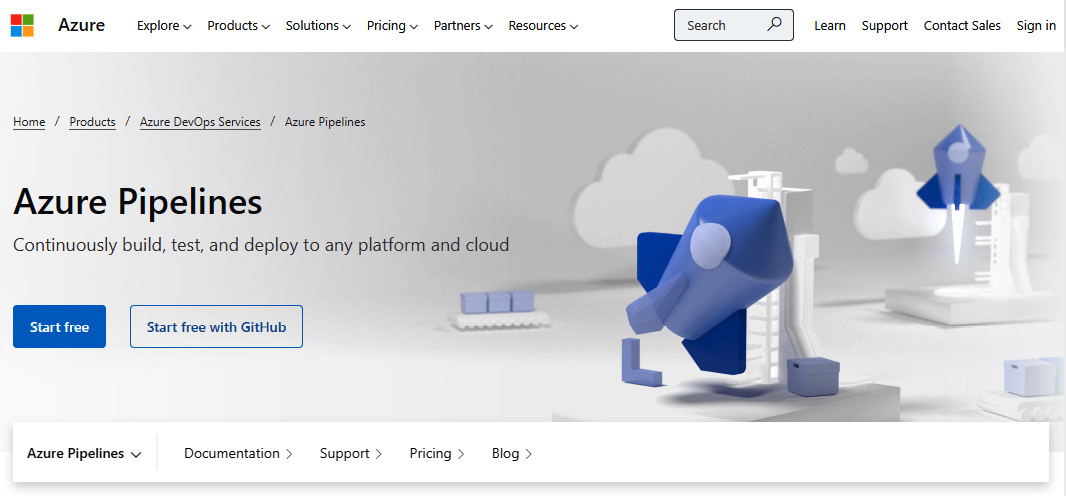
- To continue with this walkthrough, click on the Start free with GitHub button, as shown in Figure 2.2:
Figure 2.2 – The Azure Pipelines web page
Once you’ve logged in to Azure Pipelines, you are ready to create a project.
- Click New Project in the top right-hand corner. Enter details for Project Name and Description and determine whether it’s Private or Public.
- Upon clicking Create, we need to define which repository to use in our pipeline.
Identifying the Repository
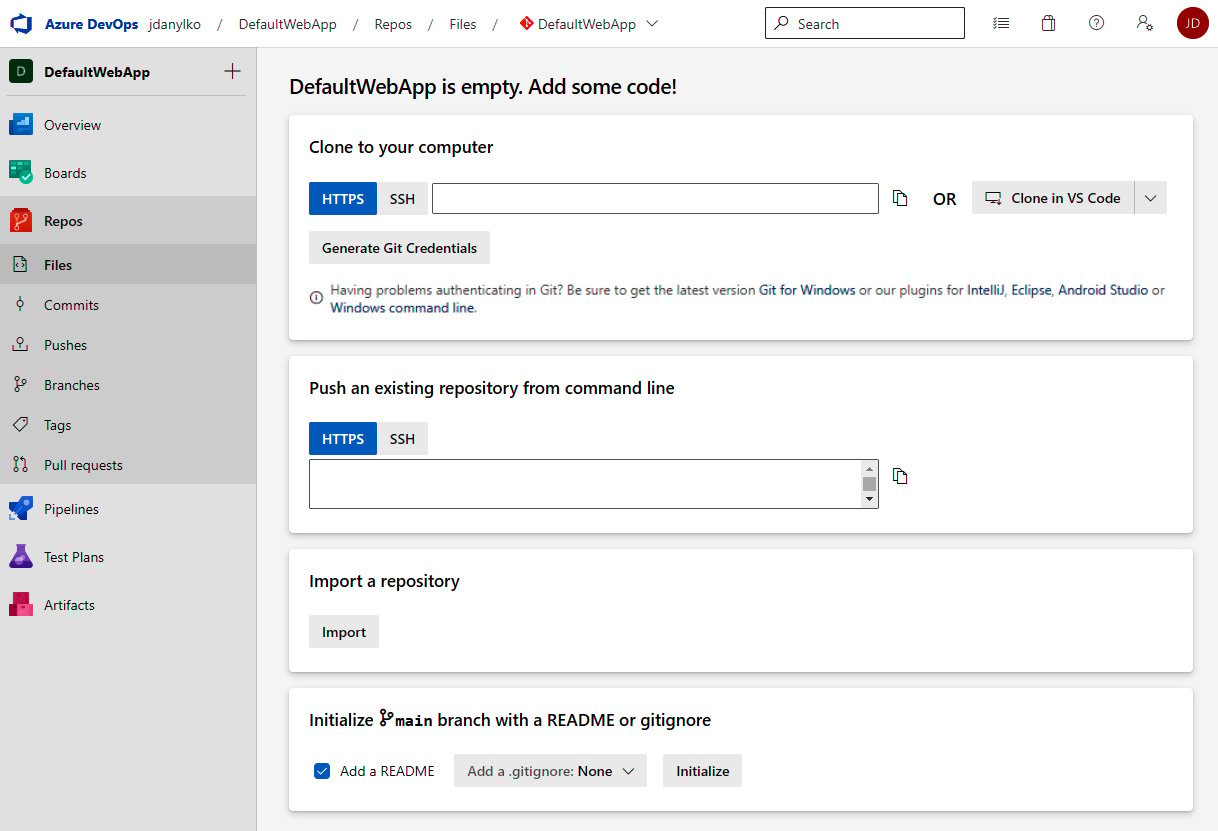
We haven’t designated a repository for Azure Pipelines to use yet. So, we need to import an existing repository:
- If you click on any option under Files, you’ll notice a message saying <YourProjectNameHere> is empty. Add some code!. Sounds like solid advice.
- Click on the Import button under the Import a repository section, as shown in Figure 2.3:
Figure 2.3 – Importing a repository
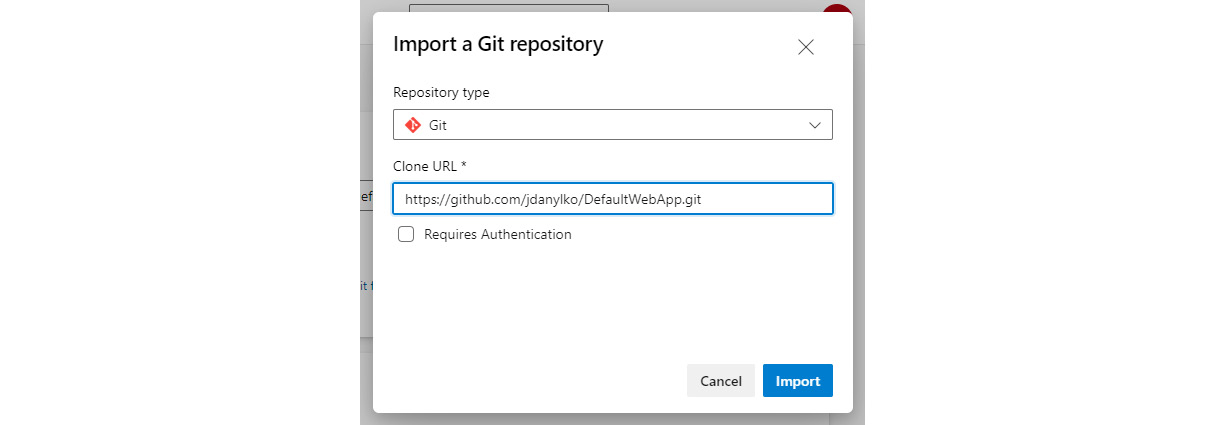
- Clicking on the Import button will result in a side panel popping out, asking where your source code is located. Currently, there is only Git and Team Foundation Version Control (TFVC).
- Since the code for
DefaultWebApp is in Git, I copied the clone URL and pasted it into the text box, and then clicked the Import button at the bottom of the side panel, as shown in Figure 2.4:
Figure 2.4 – Identifying the repository Azure Pipelines will use
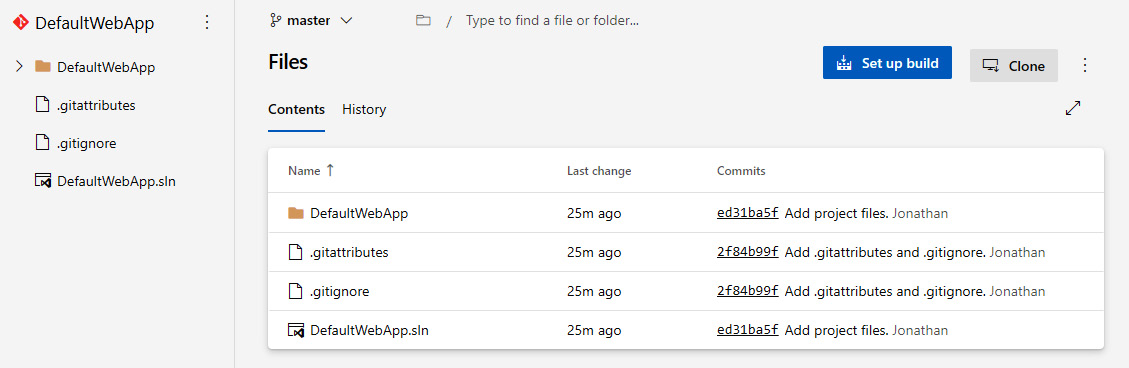
Azure Pipelines will proceed to import the repository. The next screen will be the standard Explorer view everyone is used to seeing, with a tree view on the left of your repository and a detailed list of files from the current directory on the right-hand side.
With that, we have finished importing the repository into Azure Pipelines.
Creating the Build
Now that we’ve imported our repository, Azure Pipelines makes this process extremely easy for us by adding a button called Set up build, as shown in Figure 2.5:
Figure 2.5 – Imported repository with a “Set up build” button as the next step
As vast as Azure Pipelines’ features can be, there are several preset templates to use for your builds. Each template pertains to a particular project in the .NET ecosystem, along with not-so-common projects as well:
- For our purposes, we’ll select the ASP.NET Core (.NET Framework) option.
- After the Configure step in our wizard (see the top?), we will come to the Review step, where we can examine the YAML file.
- With that said, you aren’t excluded from adding tasks at any time. There is Show Assistant to help you with adding new tasks to your existing YAML file.
For the DefaultWebApp example, we don’t need to update our YAML file because we don’t have any changes; this is because we want something very simple to create our build. The default YAML file looks like this:
# ASP.NET Core (.NET Framework)
# Build and test ASP.NET Core projects targeting the full .NET Framework.
# Add steps that publish symbols, save build artifacts, and more:
# https://docs.microsoft.com/azure/devops/pipelines/languages/dotnet-core
trigger:
- master
pool:
  vmImage: 'windows-latest'
variables:
  solution: '**/*.sln'
  buildPlatform: 'Any CPU'
  buildConfiguration: 'Release'
steps:
- task: NuGetToolInstaller@1
- task: NuGetCommand@2
  inputs:
    restoreSolution: '$(solution)'
- task: VSBuild@1
  inputs:
    solution: '$(solution)'
    msbuildArgs: '/p:DeployOnBuild=true /p:WebPublishMethod=Package /p:PackageAsSingleFile=true /p:SkipInvalidConfigurations=true /p:DesktopBuildPackageLocation="$(build.artifactStagingDirectory)\WebApp.zip" /p:DeployIisAppPath="Default Web Site"'
    platform: '$(buildPlatform)'
    configuration: '$(buildConfiguration)'
- task: VSTest@2
  inputs:
    platform: '$(buildPlatform)'
    configuration: '$(buildConfiguration)'
This new file that Azure Pipelines created is called azure-pipelines.yml. So, where does this new azure-pipelines.yml file reside when it’s created? It’s committed to the root of your repository. Once we’ve confirmed everything looks good in the YAML file, we can click the Save and run button.
Once you’ve done this, a side panel will appear, asking you for a commit message and optional description, as well as to specify options on whether to commit directly to the master branch or create a new branch for this commit. Once you’ve clicked the Save and run button at the bottom of the side panel, it will commit your new YAML file to your repository and execute the pipeline immediately.
Creating the Artifacts
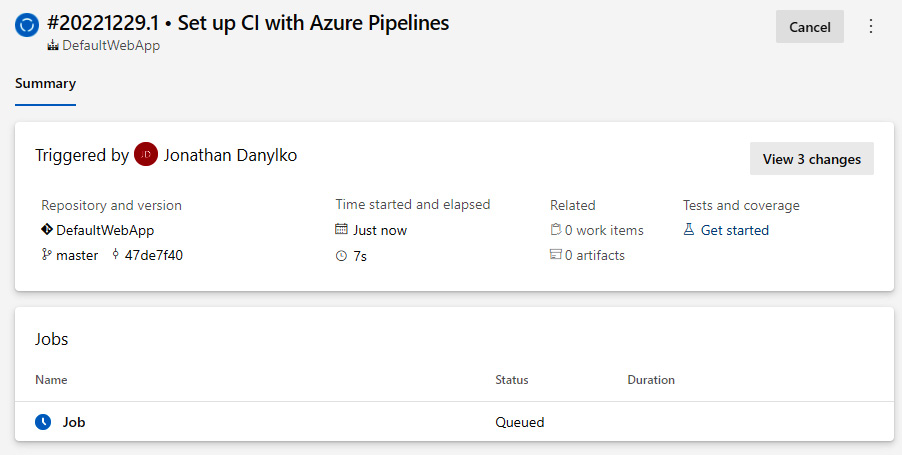
Once the build is running, you’ll see something similar to Figure 2.6:
Figure 2.6 – Queueing up our DefaultWebApp build process
As shown at the bottom of the preceding screenshot, my job’s status is Queued. Once it’s out of the queue and executing, you can watch the builds progress by clicking on Job next to the blue clock at the bottom.
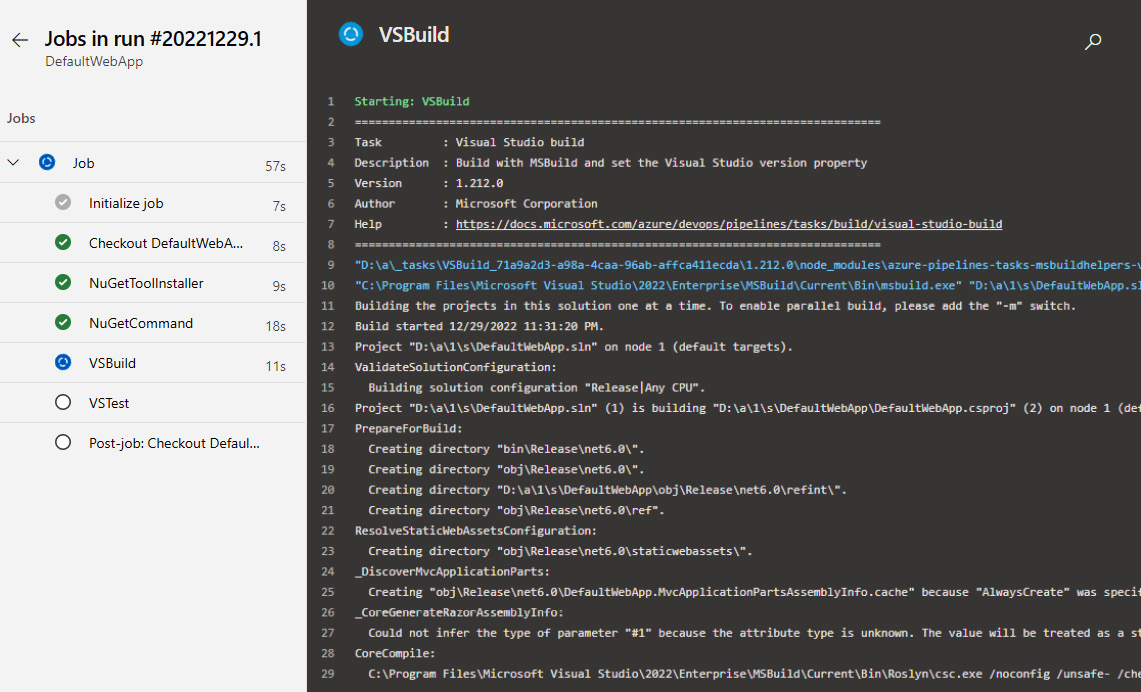
In terms of DefaultWebApp, this is what the build process looks as seen in Figure 2.7:
Figure 2.7 – The build progress of DefaultWebApp
Congratulations! You have created a successful pipeline and artifact.
For the sake of not writing an entire book on Azure Pipelines, next, we will move on to creating releases.
Creating a Release
With a completed and successful build, we can now focus on releasing our software. Follow these steps:
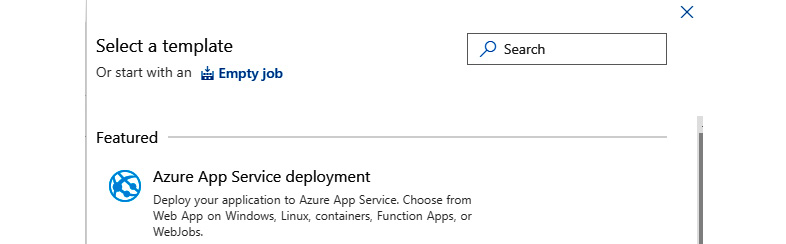
- If you click on Releases, you’ll see we need to create a new release pipeline. Click the New Pipeline button.
- Immediately, you’ll see a side panel appear with a list of templates you can choose from. Select Empty job at the top of the side panel, as shown in Figure 2.8:
Figure 2.8 – Selecting an empty job template
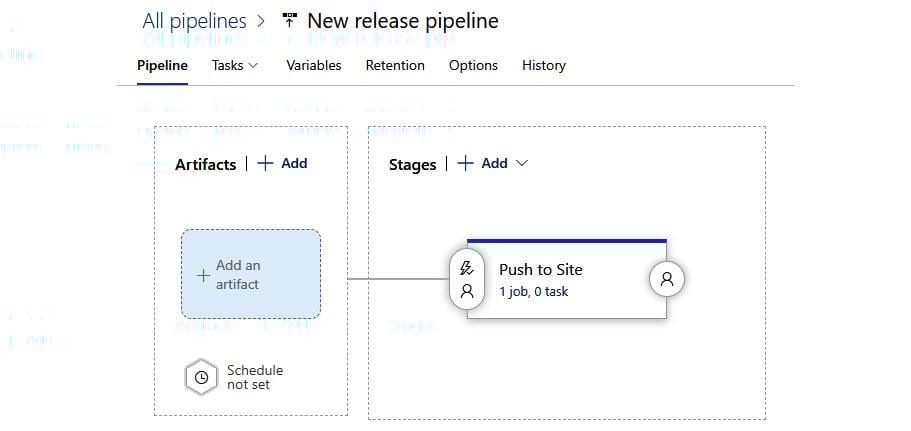
There is a term in Releases called Stages where your software can go through several stages before it’s sent to the final stage. These stages can also be synonymous with environments. These stages include development, QA, staging, and production. Once one stage has been approved (development), it moves to the next stage (QA) until the final one, which is usually production. However, these stages can get extremely complicated.
- After you click the Apply button, you will see another side panel where you can define your stage. Since we are simply deploying the website, we’ll call this the Push to Site stage.
- After entering your Stage name (that just doesn’t sound right), click the X button to close the side panel and examine the pipeline.
As shown in Figure 2.9, we need to add an artifact:
Figure 2.9 – The Push to Site stage is defined, but there’s no artifact
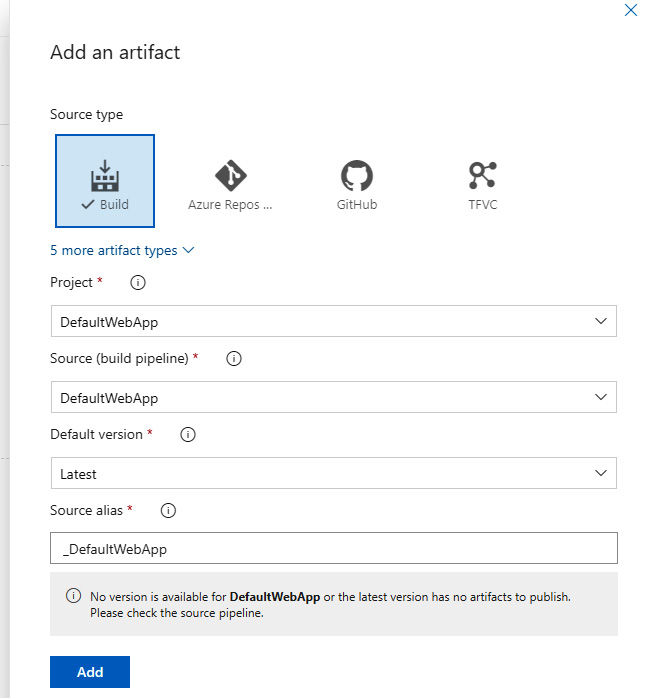
- When you click Add an Artifact, another side panel will slide open and ask you to add the artifact. Since we created an artifact in the previous subsection, we can populate all of our inputs with the DefaultWebApp project and source, as shown in Figure 2.10:
Figure 2.10 – Adding the DefaultWebApp artifact to our release pipeline
- Click Add to add your artifact to the pipeline.
Deploying the Build
Once we have defined our stages, we can attach certain deployment conditions, both before and after, to each stage. The ability to define post-deployment approvals, gates, and auto-redeploy triggers is possible but disabled by default for each stage.
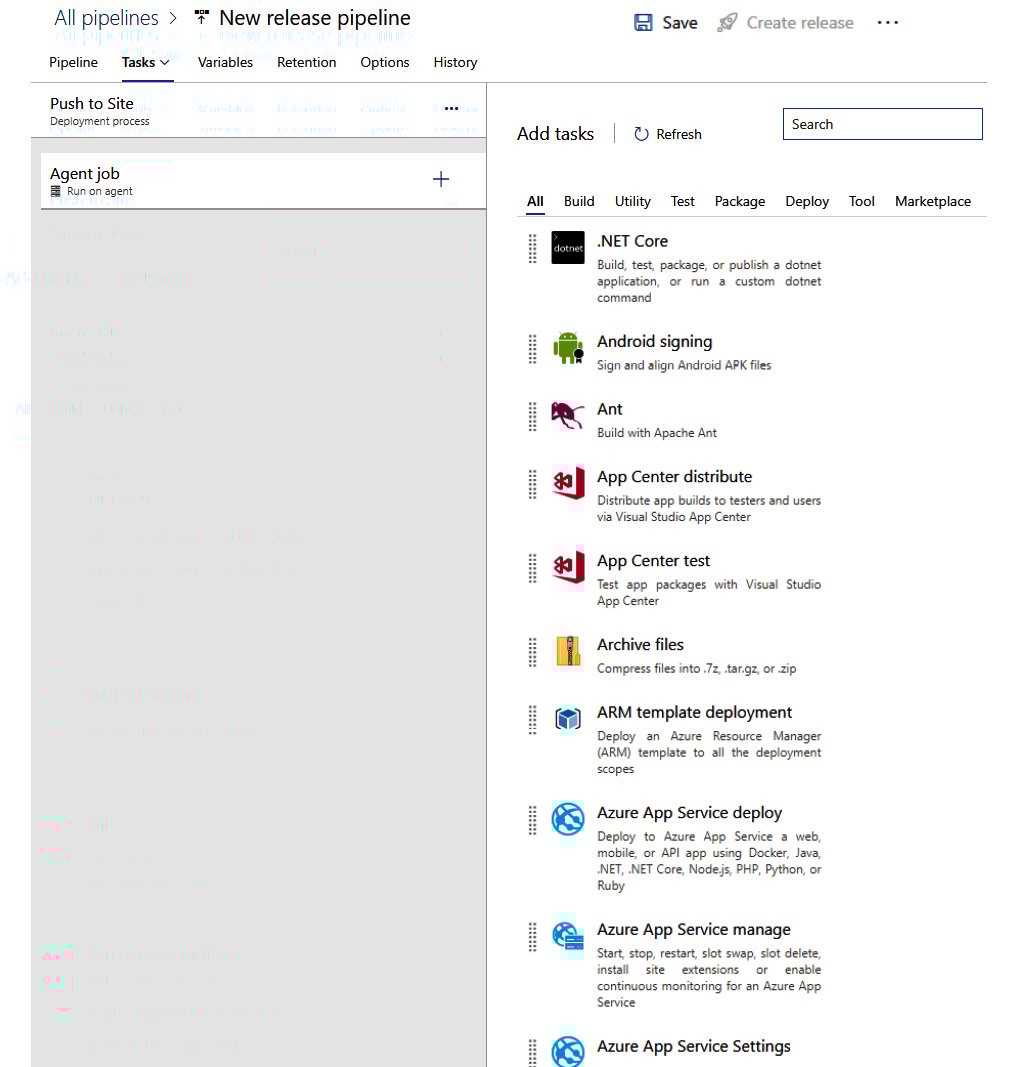
In any stage, you can add, edit, or remove any task you want by clicking on the “x job, x tasks” link under each stage’s name, as shown in Figure 2.11:
Figure 2.11 – Stages allow you to add any number of tasks
Each stage has an agent job, which can perform any number of tasks. The list of tasks to choose from is mind-numbing. If you can think of it, there is a task for it.
For example, we can deploy a website using Azure, IIS Web Deploy, or even simply a file that’s been copied from one directory to another. Want to FTP the files over to a server? Click on the Utility tab and find FTP Upload.
Each task you add has parameters per topic and can easily be modified to suit a developer’s requirements.
In this section, we covered how to create a pipeline by preparing the application to meet certain requirements. We did this by introducing Azure Pipelines by logging in and adding our sample project, identifying the repository we’ll be using in our pipeline, and creating the build. Once we’d done this, we found our artifacts, created a release, and found a way to deploy the build.


 Free Chapter