-
Book Overview & Buying
-
Table Of Contents

-
Feedback & Rating

Python GUI Programming with Tkinter, 2nd edition
By :
Python GUI Programming with Tkinter, 2nd edition
By:
Overview of this book
Tkinter is widely used to build GUIs in Python due to its simplicity. In this book, you’ll discover Tkinter’s strengths and overcome its challenges as you learn to develop fully featured GUI applications.
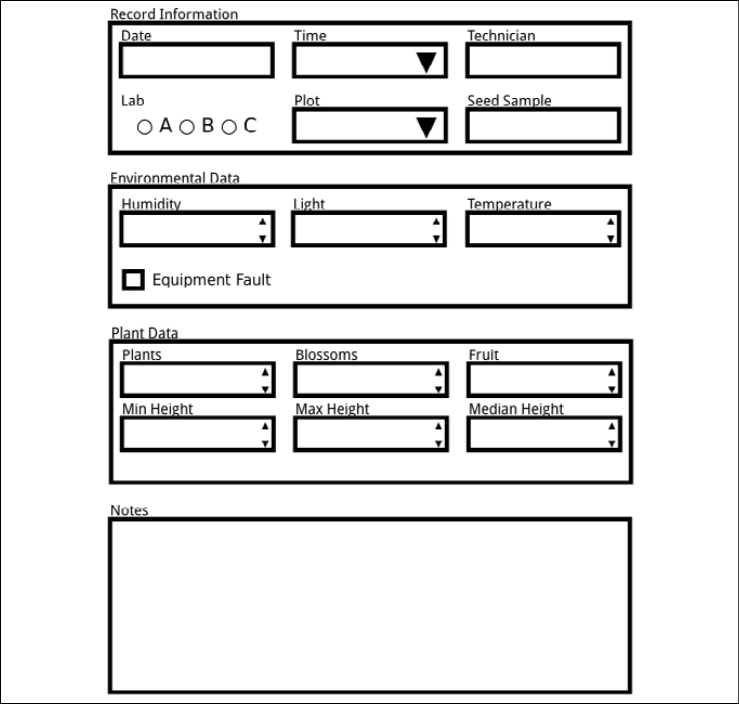
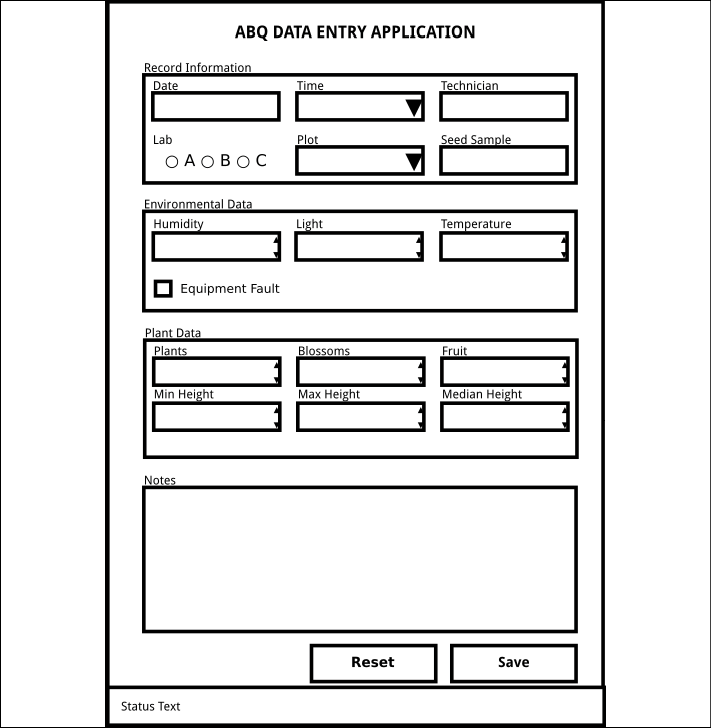
Python GUI Programming with Tkinter, Second Edition, will not only provide you with a working knowledge of the Tkinter GUI library, but also a valuable set of skills that will enable you to plan, implement, and maintain larger applications. You’ll build a full-blown data entry application from scratch, learning how to grow and improve your code in response to continually changing user and business needs.
You’ll develop a practical understanding of tools and techniques used to manage this evolving codebase and go beyond the default Tkinter widget capabilities. You’ll implement version control and unit testing, separation of concerns through the MVC design pattern, and object-oriented programming to organize your code more cleanly.
You’ll also gain experience with technologies often used in workplace applications, such as SQL databases, network services, and data visualization libraries. Finally, you’ll package your application for wider distribution and tackle the challenge of maintaining cross-platform compatibility.
Table of Contents (22 chapters)
Preface

Introduction to Tkinter
 Free Chapter
Designing GUI Applications
Creating Basic Forms with Tkinter and Ttk Widgets
Organizing Our Code with Classes
Reducing User Error with Validation and Automation
Planning for the Expansion of Our Application
Creating Menus with Menu and Tkinter Dialogs
Navigating Records with Treeview and Notebook
Improving the Look with Styles and Themes
Maintaining Cross-Platform Compatibility
Creating Automated Tests with unittest
Improving Data Storage with SQL
Connecting to the Cloud
Asynchronous Programming with Thread and Queue
Visualizing Data Using the Canvas Widget
Packaging with setuptools and cxFreeze
A: A Quick Primer on reStructuredText
B: A Quick SQL Tutorial
Other Books You May Enjoy
Index
Appendices
Customer Reviews