Sign In Start Free Trial
Account

Add to playlist

Create a Playlist

Modal Close icon
You need to login to use this feature.
  • Book Overview & Buying Extending Unity with Editor Scripting
  • Table Of Contents Toc
  • Feedback & Rating feedback
Extending Unity with Editor Scripting

Extending Unity with Editor Scripting

By : Angelo R Tadres Bustamante
4.7 (7)
close
close
Extending Unity with Editor Scripting

Extending Unity with Editor Scripting

4.7 (7)
By: Angelo R Tadres Bustamante

Overview of this book

One of Unity's most powerful features is the extensible editor it has. With editor scripting, it is possible to extend or create functionalities to make video game development easier. For a Unity developer, this is an important topic to know and understand because adapting Unity editor scripting to video games saves a great deal of time and resources. 
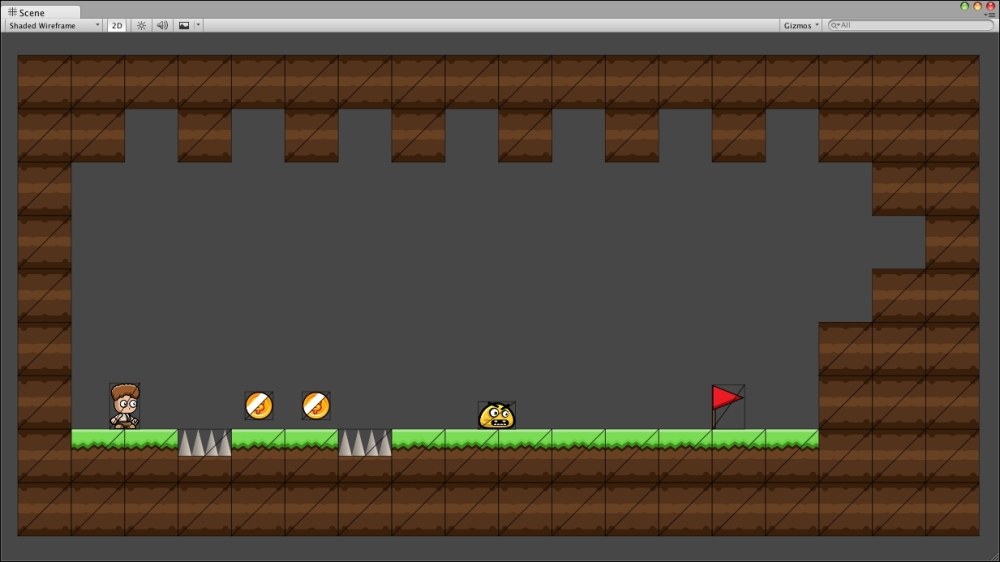
This book is designed to cover all the basic concepts of Unity editor scripting using a functional platformer video game that requires workflow improvement. You will commence with the basics of editor scripting, exploring its implementation with the help of an example project, a level editor, before moving on to the usage of visual cues for debugging with Gizmos in the scene view. Next, you will learn how to create custom inspectors and editor windows and implement custom GUI. Furthermore, you will discover how to change the look and feel of the editor using editor GUIStyles and editor GUISkins. You will then explore the usage of editor scripting in order to improve the development pipeline of a video game in Unity by designing ad hoc editor tools, customizing the way the editor imports assets, and getting control over the build creation process. Step by step, you will use and learn all the key concepts while creating and developing a pipeline for a simple platform video game. As a bonus, the final chapter will help you to understand how to share content in the Asset Store that shows the creation of custom tools as a possible new business. By the end of the book, you will easily be able to extend all the concepts to other projects.
Table of Contents (12 chapters)
close
close
11
Index

Introducing Run & Jump

Run & Jump is a 2D platformer video game created for this book to serve as a base for our editor scripting experiments. In this section, we will talk about the video game and what kind of things we want to achieve.

Keep in mind that it is not important to understand in detail how Run & Jump is implemented. It's enough just to understand the workflows associated with the content creation of this video game.

Playing the video game

In this video game, the player takes control of Timmy, a guy who likes to collect coins and invests his time searching for hidden treasures. On his journey, he needs to avoid obstacles and enemies to reach the finale of each level and win. You can see how the video game looks in the following screenshots:

Playing the video game

To play the video game, you will have to clone or download the project from https://github.com/angelotadres/RunAndJump in GitHub.

When you are ready, open the project in Unity. You will see the following folder structure in the Project browser:

Playing the video game

To test the game, open the scene Title inside the Scenes folder and then press the Play button in the Unity toolbar:

Playing the video game

To control Timmy, use the left and right arrows on your keyboard. Pressing the space bar makes him jump, and pressing it again while he is in the air makes him perform a double jump.

Currently, there are three levels implemented for this video game to test its functionality. In the next section, you will learn how to add more levels.

Creating a new level

In this video game, each level is a Unity scene inside the folder Levels. When you start playing Run & Jump and then select a specific level, the video game call the LevelHandler scene and this starts the script LevelHandlerScene.cs.

This scene has all the GUI necessary for the level, and the script is responsible for the game's status detection (playing, paused, and so on), when the player wins or loses, and loading of the specific level scene using the method Application.LoadLevelAdditive.

Note

Unlike LoadLevel, LoadLevelAdditive does not destroy objects in the current scene. Objects from the new scene are added over the current one.

Each level scene is composed of several prefabs. We will refer to these in the rest of the book as level pieces prefabs.

Navigate to Prefabs | LevelPieces to check the available level piece prefabs. The following table contains a description of each one:

Level Piece

Description

Creating a new level

Timmy (Player.prefab):

You control this character in the game. Timmy's abilities are run, jump and double jump. There's nothing to envy about the Italian plumber.

Creating a new level

Angry Blob (EnemyAngryBlob.prefab):

This character moves over platforms from one side to the other with an angry face. You don't like him and he doesn't like you so don't touch him or you will lose a life!

Creating a new level

Coins (InteractiveCoin.prefab):

It is not a real platform video game without something to collect. Coins are one of the collectibles, and when you pick one, your score increases by 100 points.

Creating a new level

Treasure (InteractiveTreasure.prefab):

Usually, this collectable is well hidden in order to motivate the player to explore the level. When you pick one, your score increases by 1,000 points.

Creating a new level

Sign (InteractiveSign.prefab):

This will display a message on the screen when the player is around the sign board. The sign is used to give the player hints or miscellaneous information about the current level.

Creating a new level

Spikes (HazardSpike.prefab):

These sharp spikes are placed in locations that make it harder to reach your objective. Don't touch them or you will lose a life!

Creating a new level

Dirt (SolidDirt.prefab):

This is used as a building block for the level.

Creating a new level

Grass (SolidGrass.prefab):

Like Dirt, this too is used as a building block for the level. The only difference is this it's green on the top.

Creating a new level

Goal flag (InteractiveGoalFlag.prefab):

The main objective of the video game is to reach the Goal flag at the end of each level. A well-designed level will have a lot of hazards and enemies between you and the goal flag.

To get a better understating of what is involved in creating levels, let's create a new one. The goal is to copy the following level (or at least try to do so):

Creating a new level

For this, you need to perform the following steps:

  1. Create a new scene and remove the default camera.
  2. Add a new Game Object to the scene and attach the level.cs script located in Scripts | Level. This script contains the base to make our level work.
  3. Navigate to Prefabs | LevelPieces and clone the prefabs in the scene until you complete creating the level. All the prefabs must be nested inside the game object you created earlier.
  4. When you are done, click again on the root game object. If you check the Inspector window, you will see the following:
    Creating a new level

    Here, you will be able to adjust the properties of the level, such as the maximum time taken to beat the level and get the score bonus, Gravity, Bgm (background music), and Background. You can play with these values: for the Bgm, you can grab an audio clip from the folder Audio/Bgm; and for the background, you can grab a sprite from Art/Bg.

  5. As soon you finish, save the scene inside the folder Levels with the name MyLevel_level.

Tip

To align the prefabs among themselves, select the Transform tool and press and hold the V key to activate the Vertex-Snapping mode.

Run & Jump comes with a custom tool that allows you to set up the order and the name of the levels and also add these to the Scenes in Build list automatically. We must use this in order of make our level usable by the video game (one of the requirements is to include the suffix _level in the name of the scene).

In the Unity editor menu, navigate to Tools | Level Packager | Show Levels Package:

Creating a new level

This will display the following in the Inspector window:

Creating a new level

Currently, there are only three levels listed, so click on the + icon to create a new item in the list. Now, add the scene you created in right column and add the string My Level in the left column. This will add your level as the fourth one.

Save the changes by clicking on the Commit Levels button.

To check the scene you created, open the scene Title inside the Scenes folder, and then click on the Play button to run the video game:

Creating a new level

Now you know the necessary amount of effort it takes to create a level for this game; so let's make this level creation process the first thing to improve.

Create a Note

Modal Close icon
You need to login to use this feature.
notes
bookmark search playlist font-size

Change the font size

margin-width

Change margin width

day-mode

Change background colour

Close icon Search
Country selected

Close icon Your notes and bookmarks

Delete Bookmark

Modal Close icon
Are you sure you want to delete it?
Cancel
Yes, Delete

Delete Note

Modal Close icon
Are you sure you want to delete it?
Cancel
Yes, Delete

Edit Note

Modal Close icon
Write a note (max 255 characters)
Cancel
Update Note

Confirmation

Modal Close icon
claim successful

Buy this book with your credits?

Modal Close icon
Are you sure you want to buy this book with one of your credits?
Close
YES, BUY