In this section, we will learn how to set up and use a Linux platform as our primary workstation for day-to-day work. We choose the Ubuntu Desktop LTS distribution, but any other modern-day Linux distribution would fit the bill. We aim to showcase some basic user operations and workflows for building and using a general-purpose Linux desktop.
As we did in the previous sections about installing a Linux distribution, we start with a brief installation guide of Ubuntu Desktop LTS.
Installing Ubuntu Desktop
If we plan to install Ubuntu Desktop on a VM, there are some preliminary steps required for provisioning the VM environment. Otherwise, we proceed directly with the Installation section.
VM provisioning
The VM provisioning procedure is very similar to the procedure described in the Installing Ubuntu section, with Ubuntu Server LTS.
We have to pay attention to the minimum system requirements of our Linux distribution and size the VM accordingly. In our case, Ubuntu Desktop requires a dual-core CPU, at least 4 GB RAM, and a minimum hard disk capacity of 25 GB. Since we plan to install a handful of additional software packages, we set the hard disk capacity to 60 GB (at least).
Installation
Ubuntu Desktop installation is relatively straightforward and requires very few user actions:
- As with the most modern Linux distributions, the very first choice we get is between trying out Ubuntu in live mode or simply proceeding with the installation. The related screen is similar to Figure 1.3.
- Beyond the welcome screen, there are a few more steps with the following configuration settings:
a) Keyboard layout
b) Installation type (normal versus minimal)
c) Localization and time zone
d) User configuration (account credentials) (Figure 1.28):
Figure 1.28 – Setting up the hostname and user credentials
- Past this point, the installation files are unpackaged and copied, while we are briefly introduced to the most attractive features of the Ubuntu platform.
After the installation completes, the system reboot takes us to the Ubuntu Desktop login screen. At this point, we have completed the Ubuntu Desktop installation.
Default software packages
The default Ubuntu Desktop installation gets us a handful of software packages and productivity tools, enough for our general-purpose, day-to-day work. Here are just a few examples:
- Calculator: Arithmetic, scientific, and financial calculations.
- Calendar: Access and manage your calendars.
- Disks: Manage drives and media.
- Files: Access and organize files.
- Firefox: Web browser.
- Image Viewer: Browse and rotate images.
- LibreOffice: Productivity suite – Calc (spreadsheet), Draw (graphics), Impress (presentation), and Writer (word processor).
- Logs: System logs.
- Remmina: Remote desktop connection.
- Rhythmbox: Organize and play music.
- Screenshot: Capture and save images of the screen or individual windows.
- Settings: GNOME desktop configuration utility.
- Shotwell: Organize photos.
- Thunderbird Mail: Send and receive mail.
- To Do: Manage personal tasks.
- Videos: Play movies.
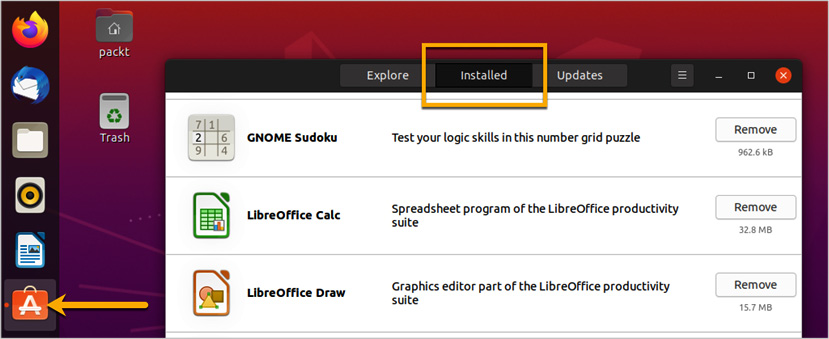
To view all currently installed applications, we click on the Ubuntu Software icon in the taskbar and then on the Installed tab. We could choose to remove (uninstall) any of these applications if we wanted to save disk space (Figure 1.29):
Figure 1.29 – Adding or removing Ubuntu applications
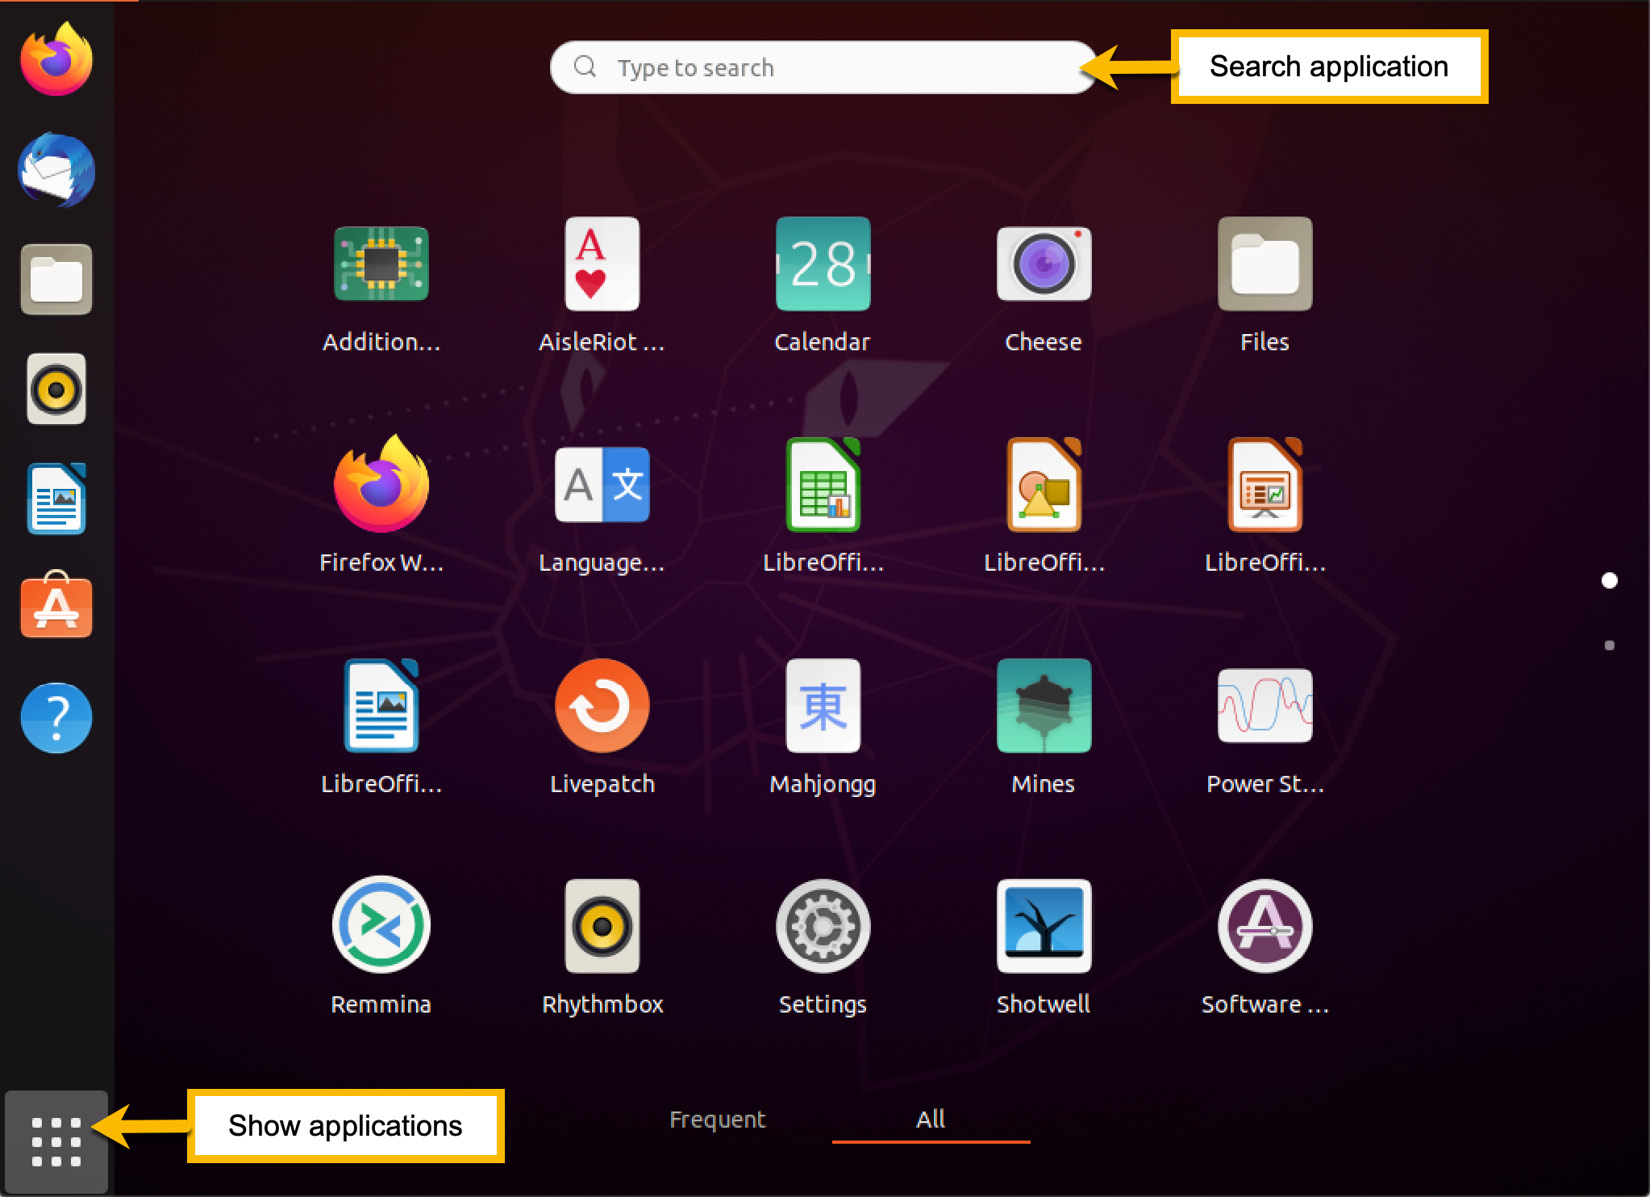
To browse or open any of these applications, click the grid icon (Show applications) at the bottom of the taskbar and then search for our application by beginning to type its name (Figure 1.30):
Figure 1.30 – Searching for installed applications
Next, let's take a look at how to install additional applications on our Ubuntu Linux workstation.
Additional software packages
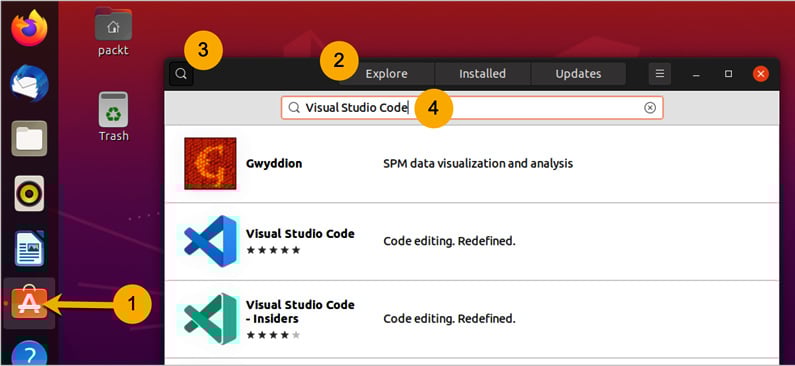
A power user may need additional software, tools, or utilities beyond the ones provisioned with the default Ubuntu Desktop installation. To add new applications, we click on the Ubuntu Software icon in the taskbar, followed by Explore, and then on the search icon. In the example illustrated in the following figure, we look for Visual Studio Code, a powerful code editor.
In general, when we decide on a particular application we want to install, we select the application, and this opens up a window for installing the related Ubuntu software package. Once we have completed the installation, the application shows up in the Installed section, where we can later uninstall it, if we choose to do so (Figure 1.31):
Figure 1.31 – Installing new applications
Different power users may look for a particular category of applications, tools, or utilities. Here are just a few of the most common types of productivity tools and applications used by the Linux user community. Some of them are readily available for download via the Ubuntu Software package management interface. Others can be downloaded from their related vendor websites.
Here are some commonly used applications for email and collaboration available for Ubuntu and other major Linux distributions:
- Hiri: Cross-platform email client, a real alternative to Microsoft Outlook.
- Thunderbird Mail: Send and receive emails (installed by default).
- Slack for Linux: Channel-based instant messaging platform.
- Teams for Linux: Instant messaging; unofficial Microsoft Teams client for Linux.
Image editing tools abound for Linux. Here are just a few:
- GIMP: Image manipulation program
- digiKam: Photo editing software
- KRITA: Free image editing and artistry
Most software development IDEs and tools are cross-platform these days. Ubuntu and many other Linux distros are not an exception in offering a vast array of such applications:
- Visual Studio Code: Code editing
- Sublime Text: Code editing, markup
- Atom: Highly customizable code editor
- Eclipse: Extensible tool platform and Java IDE
- IDEA Ultimate: Capable and ergonomic Java IDE for enterprise, web, and mobile development
- Terminator: Multiple terminals in one window
Virtualization and containerized workflows are in high demand now more than ever. All major hypervisors and container orchestration platforms are available for Linux as well:
- VirtualBox: VM manager by Oracle.
- VMware Workstation: VM manager by VMware.
- Docker Engine: Open source containerization platform.
- MicroK8s: Lightweight Kubernetes for workstations and appliances.
- Minikube: Run Kubernetes locally.
Small-factor Linux PCs and appliances are often the ideal platforms for media servers. These are the most common media server applications generally available for almost any Linux distribution:
- Plex Media Server: Organize media libraries and stream to any device.
- Kodi: Manage and view media.
In our highly collaborative world, screen capture and recording tools always come in handy. Here are just a few:
- Screenshot: Capture and save images of the screen or individual windows (installed by default).
- Kazam: Record a video or take a screenshot.
- OBS Studio: Live streaming and screen recording.
Some of these applications may require a CLI for installation. Other applications are available either as a software package installer in the Ubuntu Software management user interface or via the APT package manager CLI (apt-get).
As we have previously shown, installing an application via the Ubuntu Software management interface is straightforward. Next, we take a look at Ubuntu's APT package manager platform and CLI.
Managing software packages with APT
APT is the default package manager in Ubuntu, and it's a platform interface for installing and removing software packages. As a core system library of Ubuntu, APT is a collection of tools and CLI programs helping with package and repository management: apt, apt-cache, and apt-get.
Important note
APT and DPKG: In essence, APT is a shim (frontend) to DPKG – the package manager of Debian Linux distributions. The apt CLI invokes the dpkg CLI under the hood.
Let's look at a few examples of using the apt-get and dpkg CLI tools for installing and managing software packages.
Case study – installing Java (OpenJDK)
This scenario is from the perspective of a Java developer:
I have a powerful developer machine running Ubuntu Desktop. I work on a project that requires Java development. How do I install OpenJDK on my machine?
We assume an Ubuntu Desktop platform and OpenJDK version 14 for our case study.
Let's look at how to install OpenJDK (Java Development Kit):
- Before installing OpenJDK, let's make sure the current package lists and installed software packages are up to date. Start by updating the local package repository metadata for all configured sources:
sudo apt-get update -y
Next, proceed with the upgrade:
sudo apt-get upgrade -y
The preceding commands require superuser (sudo) privileges. We have to enter the password for our privileged (administrator) account. The -y option runs the apt-get command without requiring further user interaction.
- Now, we are ready to install OpenJDK 14:
sudo apt-get install -y openjdk-14-jre-headless
- Let's make sure the OpenJDK environment is ready. Get the OpenJDK version:
java --version
This command should yield the following response for our freshly installed OpenJDK (Figure 1.32):
Figure 1.32 – Testing the OpenJDK installation
- We can verify the status of the OpenJDK installation with this:
dpkg --list openjdk-14-jre-headless
The preceding command yields a response similar to Figure 1.33:
Figure 1.33 – Querying the OpenJDK package using dpkg
Alternatively, we can use the apt-cache CLI to verify the status of the OpenJDK package:
apt-cache policy openjdk-14-jre-headless
The output is similar to Figure 1.34:
Figure 1.34 – Querying the OpenJDK package using apt-cache
- To remove OpenJDK, run the following:
sudo apt-get remove openjdk-14-jre-headless
Or, you can use dpkg:
sudo dpkg --remove openjdk-14-jre-headless
To find out more about the dpkg CLI options, run dpkg --help. To get more information on the apt CLI tools, run man apt.
Case study – installing Plex Media Server
This scenario is from the perspective of a home theater enthusiast:
I'm using Plex as a media player system, with Plex Media Server as the backend. I want to migrate my Plex Media Server to Linux. How do I install Plex Media Server on Ubuntu?
To install Plex Media Server (PMS) on Ubuntu, follow these steps:
- Make sure the current package lists and installed software packages are up to date. Start by updating the local package repository for all configured sources:
sudo apt-get update -y
Next, run the upgrade:
sudo apt-get upgrade -y
According to the vendor's website, there are specific prerequisites regarding enabling the related repository, which we don't detail here.
- The vendor also recommends the use of the
dpkg CLI for installing PMS; use the following command:sudo dpkg -i plexmediaserver_1.19.4.2935-79e214ead_amd64.deb
- We can verify the status of our
plexmediaserver installation with the following:dpkg --list plexmediaserver
The preceding command results in a response similar to Figure 1.35:
Figure 1.35 – Querying the PMS package using dpkg
- To remove the
plexmediaserver package, run this:sudo dpkg --remove plexmediaserver
To find out more about the dpkg CLI options, run dpkg --help.


 Free Chapter