-
Book Overview & Buying
-
Table Of Contents

-
Feedback & Rating

Mastering Linux Administration
By :
Mastering Linux Administration
By:
Overview of this book
Linux plays a significant role in modern data center management and provides great versatility in deploying and managing your workloads on-premises and in the cloud. This book covers the important topics you need to know about for your everyday Linux administration tasks.
The book starts by helping you understand the Linux command line and how to work with files, packages, and filesystems. You'll then begin administering network services and hardening security, and learn about cloud computing, containers, and orchestration. Once you've learned how to work with the command line, you'll explore the essential Linux commands for managing users, processes, and daemons and discover how to secure your Linux environment using application security frameworks and firewall managers. As you advance through the chapters, you'll work with containers, hypervisors, virtual machines, Ansible, and Kubernetes. You'll also learn how to deploy Linux to the cloud using AWS and Azure.
By the end of this Linux book, you'll be well-versed with Linux and have mastered everyday administrative tasks using workflows spanning from on-premises to the cloud. If you also find yourself adopting DevOps practices in the process, we'll consider our mission accomplished.
Table of Contents (20 chapters)
Preface

Section 1: Linux Basic Administration
 Free Chapter
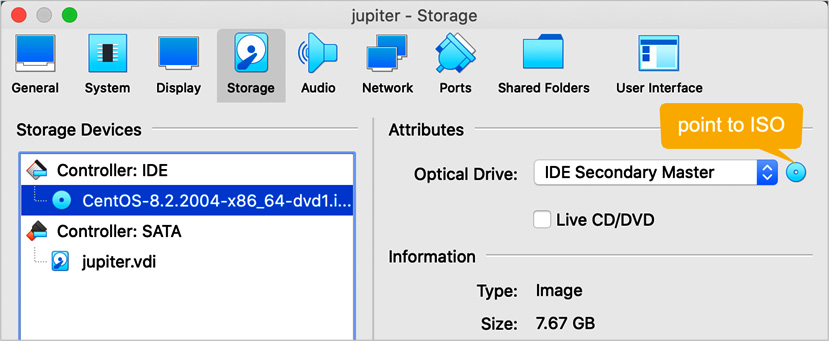
Chapter 1: Installing Linux
Chapter 2: The Linux Filesystem
Chapter 3: Linux Software Management
Chapter 4: Managing Users and Groups
Chapter 5: Working with Processes, Daemons, and Signals
Section 2: Advanced Linux Server Administration
Chapter 6: Working with Disks and Filesystems
Chapter 7: Networking with Linux
Chapter 8: Configuring Linux Servers
Chapter 9: Securing Linux
Chapter 10: Disaster Recovery, Diagnostics, and Troubleshooting
Section 3: Cloud Administration
Chapter 11: Working with Containers and Virtual Machines
Chapter 12: Cloud Computing Essentials
Chapter 13: Deploying to the Cloud with AWS and Azure
Chapter 14: Deploying Applications with Kubernetes
Chapter 15: Automating Workflows with Ansible
Customer Reviews