Apart from the usage of Inkscape, in the following paragraphs, I will also share my workflow to design clever logos.
You should start designing a logo with Inkscape the same way you would start using any other graphical program. And all the designers agree that the process does not start with opening that program itself! You have some work to do before drawing anything.
We usually start every design process with the same three steps: gather information, think, and sketch.
Reading the brief and doing your homework
The very first step is learning more about what you have to design. In this case, we have it easy since I will provide the information needed.
Logo scenario
In this chapter, our task will be to create a logo for a very successful – yet fictional – company called CloudUsers. They are a small company offering cloud-based data solutions to its clients. They offer services such as hosting, data recovery, migration, virtual machines, database services, and so on. Their main values are safety, stability, and speed; this is what you have to emphasize in the visuals.
Reading the brief covers only part of the story – you usually need to do research and learn more about the company, the market, and the competitors. In this case, if you did a bit of research, and looked at the logos of other companies with similar profiles, you would see that a simplified cloud is a common symbol for cloud-based companies. Although the servers are not literally in the clouds, this is an easily recognizable image.
Thinking and sketching
As the common cumulus cloud became an emblem for cloud computing and related services, we should include it in our logo design.
But what else is needed? What would make this logo blend into the tech field, yet stand out from the crowd? This is where the initial sketches come in.
Sketching with a pencil on paper helps you decide what you need to draw. It is the method of grabbing the ideas swirling in your head and putting them down on the paper in front of you. In my opinion, as a designer, sketches are for getting your ideas straight, and they do not need to be final by any means.
A cloud with rain or the Sun is a suitable icon for a weather app, but an IT company needs to have tech elements too. And as the company name suggests, this logo needs to have users or people in it:
Tips about sketching
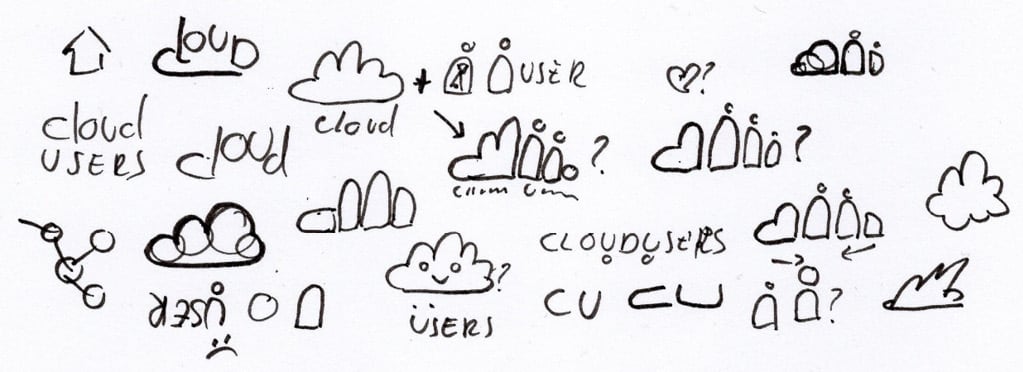
During the sketching period, I usually write out the name of the company several times, to look for typographical opportunities to add an extra layer of meaning through the shape of the letters. I also draw elements from the name and the profession of the company. Remember: sketching is not an art form. It is about drawing a ton of bad drawings and looking for visual solutions to your design problem!
Figure 2.1 – A few of my initial sketches for the CloudUsers logo
Importing your sketch into Inkscape
Now that the initial sketches are done, it is time to open Inkscape.
As I mentioned previously, sketches are never meant to be finished designs for me. This means I am glancing at my sketches most of the time while working in Inkscape, but I am not using them strictly as a base to trace over.
Other designers use their sketches differently and like to work out their ideas fully on paper first, and later follow these sketches precisely in the digital design app they use. It is all a matter of preference. But even if you only use your sketches as rough references, it is a good idea to import them into Inkscape. That way, it will be easier to find the final form that matches your ideas.
Scan your sketches or take a picture of them when you plan not to follow them precisely. Since this project was created as a step-by-step tutorial, you will learn by following my logo design in Inkscape, so you do not need to import sketches at this point. If you want to use my sketches, you can download them from here: https://istvanszep.com/inkscapeexample/logo-sketches.jpg.
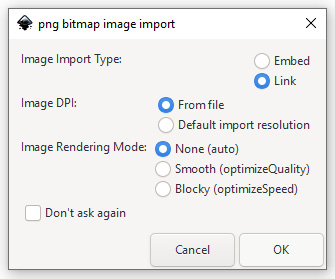
Click on File | Import or press Ctrl + I and import the picture into Inkscape. Because the bitmap image will not be used in the final form of the design (that is, it will be a vector logo, not a photomanipulation), choose the Link option under Image Import Type from the import popup window.
Linking your image instead of embedding it will keep your file size from bloating performance issues. Again, since you do not want to include the photo in the final design, high image quality is not a must. So, just leave the other import settings as-is:
Figure 2.2 – Linking your sketches while importing them
This concludes the very first steps of the logo design process. With or without Inkscape, you always need to work out what you need to design. Before starting up the program, always think and sketch! Then, import your sketch into Inkscape and get ready to take the next step!


 Free Chapter


