Configuring your environment is the most important task of this book. Without it, you won't have anything to test your skills! Building out an environment will teach you how to configure instances, add resources to them, and connect to them.
Setting up an account
To begin the process of creating your own AWS account, follow these steps:
- Please open a browser of your choice and go to the AWS home page located at https://aws.amazon.com/.
You will be greeted with a landing page and will see a button titled Create a Free Account. Simply click on Create a Free Account to get started with creating your profile:
Figure 1.1 – AWS account creation
- After clicking the button, you'll see how to create an AWS account. Fill out the information accordingly. If you use a student email address, you can get access to extra goodies:
Figure 1.2 – Account creation form
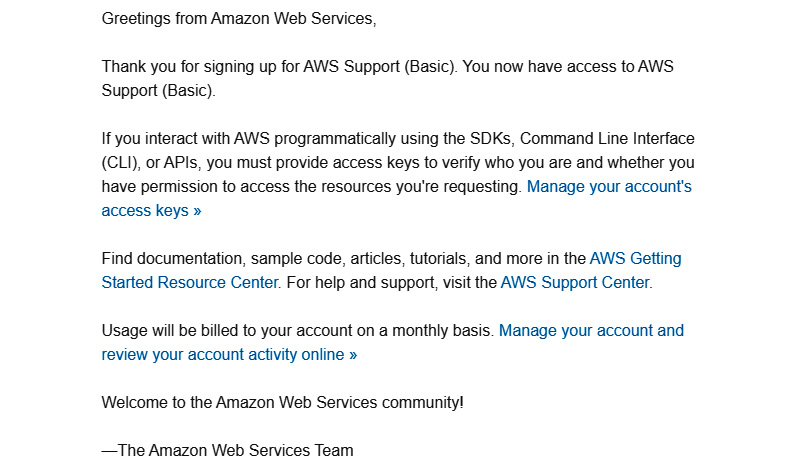
- Once the form's filled out, click Continue and you'll receive an email prompting you with a greeting and welcoming you to AWS:
Figure 1.3 – Email from AWS after account creation
Congratulations, you now have your very own account to access for the rest of this book. Feel free to get a feel for all the resources available in AWS before moving on. AWS is full of resources and information that you can use at your disposal. Once you're ready, move onto the next section as you learn how to create your very own EC2 instances.
Important note
When setting up an account, use a .edu address if possible. There are additional benefits you can use with an AWS account. A link will be available at the end of this chapter for more information about student benefits.
The next section will discuss how to create your very own EC2 instances in your new AWS account.
Setting up EC2 instances
EC2 (Elastic Compute Cloud) instances essentially replace the need for hardware by providing scalable computing within the Amazon cloud. Think of an EC2 instance as a computer with no operating system. This is beneficial because it allows organizations to scale their systems, with little to no overhead! However, while it is a benefit to have such a simple solution, the downside can come in the common form of poor management. It's extremely easy to deploy an EC2 instance only for it to go unnoticed by administrators. But that computer is someone else's computer that you're renting. Keep in mind that a computer is just a computer, so you will need to place an operating system on it.
Before we begin discussing the instances we are creating, let's make a quick mention of why we are setting these instances up. Part of being a pentester is understanding how things are set up. Often, pentesters come from a development and system administrator background and have a fundamental understanding of how systems work. We are setting up various operating systems and taking a first-hand look at how common issues are implemented in EC2 instances and the operating systems. Let's look at what we will be creating throughout this chapter.
We will create three EC2 instances with various images. Doing so will give us the tools and understanding of how accessing each system is different from the other. The first operating system that we are going to install will be CentOS 7.
CentOS is a very popular Unix-based operating system that will allow us to explore how Linux filesystems work in more depth. It is essential that we are exposed to various systems when learning penetration testing because, in the field, you can have a variety of targets that will be in the scope of a penetration test.
Setting up an EC2 instance with CentOS
If you haven't already, go ahead and log into your AWS account. Once you log into your account, you will be in the AWS Management Console. This is where we will start creating EC2 instances for this chapter. The following steps highlight how to deploy an EC2 instance:
- From the main console, you will see EC2 under the word Compute. Click on it to begin the process of creating an EC2 instance:
Figure 1.4 – AWS Management Console
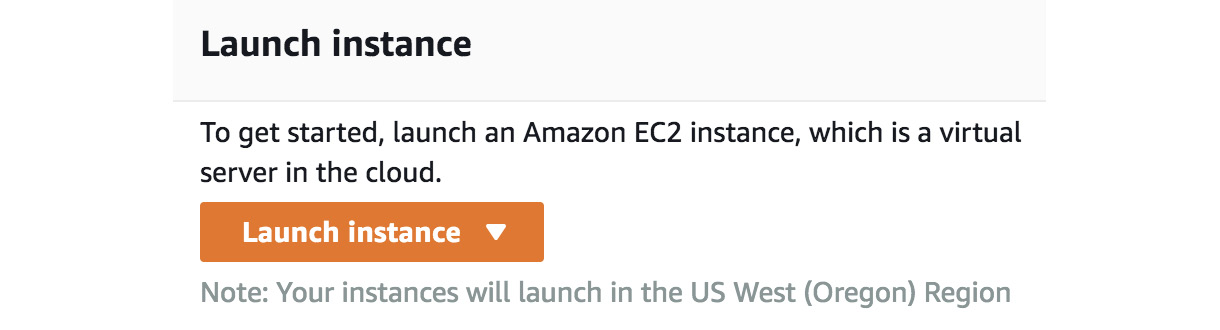
- After clicking on it, you will see a button labeled Launch instance in the bottom left-hand corner. There is also the Instance option in the left drop-down pane. Click on Launch instance to start building out your first EC2 instance:
Figure 1.5 – EC2 launch
After clicking Launch instance, you'll need to configure a host operating system within your EC2 instance. For this exercise, we'll choose the minimal CENTOS 7 install for our host operating system. This operating system is going to be what "lives" in the EC2 instance.
Now that we have set up our AWS account, we will break down, step by step, the process needed to build an EC2 instance. As mentioned, the EC2 instance is what our operating system will be hosted on. I recommend you get comfortable with this process as you will be building instances quite a bit throughout this book. To begin setting up some instances, follow the provided steps to get started. The steps are in sequence with building an EC2 instance. If you miss one step, ensure you go back and cover the step before moving on:
- Choose an Amazon Machine Image: Go to Amazon Marketplace and search for an image to install on your EC2 instance. As stated, we will use CentOS 7 for this example:
Figure 1.6 – EC2 operating system
- Choose an instance type: Ensure that you use the free tier to avoid charges. If you do forget, Amazon will bill you monthly for any usage that goes over your plan. However, feel free to use the paid tiers if you so choose. For this exercise, we are going to be using the free tier since it will serve as enough.
- After that, you'll want to create a new virtual private cloud (VPC) network that your EC2 instance can live in. The VPC acts as a network that allows secure communications between other instances within the VPC. It also allows connections outside of the VPC via a VPN:
Figure 1.7– Creating a VPC
- After that, you'll need to create a subnet that your hosts can connect to. Make sure you remember the VPC and the subnet for later when setting up other instances:
Figure 1.8 – Creating a VPC part 2
- Next, you'll be prompted about storage for the OS. The storage that is allocated will suffice for the exercise:
Figure 1.9 – Storage setup
- Next, we will be configuring routes for the instance. Routes are going to allow and disallow traffic to and from the host on certain ports of your instances. For this exercise, please set up the following routes as illustrated:
SSH : TCP : 22 : ANYWHERE //Allowing any connections over port 22
Custom UDP : UDP : 0 - 65535 : ANYWHERE // Allowing any conections of all UDP Ports
Custom TCP : TCP : 0 - 65535 : ANYWHERE // Allowing any conntections over any TCP ports
The following screenshot highlights the changes we are making and inputting:
Figure 1.10 – Creating a security group
- You're going to need to create a key pair that you can use to connect to your instance. Make sure that you save the key pair in a place where you won't lose it. You're going to need to use that key to access the instance. The following screenshot illustrates naming the key
AWS Pentest. Feel free to call yours whatever you like: Figure 1.11 – Creating a key pair
- Once you name the key pair, download it and save it in a safe place. It's important to make sure you save the key and even make a copy of it in case the original key becomes lost. You won't be able to retrieve the key from your instance.
Figure 1.12 – Dashboard for running EC2 instances
- Once finished, click on Running instances to check your instance. We will discuss how to connect to it via SSH later in the book.
You have now set up your first instance! Don't feel pressured if you're having issues connecting to it, such as a permissions error; ensure that you have the right permissions set to your instance's key. Right-click on the instance and click Connect to be advised on how to set the permissions. We will discuss connecting to instances in just a bit. For now, discover what's available in the AWS console. There is quite a bit that we will talk about, but it doesn't hurt to take a look and get to know it. When you're ready, move on to the next section.
Setting up a Windows host
The following section is going to discuss how to set up a Windows host in AWS. Setting up the host will be very similar to setting up the CentOS 7 server, with a few differences. It's important that we understand how Windows systems work and how we can set them up in AWS. As you move through your penetration testing journey, you'll come to find out that many businesses use Windows in their AWS environments and their onsite devices.
Let's set up the host:
- Let's go back to the AWS Management Console and select Launch instance to bring up another instance, just as we did before.
- Go to AWS Marketplace and select Windows Server 2008 R2 Base.
Important note
We want to use an older version, rather than a new, updated one because security issues are much easier to exploit in the older version. Since the purpose of this book is learning, we want to be able to easily exploit known issues that are typically found in older versions, rather than trying to exploit hardened newer operating systems. Make sure that you select the same VPC settings as before. Doing so ensures that all the VMs, such as your CentOS 7 and Windows host, are on the same network. This will help us later when practicing pentesting because we will be working on the same virtual network, making it easier for instances to communicate with each other.
Here's what it looks like in the marketplace:
Figure 1.13 – Windows 2008 EC2
- Just as before, we need to ensure we have the correct ports open. Take note that RDP is open on the host. The next screenshot highlights that port
3389 is open. Port 3389 is the port that is associated with RDP. Having this set correctly ensures that you can connect to the Windows host later on: Figure 1.14 – Windows 2008 EC2 open ports
- Now that we have the host all ready to go, we will need to connect to it. Since this is a Windows host, we won't be able to SSH into it like we traditionally do with other hosts. This is because the host uses the Remote Desktop Protocol on port
3389, instead of using SSH on port 22. Instead of getting a key, we will need to get the password stored on the Windows host.
- To get the password, simply right-click on your Windows instance and select Get Windows Password. If you just set up your Windows host, it could take up to 4 minutes for you to be able to decrypt the password:
Figure 1.15 – Windows 2008 EC2 password retrieval
- Decrypt the password by entering the encrypted password as illustrated. Once you have put the password in the field, click on Decrypt Password:
Figure 1.16 – Decrypting Windows passwords
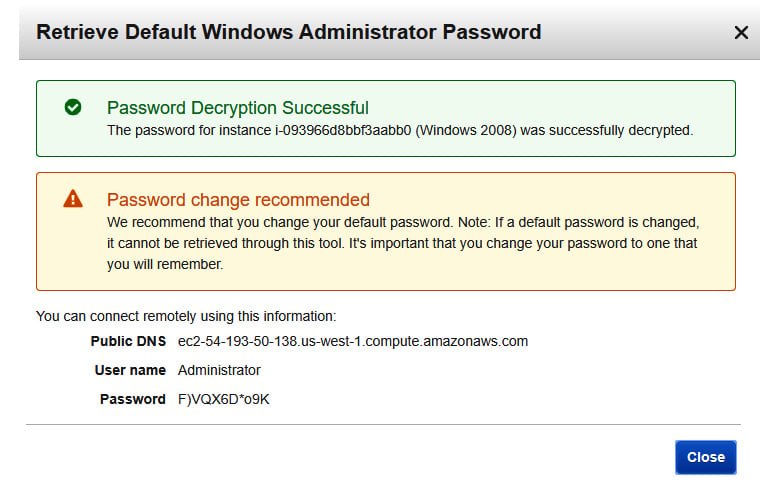
- Once complete, you'll be prompted with a User name and Password to access your host. Just as before, ensure you save these credentials somewhere safe so that you do not lose them. However, you can recover them as long as you have the encrypted password. Storing the encrypted password can be as easy as storing it in a password vault, or storing it in a cloud storage space, such as an S3 bucket. Make sure that only you have access to where it is stored. For the best results, implement user-based access control to the filesystems:
Figure 1.17 – User name and Password
To test the connection, open the Remote Desktop client on your host machine and use the public DNS of the EC2 instance. If all goes well, then you should be able to log in to the desktop!
Attacker setup – setting up a Kali instance
For this section, we will set up a Kali Linux image that can act as our attack host. Kali Linux is a popular operating system used by security professionals to test their systems and applications. This is largely due to the operating system coming preinstalled with tools that can assist in enumeration and exploitation! Kali Linux will be used as one of our main hosts as we go through this book and will be a tool that you will use in your pentesting endeavors!
Since we already know how to set up an EC2 instance, we are going to only focus on how to connect our Kali host using a tool called PuTTY. PuTTY is a tool that allows administrators to remotely access their systems, as we will do later in this chapter. As you set up your Kali machine, ensure that you use the same VPC and subnet settings you did for your other machines:
- To start, go to AWS Marketplace and retrieve an instance of Kali Linux. Then proceed to create the EC2 instance as you did with the previous exercises:
Figure 1.18 – Kali Linux EC2 instance
The same as before, make sure you create a new key pair with a new name.
Important note
It's best advised to create new keys for every instance and not share keys between instances. In a real-world situation, if a key were to become compromised and all hosts used the same key, then it would be assumed that all hosts were to become compromised. It would be a "shared secret" between all hosts.
Here's what the window looks like:
Figure 1.19 – Kali secret key
- Now that we have the key pair, we need to connect to the Kali machine. Right-click on the instance from your console and follow the connection instructions to your instance:
$ chmod 400 "Kali - AWS - Pentest.pem"
$ ssh -i "Kali - AWS - Pentest.pem" ec2-user@<AWS instance>
The following screenshot shows the steps and their meaning to help understand what these commands are doing:
Figure 1.20 – Kali information
As you can see in the screenshot, the prompt highlights a few housekeeping steps before we can access our EC2 instance.
- Open the SSH client. In our case, we will be using PuTTY for our connections and will look at how to connect in the next section.
- Locate the .
pem file that we just saved. The .pem file acts as the secret key and allows you to authenticate the EC2 instance.
- We need to change the permissions of the key using the
chmod command.
- The public DNS name that is assigned to our instance is the resource name used to connect to the instance.
- Lastly, the command shows us how we can use the SSH command, found pre-installed on our Linux machines, to connect to our cloud resource using the secret key and the username
root.
Next, we will look at how to connect to the instance with PuTTY.
Connecting with PuTTY
PuTTY is a tool that allows users to connect to a host from various ports. Unlike a terminal or command line, PuTTY gives an interface that allows users to interact with their host with the click of a mouse instead of having to connect with the terminal. It's crucial that we understand various ways to connect to our instances, and PuTTY is a common resource to connect to EC2 instances in a real environment.
We can use PuTTY or SSH to connect to any of the instances we set up in our own lab. The purpose of this section will be to walk you through the steps of creating an SSH key from a private key assigned to an EC2 instance:
- To begin, ensure that PuTTY is installed on your computer. You can download the right client for you here (https://www.chiark.greenend.org.uk/~sgtatham/putty/). Once installed, move on to converting the private key.
- Start a program called PuTTY Generator. PuTTY Gen is a key generator used for converting keys into various formats. After starting the program, click Load and put the private key to your instance in the generator. The private key you assign to your instance is the
.pem file. We created .pem files with our CentOS 7 instance before as well. Once you load the key into PuTTY Gen, assign a password phrase and click Generate. This will create a different key with the extension .ppk: Figure 1.21 – PuTTY key generator
- Now that you have created a
.ppk file, it's time to start up PuTTY and test your connection. Go to Connection > SSH > Auth and load your new key that you created in the previous step:
Figure 1.22 – PuTTY key configuration
Once the key is ready to go, it's time to input the specific data needed to start up your connection to your instance. The following steps will guide you through this process:
- Go back to the Session tab in PuTTY. Once in the session tab, input the Host Name of the instance you are connecting to. The hostname is the public DNS record that you can find in the AWS console. You can also click Connect on your instance to be provided the public DNS name.
- Once the hostname is configured, ensure that the port is set to
22 for SSH:Figure 1.23 – PuTTY connection
- Now we're ready to connect to our instance. Click Open and a PuTTY terminal will greet you asking for a passphrase. The passphrase is the password you set when you were creating the
.ppk file:Figure 1.24 – PuTTY terminal
- Now you're being logged in as the user
ec2-user. This user doesn't have very high privileges, so feel free to alter them by switching into the root account using the following command:$ sudo su
These privileges allow the user to alter, read, and execute any files on the Linux-based operating system. These high-privilege users can be found in the file path /etc/sudoers. Congratulations, you now have successfully connected to your instance using PuTTY.
Great job finishing this section! You should now be comfortable with setting up EC2 instances within AWS and also under the basics of configuring various operating systems. As stated, it is extremely important that you understand the differences because as you go on pentesting, you will be exposed to numerous operating systems, such as Windows- and Unix-based systems.
Next, we are going to move on to looking at vulnerable services and how we use our knowledge to set up a vulnerable service in our pentesting environment.


 Free Chapter