Sign In Start Free Trial
Account

Add to playlist

Create a Playlist

Modal Close icon
You need to login to use this feature.
  • Book Overview & Buying Burp Suite Cookbook
  • Table Of Contents Toc
  • Feedback & Rating feedback
Burp Suite Cookbook

Burp Suite Cookbook

By : Dr. Sunny Wear
5 (7)
close
close
Burp Suite Cookbook

Burp Suite Cookbook

5 (7)
By: Dr. Sunny Wear

Overview of this book

With its many features, easy-to-use interface, and flexibility, Burp Suite is the top choice for professionals looking to strengthen web application and API security. This book offers solutions to challenges related to identifying, testing, and exploiting vulnerabilities in web applications and APIs. It provides guidance on identifying security weaknesses in diverse environments by using different test cases. Once you’ve learned how to configure Burp Suite, the book will demonstrate the effective utilization of its tools, such as Live tasks, Scanner, Intruder, Repeater, and Decoder, enabling you to evaluate the security vulnerability of target applications. Additionally, you’ll explore various Burp extensions and the latest features of Burp Suite, including DOM Invader. By the end of this book, you’ll have acquired the skills needed to confidently use Burp Suite to conduct comprehensive security assessments of web applications and APIs.
Table of Contents (14 chapters)
close
close

Setting up a web app pentesting lab

The Broken Web Application (BWA) is an OWASP project that provides a self-contained VM complete with a variety of applications with known vulnerabilities. The applications within this VM enable students to learn about web application security, practice and observe web attacks, and make use of penetration tools such as Burp Suite.

To follow the recipes shown in this book, we will utilize OWASP’s BWA VM. At the time of writing this book, the OWASP BWA VM can be downloaded from https://sourceforge.net/projects/owaspbwa/files/.

Getting ready

We will download the OWASP BWA VM along with supportive tools to create our web app pentesting lab.

Software tool requirements

To complete this recipe, you will need the following:

How to do it...

For this recipe, you will need to download the OWASP BWA VM and install it by performing the following steps:

  1. Click Download Latest Version after clicking the OWASP BWA VM link provided earlier and unzip the OWASP_Broken_Web_Apps_VM_1.2.7z file.
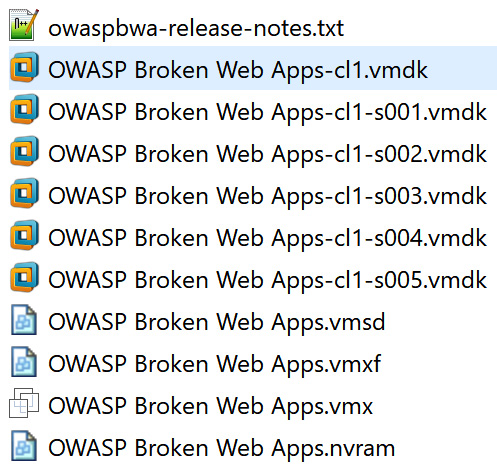
  2. You will be presented with a listing of several files, as follows:
Figure 1.4 – File listing after unzipping OWASP_Broken_Web_Apps_VM_1.2.7z

Figure 1.4 – File listing after unzipping OWASP_Broken_Web_Apps_VM_1.2.7z

  1. All file extensions shown indicate that the VM can be imported into Oracle VirtualBox or VMware Player/Workstation. To set up the web application pentesting lab for this book, we will use Oracle VirtualBox.
  2. Make a note of the OWASP Broken Web Apps-cl1.vmdk file. Open VirtualBox Manager (that is, the Oracle VM VirtualBox program).
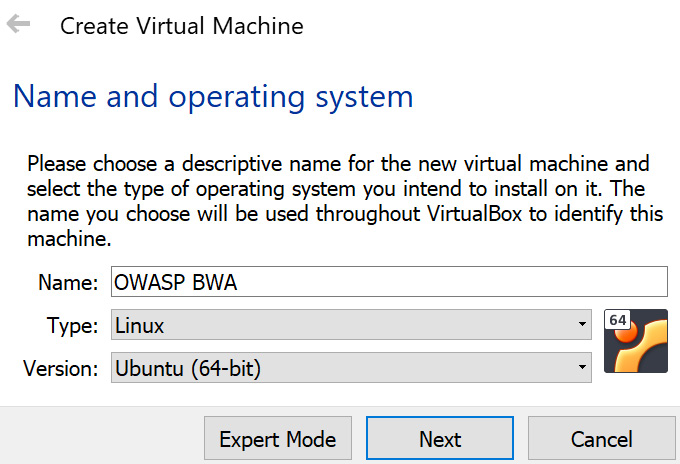
  3. Within the VirtualBox Manager screen, select Machine | New from the top menu and type a name for the machine – for example, OWASP BWA.
  4. Set Type to Linux and Version to Ubuntu (64-bit), and then click Next, as follows:
Figure 1.5 – Create Virtual Machine

Figure 1.5 – Create Virtual Machine

  1. The next screen allows you to adjust the RAM or leave it as-is. Click Next.
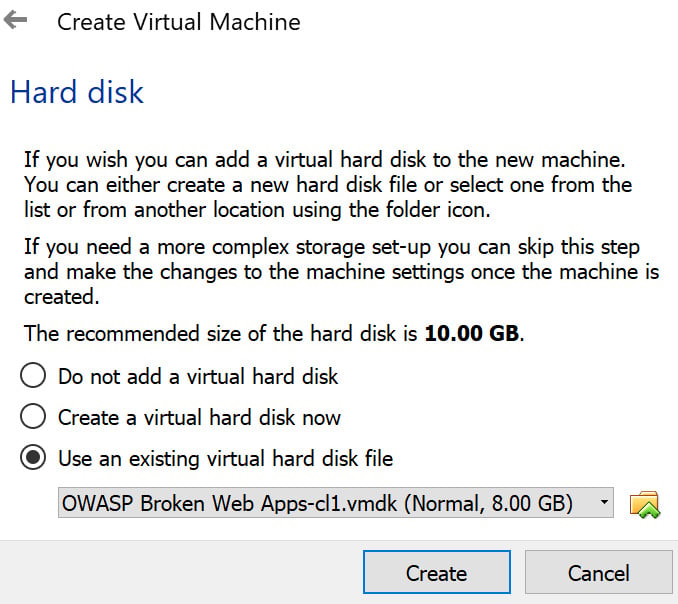
  2. On the next screen, choose Use an existing virtual hard disk file.
  3. Use the folder icon on the right to select the OWASP Broken Web Apps-cl1.vmdk file from the extracted list and click Create, as follows:
Figure 1.6 – Hard disk allocation

Figure 1.6 – Hard disk allocation

  1. Your VM will have been loaded into VirtualBox Manager. Let’s make some minor adjustments. Highlight the OWASP BWA entry and select Settings from the top menu.
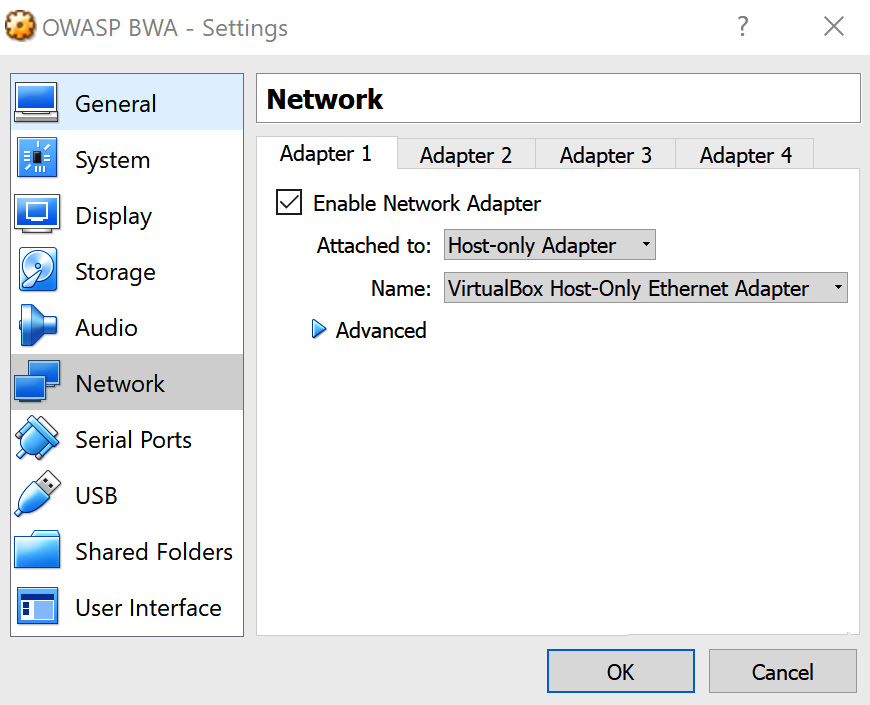
  2. Select the Network section in the left-hand pane and change Attached to: to Host-only Adapter. Click OK:
Figure 1.7 – Network adapter settings

Figure 1.7 – Network adapter settings

  1. Now, let’s start the VM. Right-click and then choose Start | Normal Start:
Figure 1.8 – Starting the VM

Figure 1.8 – Starting the VM

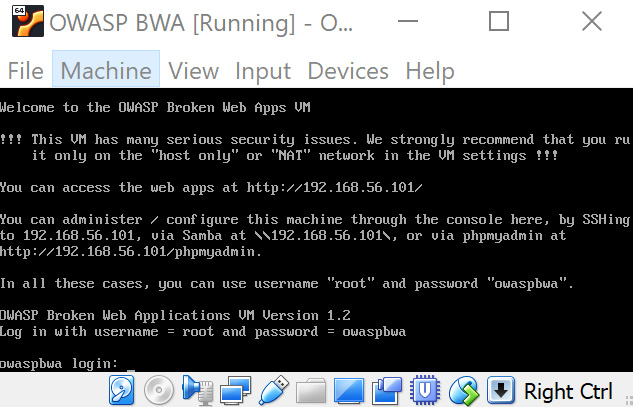
  1. Wait until the Linux system is fully booted, which may take a few minutes. After the booting process is complete, you should see the following screen. Note that the IP address shown will be different for your machine:
Figure 1.9 – Your assigned IP address for the VM

Figure 1.9 – Your assigned IP address for the VM

  1. The information presented on this screen identifies the URL where you can access vulnerable web applications running on the VM. For example, in the previous screenshot, the URL is http://192.168.56.101/. You will be given a prompt to administer the VM, but it is not necessary to log in at this time.
  2. Open the Firefox browser on your host system, not in the VM. Using the Firefox browser on your host machine, enter the URL provided (for example, http://192.168.56.101/), where the IP address is specific to your machine.
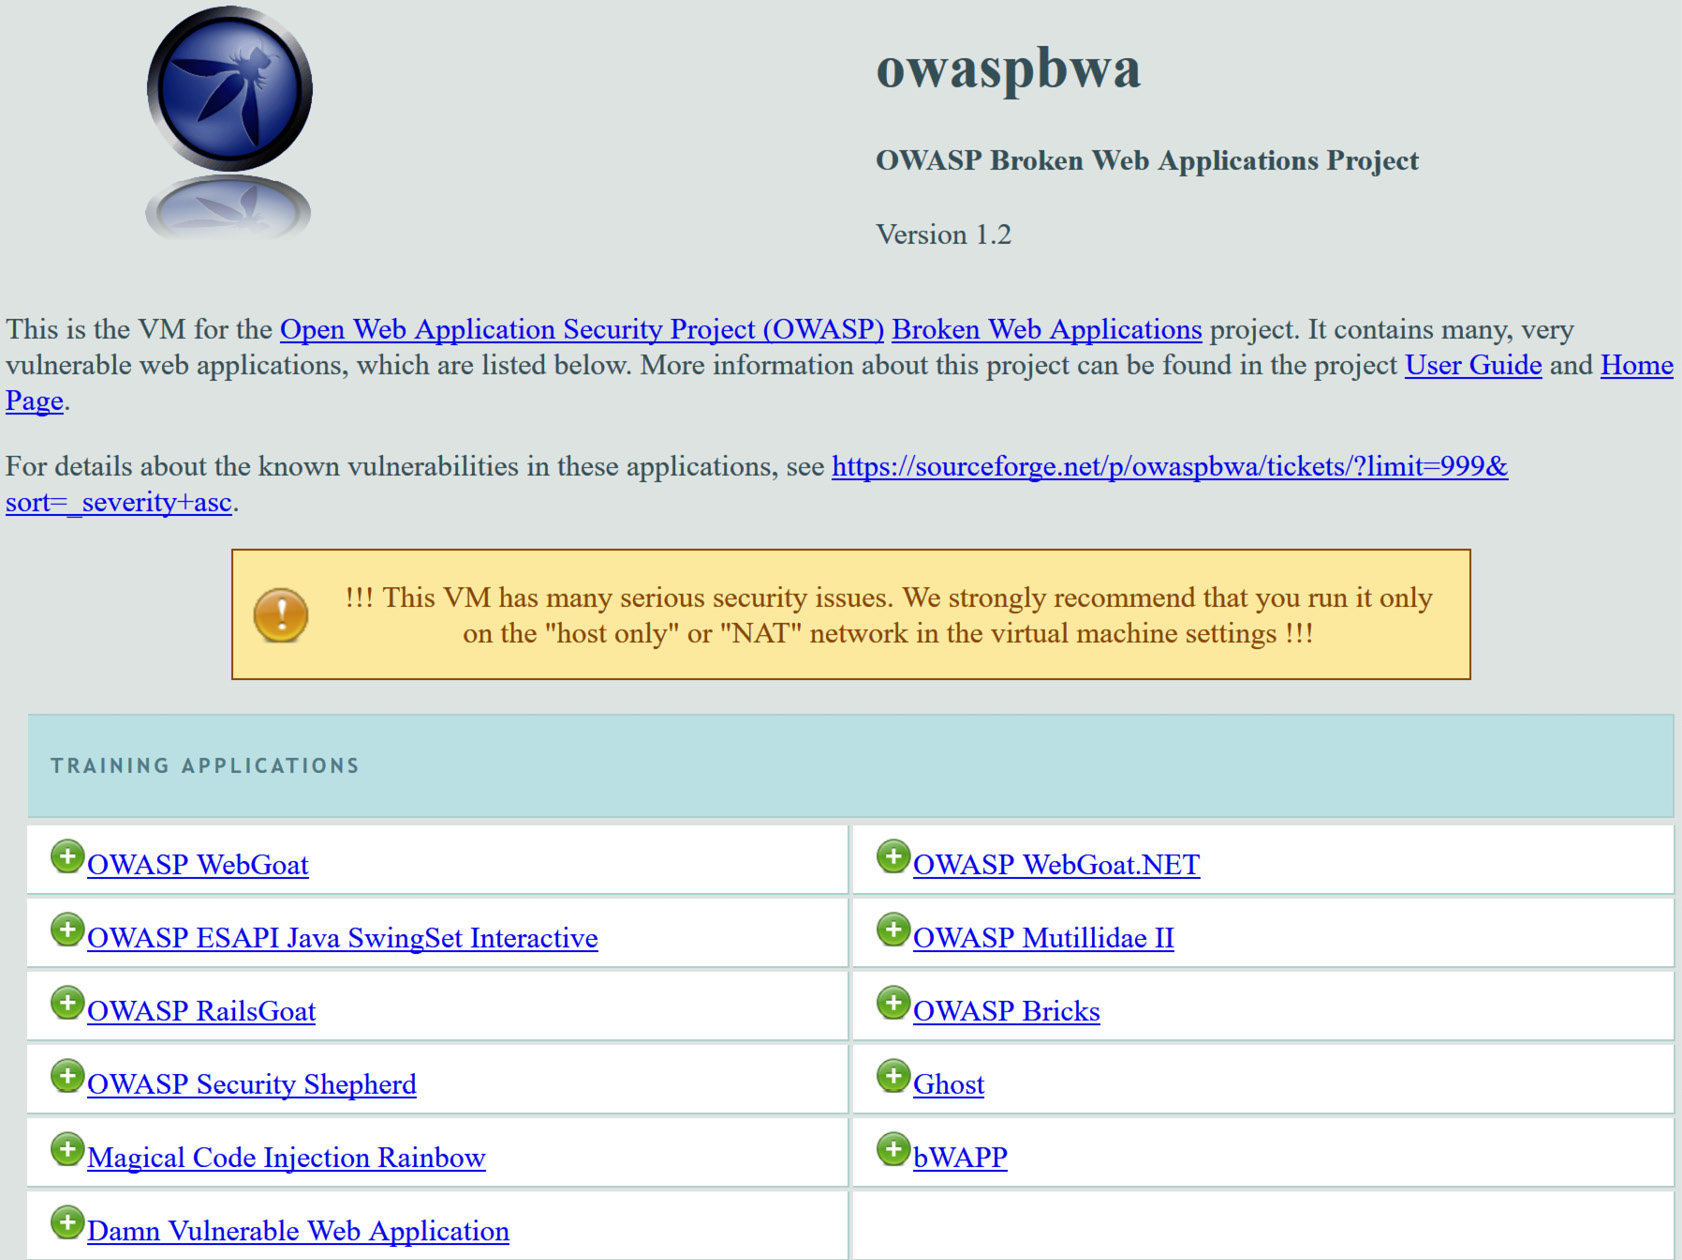
  3. In your browser, you will be presented with an index page containing links to vulnerable web applications. These applications will be used as targets throughout this book:
Figure 1.10 – Splash page of the VM

Figure 1.10 – Splash page of the VM

How it works…

Leveraging a customized VM created by OWASP, we can quickly set up a web app pentesting lab containing purposefully vulnerable applications that we can use as legal targets for our exercises throughout this book.

bookmark search playlist font-size

Change the font size

margin-width

Change margin width

day-mode

Change background colour

Close icon Search
Country selected

Close icon Your notes and bookmarks

Delete Bookmark

Modal Close icon
Are you sure you want to delete it?
Cancel
Yes, Delete

Confirmation

Modal Close icon
claim successful

Buy this book with your credits?

Modal Close icon
Are you sure you want to buy this book with one of your credits?
Close
YES, BUY