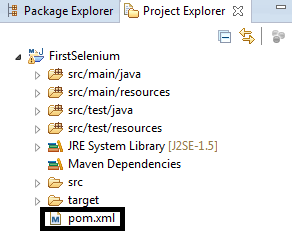
Follow the steps shown here to get started with Selenium WebDriver.
-
Book Overview & Buying
-
Table Of Contents

-
Feedback & Rating

Selenium WebDriver Quick Start Guide
By :
Selenium WebDriver Quick Start Guide
By:
Overview of this book
Selenium WebDriver is a platform-independent API for automating the testing of both browser and mobile applications. It is also a core technology in many other browser automation tools, APIs, and frameworks. This book will guide you through the WebDriver APIs that are used in automation tests.
Chapter by chapter, we will construct the building blocks of a page object model framework as you learn about the required Java and Selenium methods and terminology.
The book starts with an introduction to the same-origin policy, cross-site scripting dangers, and the Document Object Model (DOM). Moving ahead, we'll learn about XPath, which allows us to select items on a page, and how to design a customized XPath. After that, we will be creating singleton patterns and drivers. Then you will learn about synchronization and handling pop-up windows. You will see how to create a factory for browsers and understand command design patterns applicable to this area.
At the end of the book, we tie all this together by creating a framework and implementing multi-browser testing with Selenium Grid.
Table of Contents (10 chapters)
Preface
 Free Chapter
Introducing Selenium WebDriver and Environment Setup
Understanding the Document Object Model and Creating Customized XPaths
Basic Selenium Commands and Their Usage in Building a Framework
Handling Popups, Frames, and Alerts
Synchronization
The Actions Class and JavascriptExecutor
The Command Pattern and Creating Components
Hybrid Framework
Other Books You May Enjoy
Customer Reviews