Because SSAS is part of the SQL Server stack, many tools can be used to support both products. Microsoft has made a significant push to consolidate tooling over the years. As a result, we have two key tools used for building and interacting with models – SQL Server Management Studio (SSMS) and Visual Studio. In the following sections, I will discuss what role each plays and where to get the tools to match the work we are doing in the rest of the book. We will also walk through the installation of both Analysis Services modes.
SQL Server 2019 Developer edition
Let's start with installing SQL Server 2019 and both Analysis Services modes. We will be using the Developer edition of the SQL Server products. Because we will be using data stored in SQL Server to support our models, you will be installing three instances of SQL Server – one relational, one multidimensional, and one tabular. The relational and multidimensional instances will be installed during the same installation. The Developer Edition is the functional equivalent of the Enterprise Edition.
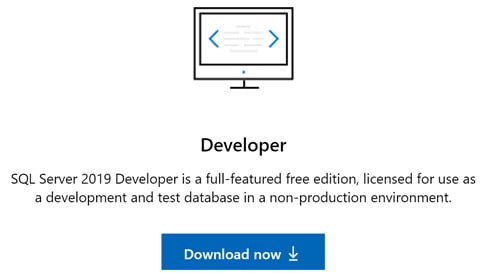
You can find the latest version of SQL Server 2019 Developer edition by searching for SQL Server 2019 Developer in your preferred search engine. The current location for all SQL Server downloads is https://www.microsoft.com/en-us/sql-server/sql-server-downloads. You should download the Developer edition as shown in the following screenshot. It is a free developer option for you to use while learning SSAS:
Figure 1.6 – Downloading the Developer edition
We do have the ability to install two of the instances simultaneously. Next, we will install the database engine and multidimensional mode as described. Once those are complete, we will install another instance to support the tabular mode.
Installing SQL Server 2019 database engine and SQL Server 2019 Analysis Services multidimensional mode
For the most part, we will follow a normal installation process for the database engine and Analysis Services in multidimensional mode. I will use the following set of screenshots to highlight decision points through the process:
- After you launch the installation for the first time, you will need to select the Custom installation type. Basic does not include the option to install Analysis Services:
Figure 1.7 – Choose Custom from the initial installation dialog
Production installations
The instructions provided here are intended for development and experimental installs. Please refer to the latest best practices from Microsoft regarding production workload installations.
- You will need to select the Installation tab on the left, then select New SQL Server stand-alone installation or add features to an existing installation option:
Figure 1.8 – Choose the New SQL Server stand-alone installation
- You will start the installation process. You can select the default options until you get to the Product Key screen. On this screen, you should select the Developer edition for your free key. This will allow you to use all the features available in SQL Server Enterprise edition:
Figure 1.9 – Select Developer edition for free product key
- The next stopping point is Feature Selection, as shown in the following screenshot. I encourage you to review all the options available to you with SQL Server 2019. There are a lot of non-database features included in SQL Server, such as support for machine learning and data virtualization (Polybase). If this is the first time you have installed SQL Server in some time, you should note that SQL Server Reporting Services (SSRS) and SQL Server Management Studio (SSMS) are not included here. Both of these products should be downloaded separately. We will walk through Management Studio for our purposes shortly.
We will need Database Engine Services and Analysis Services for our installation. That will allow us to create instances of SQL Server and SSAS during our installation:
Figure 1.10 – Choose Database Engine Services and Analysis Services
- The next section of interest is Instance Configuration. If you have been around SQL Server for a while, you have likely installed the Default instance many times. I am recommending you use the Named instance option. We will have two instances of Analysis Services when we are done. Using the Named instance option will help you keep these clearly separate:
Figure 1.11 – Select Named instance and provide a unique name for your instance
Two names or three names
The current installation path we are following will result in two instance names. The first instance name will be used for both Database Engine Services and Analysis Services – Multidimensional Mode. We will go through the install process again to install Analysis Services – Tabular Mode with a different instance name. If you want to identify all of your instances separately, go back a step and unselect Analysis Services. This will allow you to create Database Engine Services with a unique instance name. You will need to follow the steps in the tabular mode installation instructions to add an instance for multidimensional mode as well. Refer to the setup instructions in the following sections for the Multidimensional Mode installation. This is your choice and will not affect examples used in the remainder of the book.
Remember that the name you choose here will be used by both the Database Engine Services instance and the Analysis Services Multidimensional Mode instance.
I am choosing to keep the default settings for Server Configuration. In a production installation, you should use service accounts configured for this purpose. Service accounts are created by your security team and are typically the more secure option for production environments. You may choose to do this for your developer install here if you choose to:
Figure 1.12 – Set custom accounts here if preferred
- The next section covers Database Engine Configuration. I almost always set up mixed mode when doing development or testing work. This allows me to have an System Administrator user as well as to set up local database users if needed. I would not recommend this for most production scenarios. Using an Active Directory account is more secure for production servers. In our scenario, I would also recommend adding your current Windows user account to the SQL Server Administrators group:
Figure 1.13 – Set up your authentication and admins
- Now click on the Data Directories tab. This is a preference for you as well. You are welcome to keep the default options here. I typically create a data directory off of a drive – in this case,
C – to hold data files. If you have multiple drives, you should select the fastest drive for your SQL Server data. Take note of your backup directory as you will need to use that later in the chapter:Figure 1.14 – Choose the location for your data directories
I will not be customizing the rest of the install. Feel free to browse the other tabs to review additional options you can set during installation.
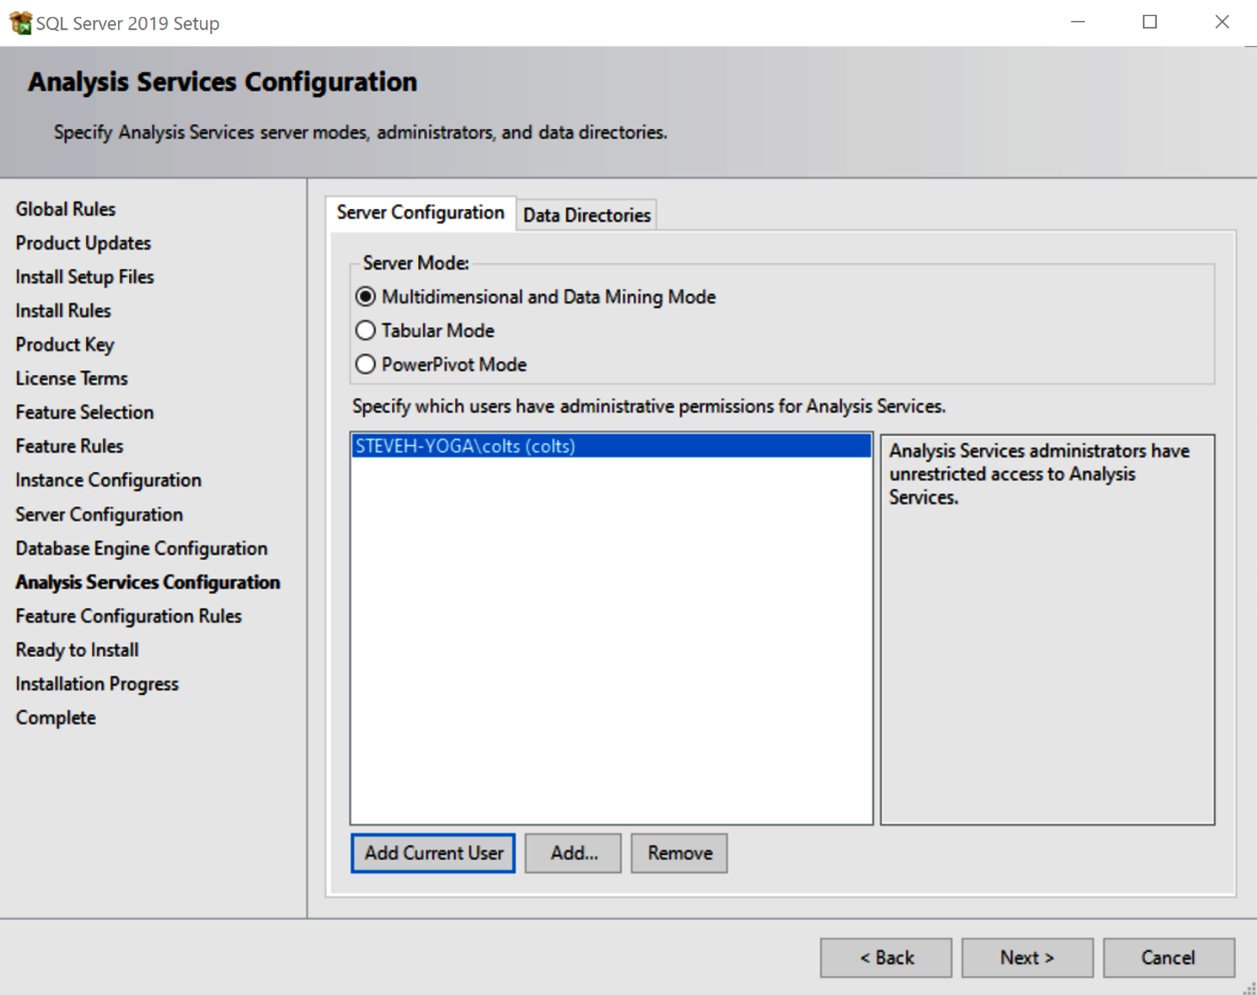
- The next screen is Analysis Services Configuration. It is similar to the previous two screens we worked with. However, you will notice that Analysis Services does not have a mixed mode option. It only supports Windows or Active Directory security.
We will be installing Multidimensional and Data Mining Mode in this instance. While I don't have a screenshot of the data directories, I would recommend you choose your fastest available hard disk for this instance as well:
Figure 1.15 – Select multidimensional mode and add your user as an admin
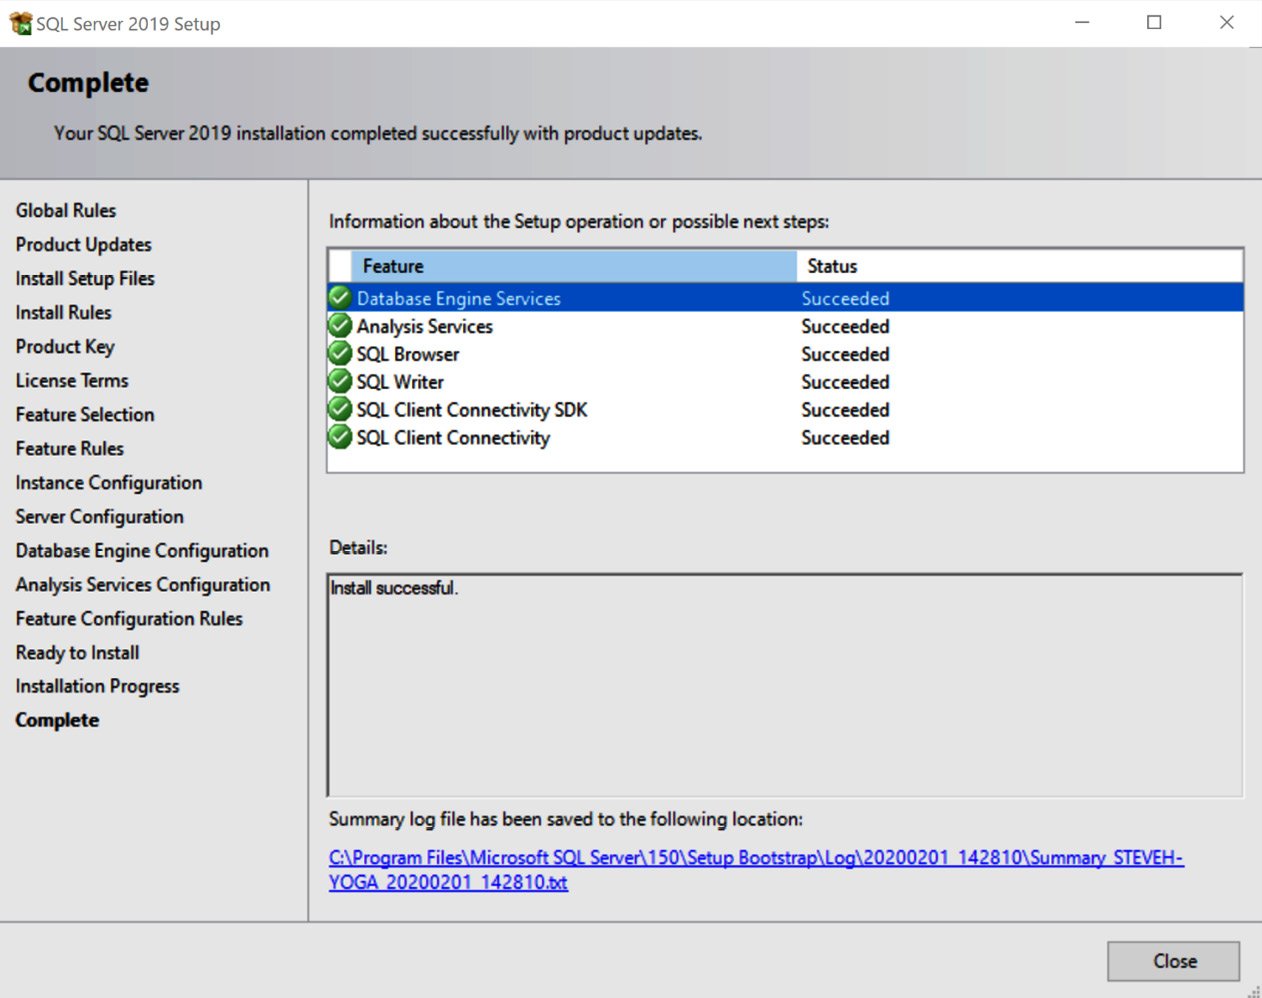
You have completed the configuration settings at this point. The next few dialogs will show you what you have chosen to install, and you will be able to see your installation progress. You will see the following dialog when you have successfully completed your installations:
Figure 1.16 – Congratulations! You have successfully installed SQL Server 2019
Let's now look at the installation of SSAS using tabular mode.
Installing SQL Server 2019 Analysis Services tabular mode
Now, we will install another instance of Analysis Services using the tabular mode as follows:
- Typically, the Installation dialog box is still open at this point (assuming you did not close it). If it is not open, you will want to run the installation media for SQL Server 2019 again.
You will choose the new SQL Server stand-alone installation option as we did in the previous section:
Figure 1.17 – Choose to do a new SQL Server installation
- You can use the default settings until you get to the Installation Type dialog. Do not choose to add features. You must perform a new installation. The reason for this is that you cannot add another Analysis Services instance to your current instance:
Figure 1.18 – Choose Perform a new installation of SQL Server 2019
- As you move through the next few dialogs, you will choose the development free option once again. When you get to the feature selection, you should only select the Analysis Services option. We are only planning to install an additional Analysis Services Tabular Mode instance:
Figure 1.19 – Only choose Analysis Services here
- Once again, I will recommend a named instance for this installation as well. As you can see, we do not have a default instance, so that is still an option here. Your existing instance name is shown in the table for your reference:
Figure 1.20 – Create a new named instance
- The next step is Analysis Services Configuration. In this case, you will select the Tabular Mode option. As with the other installation, you can specify your Data Directories and set your current user as an administrator for this instance:
Figure 1.21 – Choose Tabular Mode and add your user as an admin
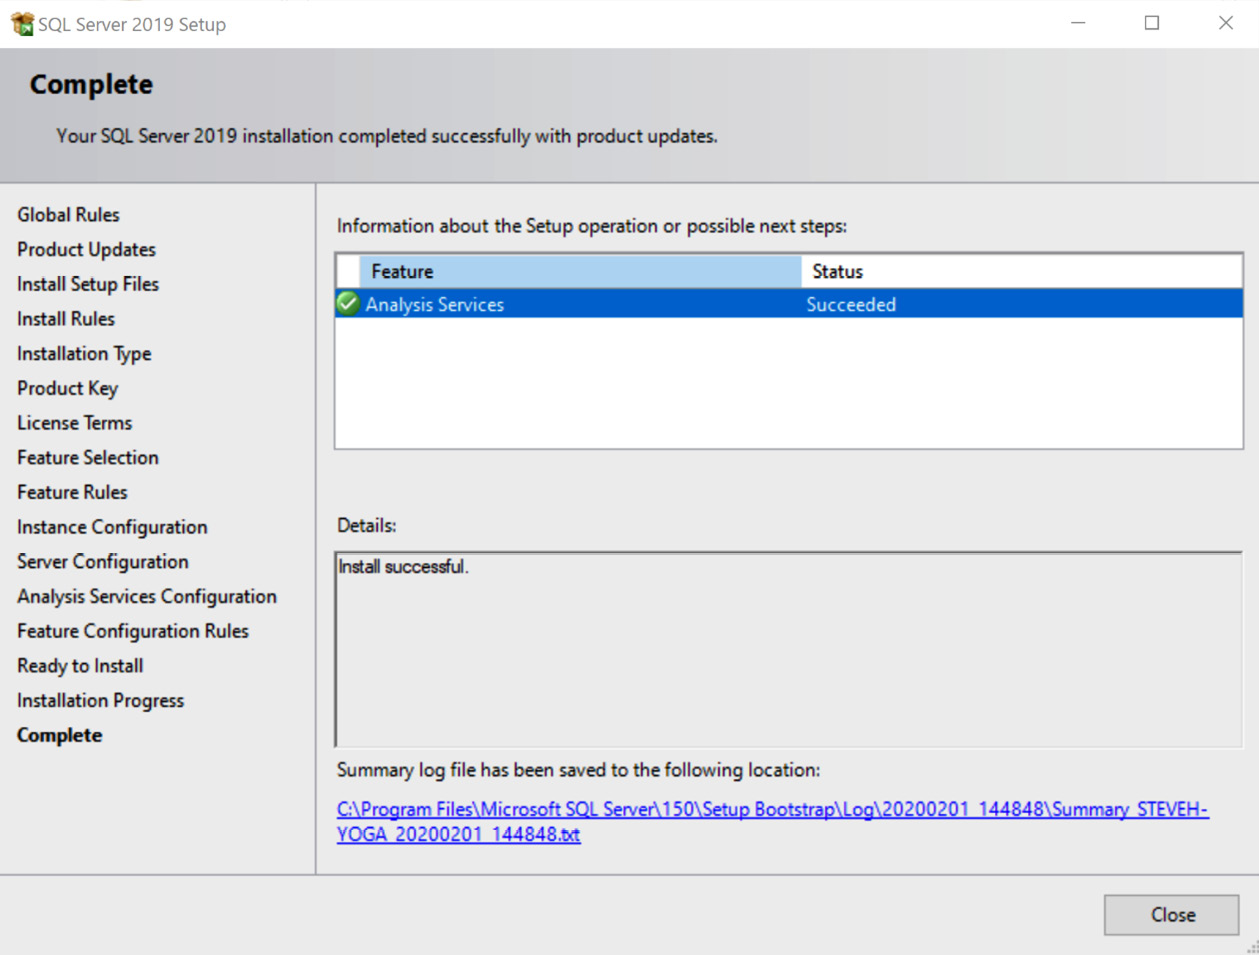
- Complete the installation process and you should see the following Complete dialog with only Analysis Services in the Feature list. Congratulations, you have successfully installed the three instances of SQL Server 2019 to be used throughout the book:
Figure 1.22 – Congratulations! You have successfully installed your Analysis Services – Tabular Mode
Now that we have successfully installed Analysis Services for tabular models, let's see how to manage installations.
Managing installations
Once installed, you will find that SQL Server tends to be very resource hungry. My recommendation is that you turn the services off when you are not using them. The following scripts are PowerShell and will allow you to turn them on and off as needed. In order to use these scripts, you will need to put the instance name in the locations where [[INSTANCE NAME]] is in the code. Replace all that text with your instance name. If that does not work, you will need to find the service name in the services list in Windows.
There are two scripts here – the first will disable the service and turn it off. This will prevent it from restarting if you reboot your PC. The second script will turn on the services. I saved these files as SQLServerOn.ps1 and SQLServerOff.ps1. I execute them by opening a PowerShell window as an administrator. At the prompt, you type the following:
$ "<<YOUR PATH HERE>>\SQLServerOff.ps1"
You will need to replace <<YOUR PATH HERE>> with the location you stored the file at. Now to the scripts themselves. This script will disable the services and power down the service:
Set-Service 'MSSQL$[[INSTANCENAME]]' -StartupType Disabled
Stop-Service -Name 'MSSQL$[[INSTANCENAME]]' -Force
Set-Service 'MSOLAP$[[INSTANCENAME]]' -StartupType Disabled
Stop-Service -Name 'MSOLAP$[[INSTANCENAME]]' -Force
Set-Service 'MSOLAP$[[INSTANCENAME]]' -StartupType Disabled
Stop-Service -Name 'MSOLAP$[[INSTANCENAME]]' -Force
I saved this script as SQLServerOff.ps1. Once this is run, these services will not restart on reboot. The next script will re-enable the services. I chose to enable with a manual StartupType in order to prevent a restart in the event of a reboot. You can choose Automatic if you prefer:
Set-Service 'MSSQL$[[INSTANCENAME]]' -StartupType Manual
Start-Service -Name 'MSSQL$[[INSTANCENAME]]'
Set-Service 'MSOLAP$[[INSTANCENAME]]' -StartupType Manual
Start-Service -Name 'MSOLAP$[[INSTANCENAME]]'
Set-Service 'MSOLAP$[[INSTANCENAME]]' -StartupType Manual
Start-Service -Name 'MSOLAP$[[INSTANCENAME]]'
This script is saved as SQLServerOn.ps1. Remember to execute this with a PowerShell command window open in administrator mode.
Enabling PowerShell execution
By default, PowerShell execution is secured. If you have not enabled PowerShell execution on your PC, you will be unable to run a script you have created. To enable PowerShell to run locally created scripts on your PC, you will need to open a PowerShell window and run the following script:
Set-ExecutionPolicy RemoteSigned
Next, we will get familiar with SSMS.
SQL Server Management Studio (SSMS)
A few versions back, Microsoft removed SSMS from the SQL Server media. This allowed them to make changes to the tool independent of the version of SQL Server released. This made it significantly easier for users to get Management Studio, eliminating the need to run the SQL Server installation process. At the time of writing, the latest version of Management Studio is 18. You should install the latest version to make sure you have all the capabilities we will go through in the book.
Installing SQL Server Management Studio
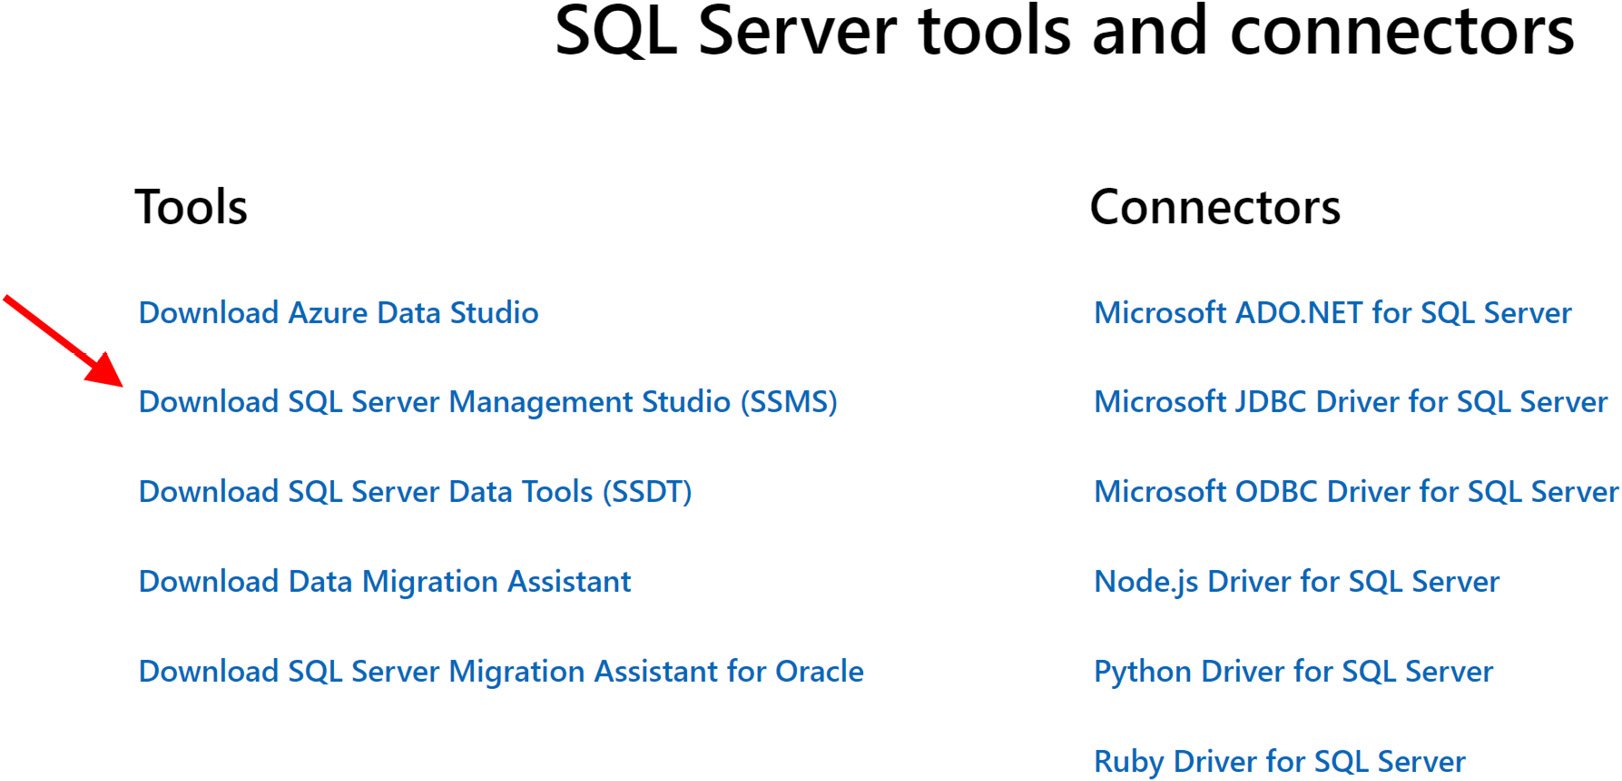
The installation link for SSMS can be found on the same page as SQL Server 2019 Developer edition. It is usually located near the bottom of the page with all the supporting tools, as follows:
Figure 1.23 – Choose SQL Server Management Studio
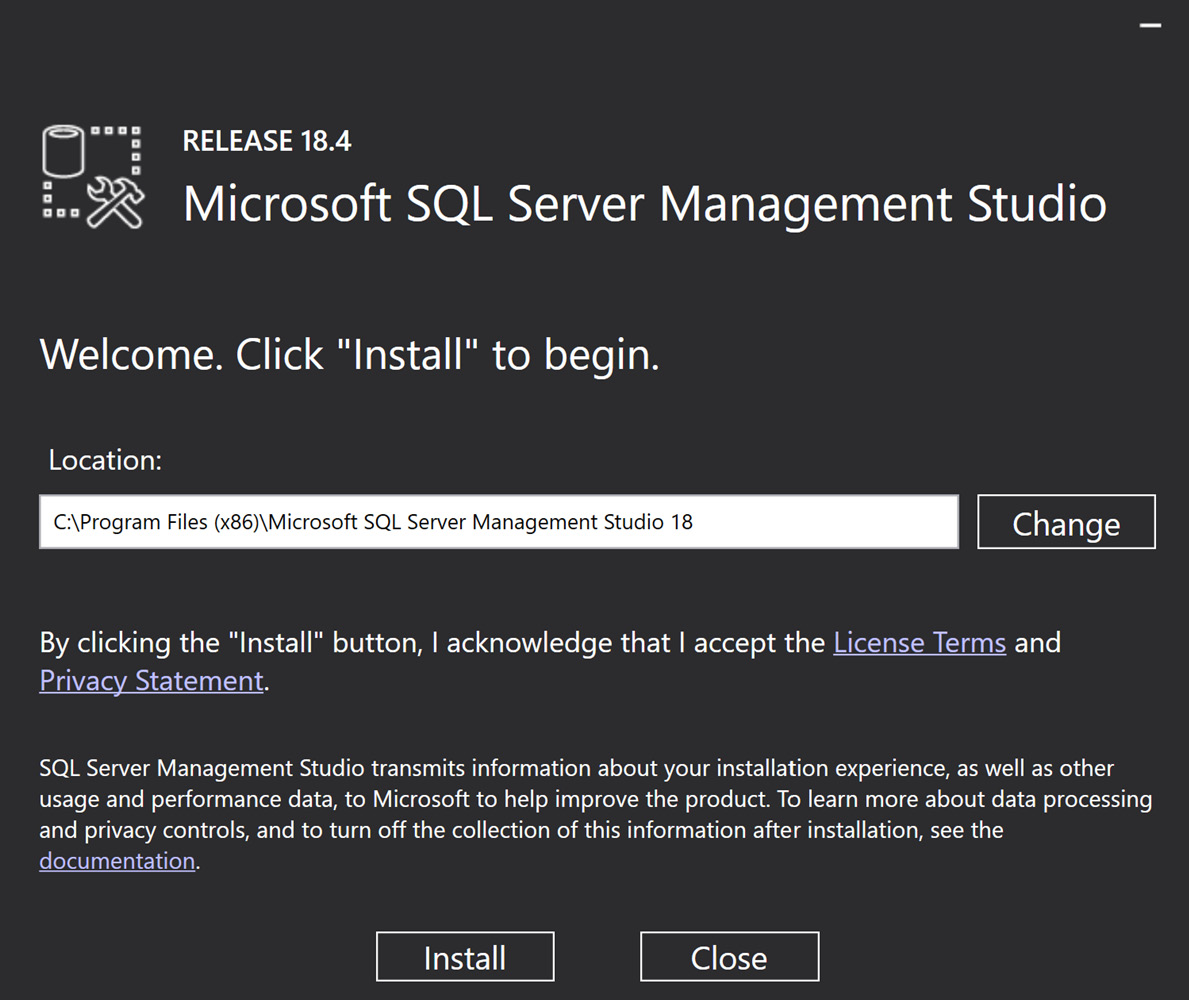
When you select the SSMS link, you will be redirected to the Microsoft Docs page with instructions and details about the current version of Management Studio. Download and install SSMS. This is a simple install with no options that impact the work we will do in the book. As noted in the following install dialog, this book will be using RELEASE 18.4:
Figure 1.24 – Installation screen for SQL Server Management Studio – release 18.4
Next, let's learn more about Visual Studio.
Visual Studio with SQL Server Data Tools (SSDT)
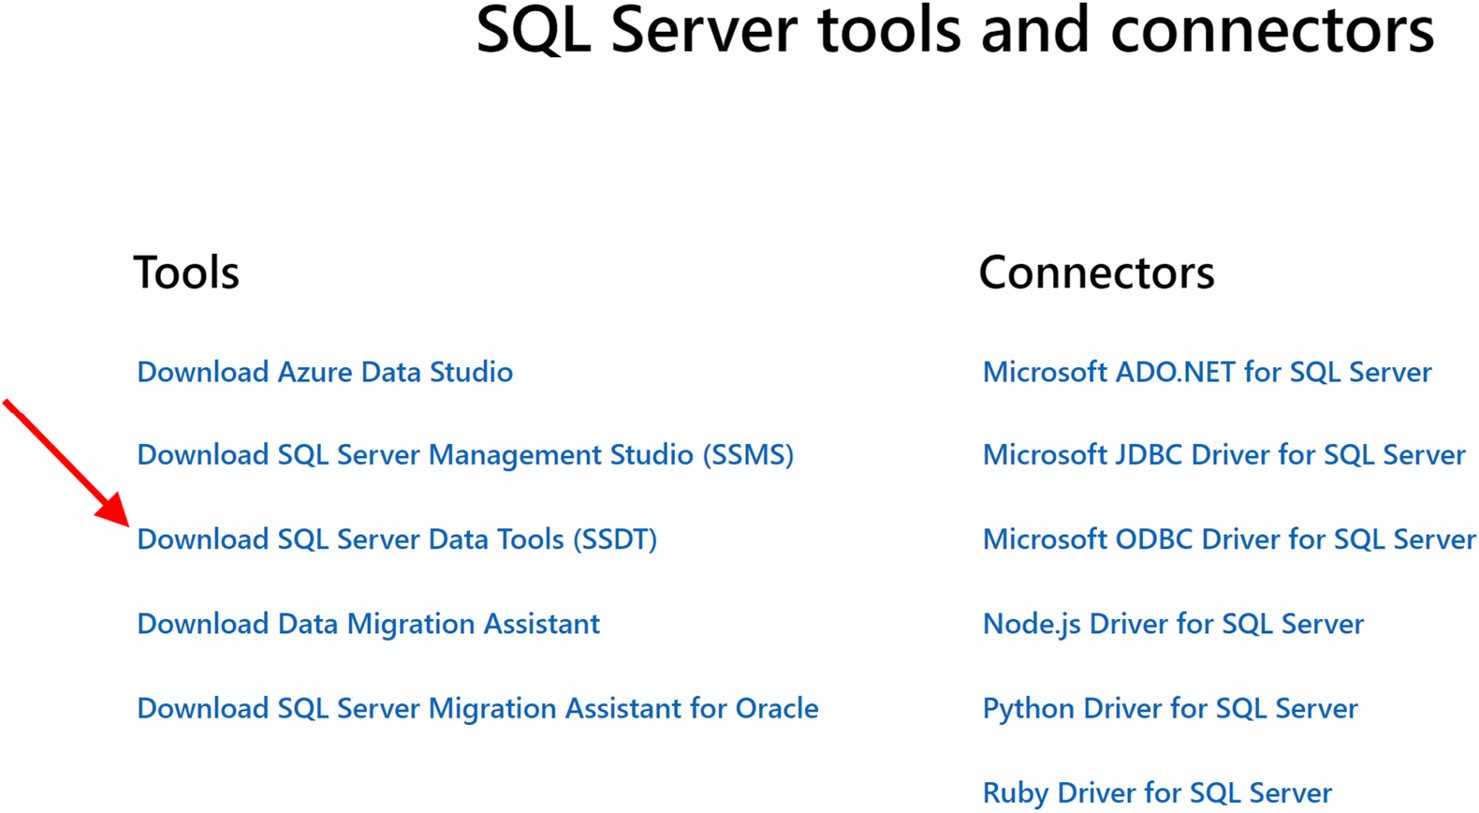
Visual Studio and SQL Server have had many different working combinations over the years. While I included SSDT in this section's heading, Visual Studio 2019 is set up differently. Prior to the current version of Visual Studio, SSDT was a separate installation that you installed after selecting your Visual Studio version. As a reminder, we will be using Visual Studio 2019 for the examples and illustrations in this book:
Figure 1.25 – Choose Download SQL Server Data Tools for this section
Previous versions of Visual Studio
SSDT is still a valid install with Visual Studio version 2017. However, SQL Server 2019 components including the latest Compatibility Level are not supported. You may need to keep Visual Studio 2017 and related tools to support the current project. Visual Studio 2017 and Visual 2019 can be installed side by side.
Installing and configuring Visual Studio with support for Analysis Services 2019
The first decision you will need to make is what edition of Visual Studio you want to use. If you have a Visual Studio subscription, a corporate license, or a personal license, you likely have options to install Visual Studio 2019 Professional or Visual Studio 2019 Enterprise. If you are starting out and this is truly a learning experience for you and you don't want or need to purchase a license for Visual Studio, the best option is likely the Community Edition.
For the purposes of this book, I will be using the Community Edition of Visual Studio 2019. You can find this edition for download at https://visualstudio.microsoft.com/downloads/. Let's get it installed and configured.
As part of the installation, you will need to select one or more workloads. While you are welcome to choose other workloads for the installation, for our purposes, you need to select Data storage and processing in the Visual Studio installation dialog.
Once the installation is complete, launch Visual Studio. Under the Get started options, choose Continue without code. The next step is to install the extensions to create Analysis Services projects.
Adding Visual Studio Extensions for Analysis Services 2019
Now that you have Visual Studio 2019 open, you need to install the extensions used to support Analysis Services development:
- First, let's open the Manage Extensions dialog. You can open this by selecting the Extensions option in Visual Studio and selecting Manage Extensions:
Figure 1.26 – Open Manage Extensions in Visual Studio 2019
- Once you select Manage Extensions, the following dialog will open. You will need to open the following menu sequence: Online > Visual Studio Marketplace > Tools > Data. This will filter the list of options to data-specific extensions. Choose Microsoft Analysis Services Projects and then click Download. This will start the process to download and install the extension:
Figure 1.27 – Choose the Microsoft Analysis Services Projects download
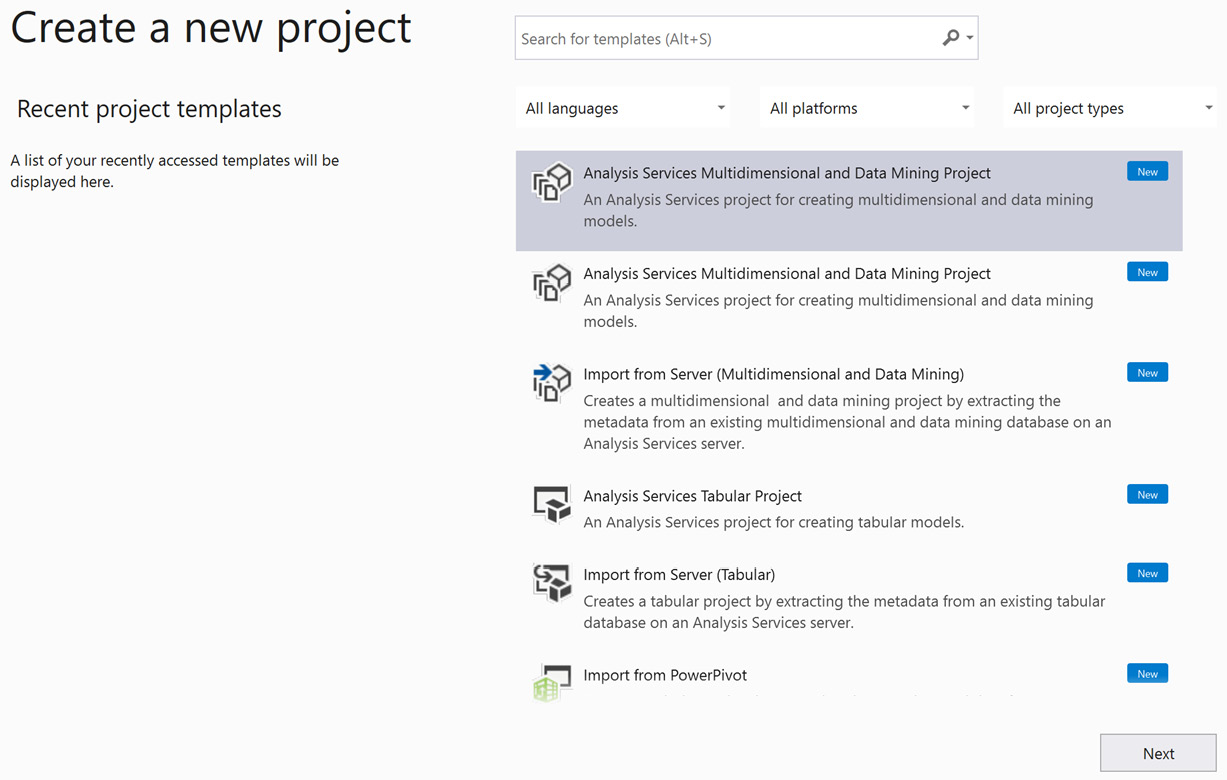
- Once the install is complete (it may require you to close Visual Studio), you should be able to create a new project and see the Analysis Services project types in the options:
Figure 1.28 – Congratulations! You can create Analysis Services projects
You will need to restart Visual Studio to complete the installation process. Once you have restarted Visual Studio, you are ready to create Analysis Services models and deploy them to Analysis Services 2019.


 Free Chapter