-
Book Overview & Buying

-
Table Of Contents

-
Feedback & Rating

Exam Ref AZ-104 Microsoft Azure Administrator Certification and Beyond
By :
Exam Ref AZ-104 Microsoft Azure Administrator Certification and Beyond
By:
Overview of this book
Take the first step toward excellence in Azure management and achieving Microsoft certification with this practical guide!
This third edition of Exam Ref AZ-104 Microsoft Azure Administrator Certification and Beyond offers comprehensive insights and clear, step-by-step instructions that follow the latest AZ-104 exam objectives. You’ll work your way from foundational topics such as Azure identity management and governance to essential skills such as deploying and managing storage solutions, configuring virtual networks, and effectively monitoring Azure resources. Each chapter is equipped with practice questions to reinforce your understanding and enhance your practical skills. The book also provides you with access to online mock exams, interactive flashcards, and expert exam tips, guaranteeing that you pass with flying colors.
By the end of this book, you'll not only be equipped to pass the AZ-104 exam but also possess the expertise needed to expertly manage Azure environments.
Table of Contents (25 chapters)
Preface
In Progress
| 0 / 14 sections completed |
0%

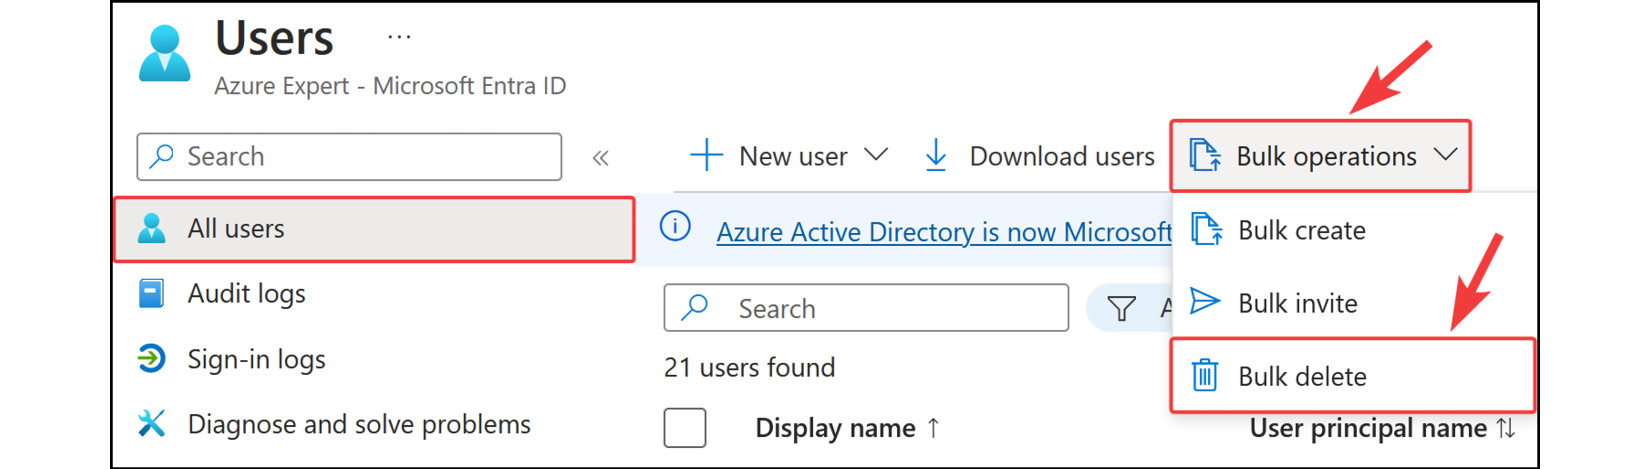
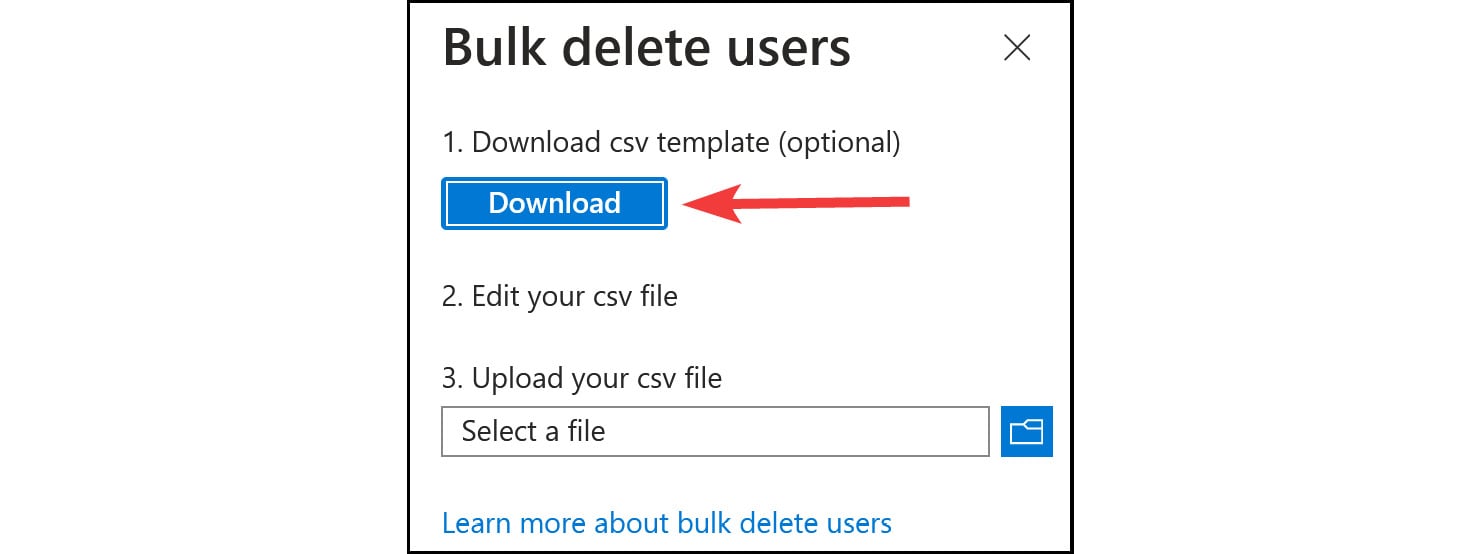
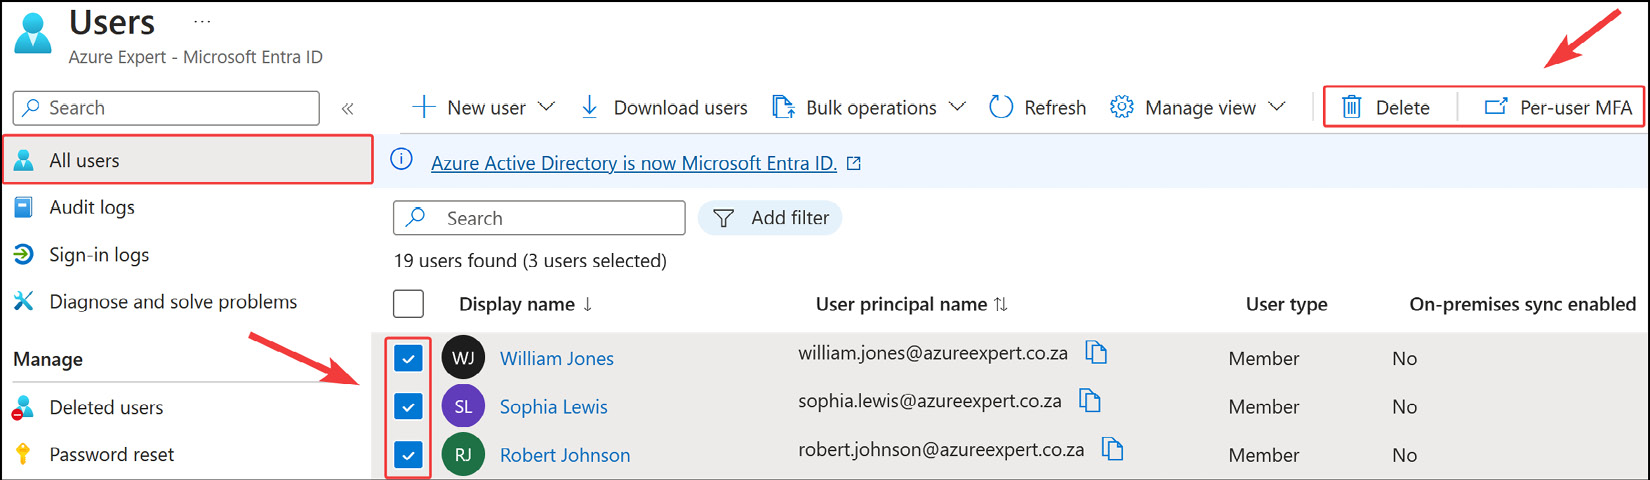
Chapter 1: Managing Microsoft Entra ID Objects
In Progress
| 0 / 9 sections completed |
0%
 Free Chapter
Chapter 2: Devices in Microsoft Entra ID
In Progress
| 0 / 8 sections completed |
0%
Chapter 3: Managing Role-Based Access Control in Azure
In Progress
| 0 / 9 sections completed |
0%
Chapter 4: Creating and Managing Governance
In Progress
| 0 / 5 sections completed |
0%
Chapter 5: Managing Governance and Costs
In Progress
| 0 / 6 sections completed |
0%
Chapter 6: Understanding Storage Accounts
In Progress
| 0 / 5 sections completed |
0%
Chapter 7: Copying Data To and From Azure
In Progress
| 0 / 6 sections completed |
0%
Chapter 8: Securing Storage
In Progress
| 0 / 7 sections completed |
0%
Chapter 9: Storage Management and Replication
In Progress
| 0 / 5 sections completed |
0%
Chapter 10: Azure Resource Manager Templates
In Progress
| 0 / 13 sections completed |
0%
Chapter 11: Azure Bicep
In Progress
| 0 / 10 sections completed |
0%
Chapter 12: Understanding Virtual Machines
In Progress
| 0 / 7 sections completed |
0%
Chapter 13: Managing Virtual Machines
In Progress
| 0 / 12 sections completed |
0%
Chapter 14: Creating and Configuring Containers
In Progress
| 0 / 16 sections completed |
0%
Chapter 15: Creating and Configuring App Service
In Progress
| 0 / 12 sections completed |
0%
Chapter 16: Implementing and Managing Virtual Networking
In Progress
| 0 / 10 sections completed |
0%
Chapter 17: Securing Access to Virtual Networks
In Progress
| 0 / 7 sections completed |
0%
Chapter 18: Configuring Load Balancing
In Progress
| 0 / 10 sections completed |
0%
Chapter 19: Integrating On-Premises Networks with Azure
In Progress
| 0 / 8 sections completed |
0%
Chapter 20: Monitoring and Troubleshooting Virtual Networking
In Progress
| 0 / 5 sections completed |
0%
Chapter 21: Monitoring Resources with Azure Monitor
In Progress
| 0 / 8 sections completed |
0%
Chapter 22: Implementing Backup and Recovery Solutions
In Progress
| 0 / 12 sections completed |
0%
Chapter 23: Accessing the Online Practice Resources
In Progress
| 0 / 5 sections completed |
0%
Other Books You May Enjoy
In Progress
| 0 / 3 sections completed |
0%
Customer Reviews