-
Book Overview & Buying
-
Table Of Contents

-
Feedback & Rating

OPNsense Beginner to Professional
By :
OPNsense Beginner to Professional
By:
Overview of this book
OPNsense is one of the most powerful open source firewalls and routing platforms available. With OPNsense, you can now protect networks using features that were only previously available to closed source commercial firewalls.
This book is a practical guide to building a comprehensive network defense strategy using OPNsense. You’ll start with the basics, understanding how to install, configure, and protect network resources using native features and additional OPNsense plugins. Next, you’ll explore real-world examples to gain in-depth knowledge of firewalls and network defense. You’ll then focus on boosting your network defense, preventing cyber threats, and improving your knowledge of firewalling using this open source security platform.
By the end of this OPNsense book, you’ll be able to install, configure, and manage the OPNsense firewall by making the most of its features.
Table of Contents (25 chapters)
Preface

Section 1: Initial Configuration
 Free Chapter
Chapter 1: An OPNsense Overview
Chapter 2: Installing OPNsense
Chapter 3: Configuring an OPNsense Network
Chapter 4: System Configuration
Section 2: Securing the Network
Chapter 5: Firewall
Chapter 6: Network Address Translation (NAT)
Chapter 7: Traffic Shaping
Chapter 8: Virtual Private Networking
Chapter 9: Multi-WAN – Failover and Load Balancing
Chapter 10: Reporting
Section 3: Going beyond the Firewall
Chapter 11: Deploying DHCP in OPNsense
Chapter 12: DNS Services
Chapter 13: Web Proxy
Chapter 14: Captive Portal
Chapter 15: Network Intrusion (Detection and Prevention) Systems
Chapter 16: Next-Generation Firewall with Zenarmor
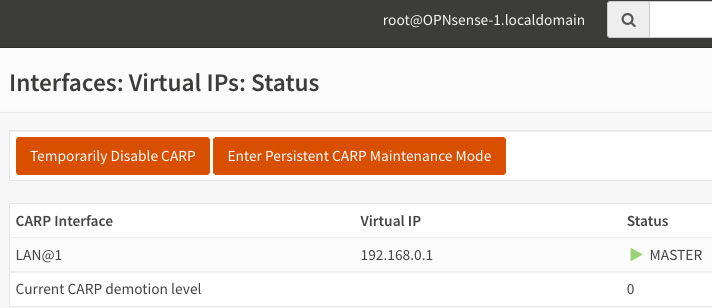
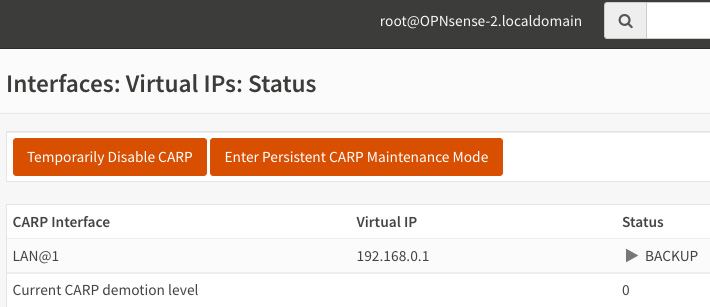
Chapter 17: Firewall High Availability
Chapter 18: Website Protection with OPNsense
Chapter 19: Command-Line Interface
Chapter 20: API – Application Programming Interface
Other Books You May Enjoy
Customer Reviews