-
Book Overview & Buying
-
Table Of Contents

-
Feedback & Rating

Teaching with Google Classroom
By :
Teaching with Google Classroom
By:
Overview of this book
Google Classroom is designed to help you manage and deliver online and in-person courses in an interactive manner. Using Google Classroom saves time organizing and communicating information to students and parents. This updated second edition of Teaching with Google Classroom covers the modern features of Google Classroom that meet the current needs of online teaching.
The book is written from the high-school perspective but is applicable to teachers and educators of all age groups. If you’re new to Google Classroom or an experienced user who wants to explore more advanced methods with Google Classroom, this book is for you.
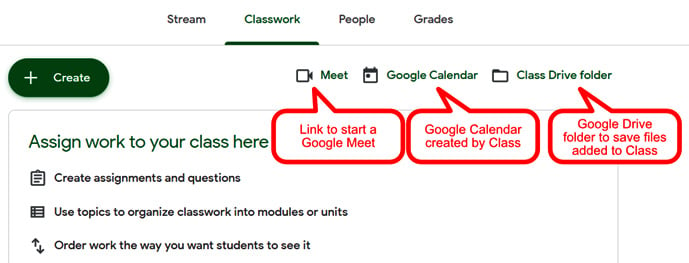
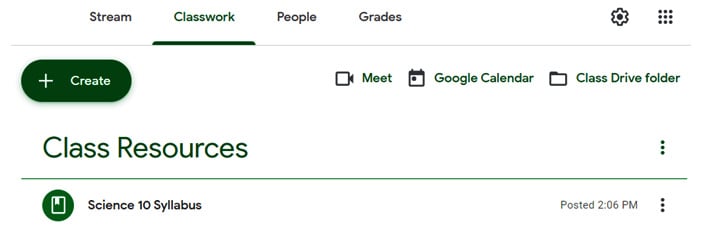
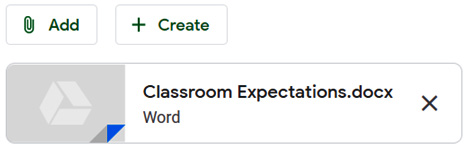
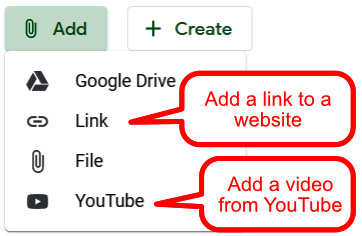
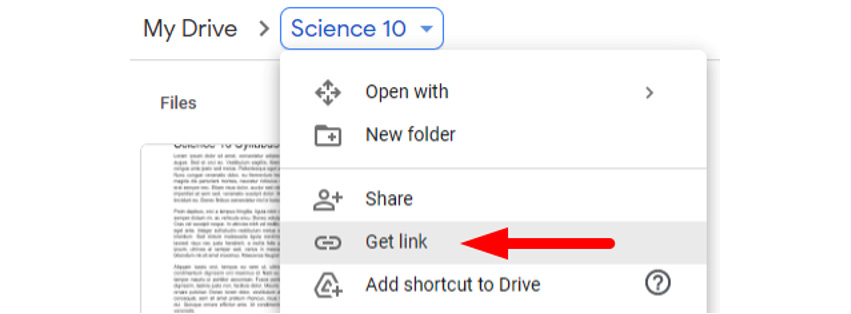
With hands-on tutorials, projects, and self-assessment questions, you’ll learn how to create classes, add students to those classes, send announcements, and assign classwork. The book also demonstrates how to start an online discussion with your students. Later, you’ll discover how you can involve parents by inviting them to receive guardian emails and sharing Google Calendar with a URL. This will help them to view assignment deadlines and other important information. The book goes step by step through all the features available and examples of how best to use them to manage your classroom.
By the end of this book, you’ll be able to do more with Google Classroom, managing your online or in-person school classes effectively.
Table of Contents (17 chapters)
Preface

Section 1: Getting Started
 Free Chapter
Chapter 1: Getting to Know Google Classroom
Chapter 2: Inviting Students to Their Virtual Classroom
Section 2: The Basics
Chapter 3: Sending Your First Announcement
Chapter 4: Starting an Online Discussion with Questions
Chapter 5: Handing Out and Taking In Assignments
Section 3: Diving Deeper
Chapter 6: Grading Written Assignments in a Flash
Chapter 7: Creating Multiple Choice and Fill-in-the-blank Quizzes using Google Forms
Chapter 8: Keeping Parents in the Loop
Chapter 9: Customizing to Your Subject
Section 4: Going Digital
Chapter 10: Hosting Classes Online Using Google Meet
Chapter 11: Strategies for a Successful Online Class
Customer Reviews