Sign In Start Free Trial
Account

Add to playlist

Create a Playlist

Modal Close icon
You need to login to use this feature.
  • Salesforce for Beginners
  • Toc
  • feedback
Salesforce for Beginners

Salesforce for Beginners

By : Sharif Shaalan
4.5 (25)
close
Salesforce for Beginners

Salesforce for Beginners

4.5 (25)
By: Sharif Shaalan

Overview of this book

Salesforce is the world's leading Customer Relationship Management (CRM) software, helping businesses connect with their constituents and partners. This book will give you a comprehensive introduction to managing sales, marketing, customer relationships, and overall administration for your organization. You'll learn how to configure and use Salesforce for maximum efficiency and return on investment. You'll start by learning how to create activities, manage leads, and develop your prospects and sales pipeline using opportunities and accounts, and then understand how you can enhance marketing activities using campaigns. Packed with real-world business use cases, this Salesforce book will show you how to analyze your business information accurately to make productive decisions. As you advance, you'll get to grips with building various reports and dashboards in Salesforce to derive valuable business insights. Finally, you'll explore tools such as process builder, approval processes, and assignment rules to achieve business process automation and set out on the path to becoming a successful Salesforce Administrator. By the end of the book, you'll have learned how to use Salesforce effectively to achieve your business goals.
Table of Contents (23 chapters)
close
1
Section 1: Salesforce for Sales, Marketing, and Customer Relationship Management
10
Section 2: Salesforce Administration
16
Section 3: Automating Business Processes Using Salesforce

Login and navigation

Once you get access to your development org, it's time to log in. To log in to Salesforce, you need to go to https://login.salesforce.com/. This is important, as we'll see later when we discuss sandboxes—you have to go to https://test.salesforce.com/ to log in to a sandbox. Your Salesforce username has to be in the format of an email, but not an actual email address. This is a key point since you may have access to multiple Salesforce orgs and the username has to be unique. So, when you set up your account, there is a requirement for an email address, which does have to be a real email address since you will receive your verification confirmation for the first-time login there. The username can be anything that takes the form of an email: so, for instance, my email might be [email protected], but my username could be [email protected].

Once you log in, you will notice all of the tabs at the top of the page:

These tabs will help you navigate to the various objects in Salesforce. Objects can be considered as buckets of information or tables in a database. The Account object holds the various account records, the Contact object holds the various contact records, and so on. We will cover these objects in more detail in the upcoming chapters. You will also see tabs for things such as reports, dashboards, and Chatter. So, tabs are a mix of objects, as well as items you may want to easily access. When you log in, you will always land on the home page, which can be customized with various items that can make your job easier. The home page has components such as quarterly performance and Einstein Voice Assistant, which can be customized as needed. The quarterly performance component allows the logged-in user to see their sales statistics for the current quarter. The Einstein Voice Assistant is an artificial intelligence module that lets you know which customers or potential customers to follow up with using a phone call or an email based on data points, such as the last activity.

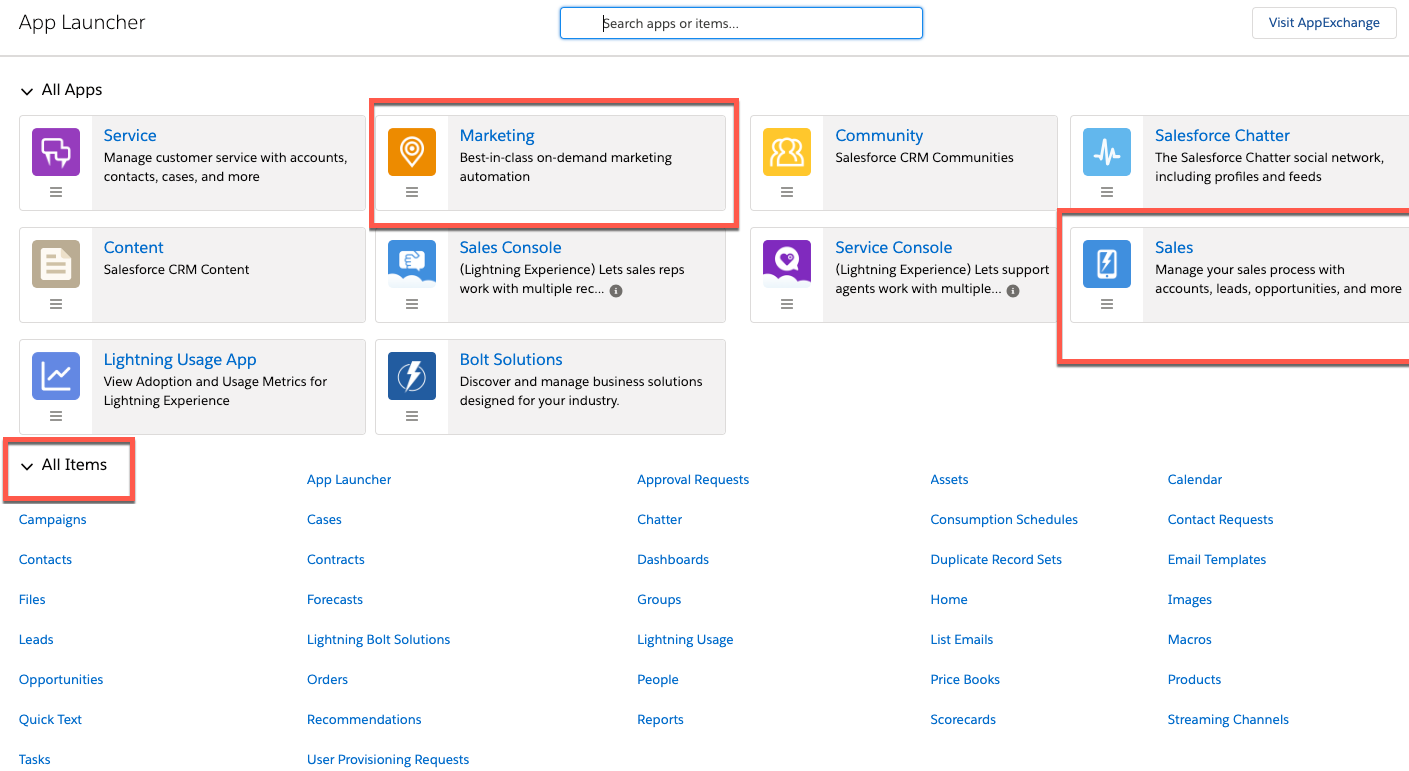
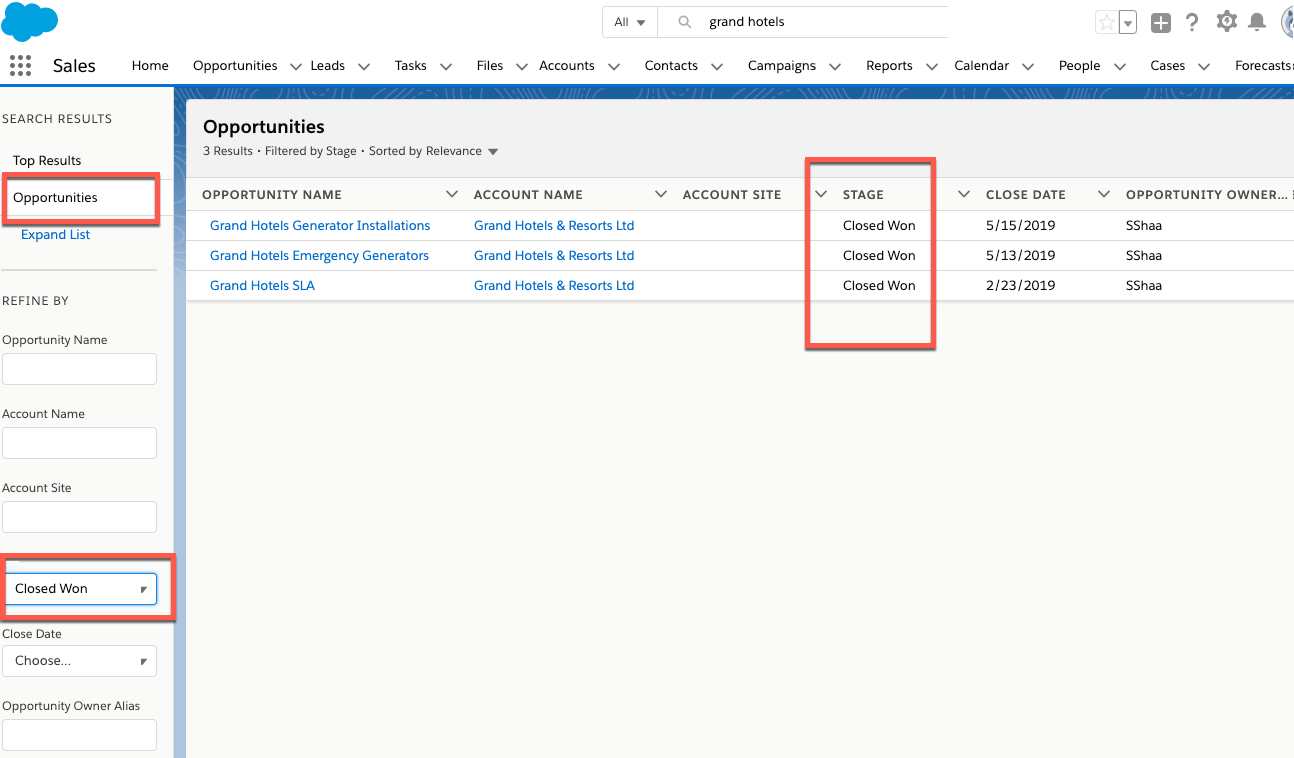
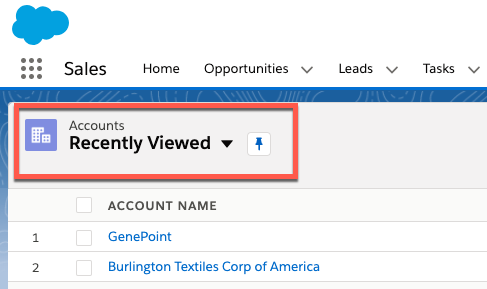
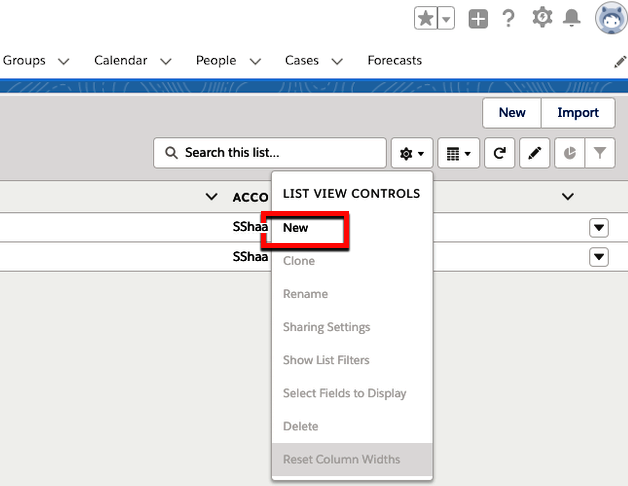
In the following sections, we will cover App Launcher, the search functionality, list views, Chatter, and the personal settings that can be applied.

App Launcher

On the upper left-hand side of the page, you will notice a few tiles under the cloud icon. These tiles take you to App Launcher, where you can access various apps in your Salesforce instance:

Apps are a collection of tabs that can be customized. Changing the apps will change the tabs you see in your navigation. Some good examples of things you will see when you click on this tile are the Sales and Marketing apps. The Sales app has things such as Leads, Contacts, Opportunities, and other tabs that are used for the sales process. The Marketing app has these same tabs, along with the Campaign tab, which is heavily used in marketing. You will also see All Items, which shows you all the objects in case you need to access one of them and it is not a part of the specific app you have chosen.

Search

At the top of the page, you will notice the global search bar. This search bar allows you to enter any search term and returns any object where that term is included. In the following example, I searched for grand hotels. Notice that Salesforce returns the Accounts, Opportunities, and Contacts where this term is present:

Once you have looked at the top results, you can narrow the search down to a specific object and refine the search further, if needed:

In the preceding example, I narrowed the search down to the Opportunity object and further refined the search by setting the Stage filter under Opportunities to Closed Won.

List views

List views are one of the most useful tools available to Salesforce end users. They allow you to sort, prioritize, and analyze records that are important to you within a given object using filter criteria. You will notice that whenever you click on a tab that is connected to an object, you will always land on a default view called Recently Viewed. This view shows any records you have recently worked on:

You can create as many list views as you need to help facilitate your work. For example, let's say you are an account manager and you only work with accounts in California. Let us see how to build this:

  1. Click on New to create a new list view:
  1. On the next screen, enter the list view name, California Accounts. The API name is the name used for development/coding purposes; this name is automatically set based on your list view name. As you will notice, the API name cannot have any spaces, so underscores are automatically entered in place of any spaces in the name.
  2. Here, you can also set the sharing settings for this list view. The view can be private, shared with all users, or shared with a subset of users:
  1. Next, you can choose your filters. You can filter by the accounts you own or all accounts and you can add multiple filters. For our example, we want any account where the billing state or the shipping state is CA. The filter logic allows you to set the AND/OR logic. In this case, we set it to 1 OR 2 since we want any records with the billing or the shipping state set to CA as shown in the following screenshot:

Create a few list views in your development org (organization) to get the hang of using this feature. As you do this, use different objects to see the different field options you have within a specific object and think about the use cases where you may need list views in a business context. Now that we have learned about login and navigation, let's take a look at Salesforce Chatter.

bookmark search playlist font-size

Change the font size

margin-width

Change margin width

day-mode

Change background colour

Close icon Search
Country selected

Close icon Your notes and bookmarks

Delete Bookmark

Modal Close icon
Are you sure you want to delete it?
Cancel
Yes, Delete