Sign In Start Free Trial
Account

Add to playlist

Create a Playlist

Modal Close icon
You need to login to use this feature.
  • Raspberry Pi 3 Projects for Java Programmers
  • Toc
  • feedback
Raspberry Pi 3 Projects for Java Programmers

Raspberry Pi 3 Projects for Java Programmers

By : Chandra, John Sirach, Seneviratne
close
Raspberry Pi 3 Projects for Java Programmers

Raspberry Pi 3 Projects for Java Programmers

By: Chandra, John Sirach, Seneviratne

Overview of this book

Raspberry Pi is a small, low cost and yet very powerful development platform. It is used to interact with attached electronics by the use of it's GPIO pins for multiple use cases, mainly Home Automation and Robotics. Our book is a project-based guide that will show you how to utilize the Raspberry Pi's GPIO with Java and how you can leverage this utilization with your knowledge of Java. You will start with installing and setting up the necessary hardware to create a seamless development platform. You will then straightaway start by building a project that will utilize light for presence detection. Next, you will program the application, capable of handling real time data using MQTT and utilize RPC to publish data to adafruit.io. Further, you will build a wireless robot on top of the zuma chassis with the Raspberry Pi as the main controller. Lastly, you will end the book with advanced projects that will help you to create a multi-purpose IoT controller along with building a security camera that will perform image capture and recognize faces with the help of notifications. By the end of the book, you will be able to build your own real world usable projects not limited to Home Automation, IoT and/or Robotics utilizing logic, user and web interfaces.
Table of Contents (8 chapters)
close
4
Integrating a Real-Time IoT Dashboard

Writing your Java program

Open the NetBeans IDE and create a new project named ZumoRobot.

  1. In the menu bar, click File|New Project. The New Project wizard will appear. In the New Project wizard, click on Java under Categories and click on Java Application under Projects. Then click the Next button:
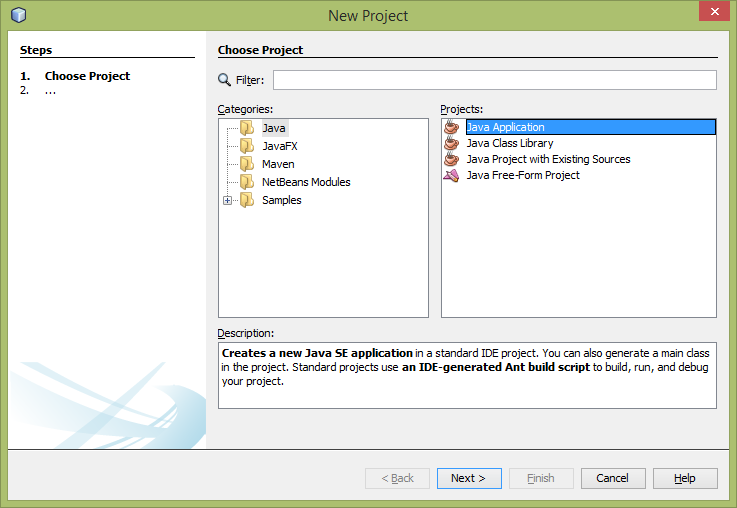
Figure 5-20: Creating ZumoRobot project with NetBeans IDE - step 1. Image credits: Courtesy of Adafruit (https://www.adafruit.com/)
  1. In the Name and Location step, type ZumoRobot for the Project Name and com.packt.B05688.chapter5.ZumoRobot for the Create Main Class. Click the Finish button to create the project:
Figure 5-21: Creating ZumoRobot project with NetBeans IDE - step 2. Image credits: Courtesy of Adafruit (https://www.adafruit.com/)
  1. The NetBeans IDE will create a file named ZumoRobot.java and the project environment for you.
  2. To work with Raspberry Pi GPIO pins, you should add the Pi4j library to your...

Unlock full access

Continue reading for free

A Packt free trial gives you instant online access to our library of over 7000 practical eBooks and videos, constantly updated with the latest in tech
bookmark search playlist download font-size

Change the font size

margin-width

Change margin width

day-mode

Change background colour

Close icon Search
Country selected

Close icon Your notes and bookmarks

Delete Bookmark

Modal Close icon
Are you sure you want to delete it?
Cancel
Yes, Delete