Before exploring the book, you need to set up Terraform CLI and configure one of the cloud platforms for Terraform usage. We use the AWS cloud platform in this book.
Terraform works seamlessly across multiple operating systems. It offers multiple installation options. The following sections will help you understand the Terraform components and the installation and configuration of Terraform for AWS:
- Components of Terraform
- Terraform installation:
- Configuring Terraform with AWS
By the end of this section, you will understand the different components of Terraform and the different ways of installing Terraform across Linux, Windows, and macOS.
Components of Terraform
When Terraform was launched in 2014, it was a single component that included the provider plugins as part of the binary. In 2017, HashiCorp made the decision to separate the providers to allow the provider’s code to be managed independently from the Terraform binary (from Terraform version 0.10).
Currently, Terraform has a plugin-based architecture in which the Terraform core makes a remote procedure call (RPC) to the Terraform plugins to provision and manage the infrastructure.
Terraform is composed of two components:
- Terraform core: This is a statically compiled binary written in the Go programming language. Once it has been compiled, you get a binary file that is used as the command-line tool. This binary is downloaded by users and acts as an entry point. The core communicates with the plugins, reads the configuration files, creates a plan, and manages the resources.
- Terraform plugins: Terraform plugins are the binaries that expose an implementation for a specific service/provider, such as AWS, GCP, or Salesforce. These plugins get invoked by the Terraform core over RPC. The providers are a type of plugin that needs to be installed separately. These provider plugins are responsible for authenticating and initializing the libraries to make the API calls to the infrastructure provider.
At the time of this book, Terraform supports the Windows, macOS, FreeBSD, OpenBSD, Solaris, and Linux (Ubuntu/Debian, CentOS/RHEL, Fedora, and Amazon Linux) operating systems. Figure 0.2 summarizes the details of the Terraform installation.
Figure 0.2: Terraform installation
In the following section, you will learn how to install Terraform on macOS, Linux, and Windows.
Terraform Installation
The Terraform installation process varies depending on the operating system and the CPU architecture.
macOS
You can install Terraform on macOS using a package manager (Homebrew), by downloading the pre-compiled binary, or by compiling it from the source. In this section, you will learn how to install via the package manager and pre-compiled binary.
Package Manager – Homebrew
Homebrew is a free, open source package management system for macOS. The following steps will help you install Terraform using the Homebrew package manager:
- Install the HashiCorp tap containing the Terraform binary by running the following command:
brew tap hashicorp/tap
- Install Terraform by running the following command:
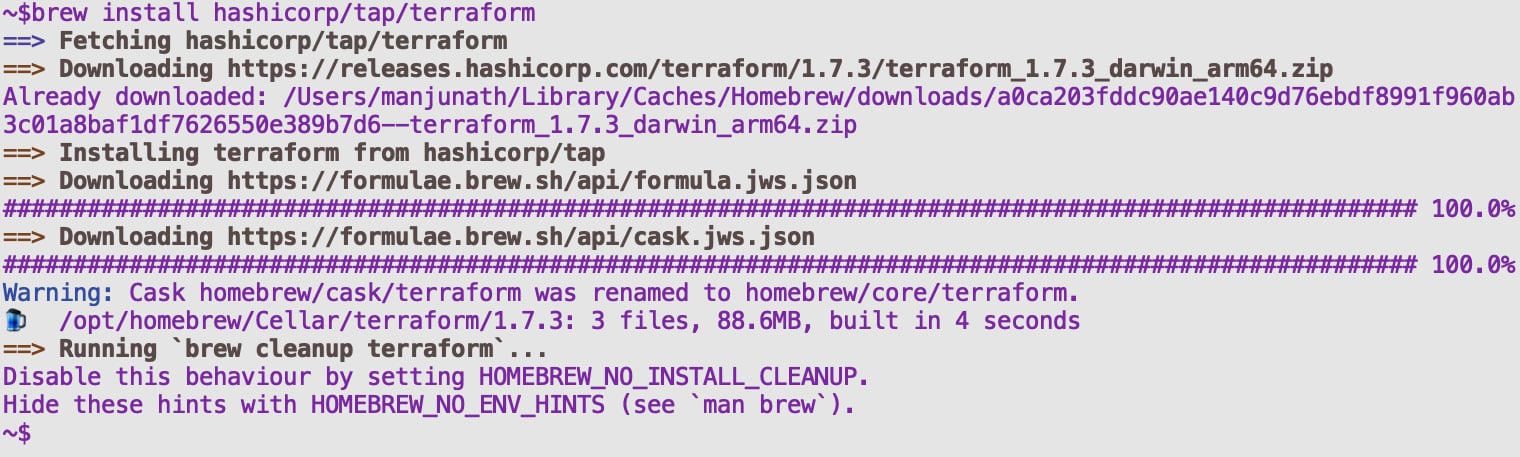
brew install hashicorp/tap/terraform
- After installation, you should see some output similar to that shown in Figure 0.3. There may be some variation in the messages received depending on the presence of a previous installation of Terraform.
Figure 0.3: Terraform installation using Homebrew
- Test the installation of Terraform by running the following command, which shows the version:
terraform -v
- You should see some output like that shown in Figure 0.04. The version shown on your terminal may be a different one.
Figure 0.4: Terraform installation validation
Pre-Compiled Binary Download
If you are looking for a specific version of Terraform, it is recommended to go with the pre-compiled binary option. Another reason to go with this installation option is that the package managers may not always have the latest version of the software.
Pre-compiled binaries are available in both AMD64 and ARM64. Make sure to choose the right binary depending on your CPU architecture. The following steps will help you install Terraform using a pre-compiled binary:
- Navigate to the following URL that has the latest version of pre-compiled binary:
https://developer.hashicorp.com/terraform/install
- You should see the binaries, as shown in Figure 0.5.
Figure 0.5: Pre-compiled binary for macOS
- Depending on the CPU architecture of your laptop or server, you can choose AMD64 or ARM64.
- The binary is downloaded in ZIP format. Navigate to the path where the file was downloaded and unzip it. In the following command, the file is downloaded under
~/Downloads and hence the command is being run from the Downloads folder:~/Downloads $ unzip terraform_1.7.3_darwin_arm64.zip
- You should see the Terraform binary file, as shown in Figure 0.6.
Figure 0.6: Unzipping the Terraform ZIP file
- Now, move the Terraform binary to the appropriate directory on the filesystem. Typically, it is moved to
/usr/local/bin:mv ~/Downloads/terraform /usr/local/bin/
- Now you can test the Terraform installation by running the following command:
terraform -v
You should see the output detailing the Terraform version as shown in Figure 0.7.
Figure 0.7: Pre-compiled binary installation validation
Note
If you get an error when you run terraform -v, make sure your PATH variable has the location where the Terraform binary is moved to. Here, the binary is moved to /usr/local/bin, and this should be present in your PATH environment variable on your operating system.
Linux
Terraform is available for Ubuntu/Debian-based OS, CentOS/RHEL-based OS, Fedora, and Amazon Linux operating systems. All operating systems support installation via the package manager, pre-compiled binary, and compilation from the source.
In the following sections, you will learn how to install Terraform in Ubuntu and Amazon Linux.
Package Manager
Use the package manager specific to your Linux OS distribution to install Terraform. Here, you will be using Ubuntu and Amazon Linux as examples. For other OS, refer to https://developer.hashicorp.com/terraform/install.
Ubuntu
The following steps will help you install Terraform via the package manager in Ubuntu:
- Download HashiCorp’s GPG key onto your OS:
wget -O- https://apt.releases.hashicorp.com/gpg | sudo gpg --dearmor -o /usr/share/keyrings/hashicorp-archive-keyring.gpg
- Add HashiCorp’s
apt repository that contains Terraform:echo "deb [signed-by=/usr/share/keyrings/hashicorp-archive-keyring.gpg] https://apt.releases.hashicorp.com $(lsb_release
-cs) main" | sudo tee /etc/apt/sources.list.d/hashicorp.list
- Update the repo and install Terraform:
sudo apt update && sudo apt install terraform
- Test the installation:
terraform version
If you get the version details as output, then Terraform has been installed successfully.
Amazon Linux
The following steps will help you install Terraform via the package manager in Amazon Linux:
- Install
yum-config-manager to manage the repositories:sudo yum install -y yum-utils shadow-utils
- Add the HashiCorp Linux repository:
sudo yum-config-manager --add-repo https://rpm.releases.hashicorp.com/AmazonLinux/hashicorp.repo
- Install Terraform:
sudo yum -y install terraform
- Test the installation:
terraform version
- If you get the version details as output, then Terraform has been installed successfully.
Pre-Compiled Binary Download
Copy the appropriate binary’s link for your OS and CPU architecture from the following URL:
https://developer.hashicorp.com/terraform/install
All the operating systems have similar steps: install the unzip application, download the Terraform binary, unzip the archive, move the binary to the right location, and test it. To avoid repetition, this section will cover Ubuntu only. For other OS, please make the required changes in the commands (mostly in the unzip installation) before proceeding with this method.
Ubuntu
The following steps will help you install Terraform using a pre-compiled binary in Ubuntu:
- Install the
unzip package, which is required to unzip the Terraform file:sudo apt-get install unzip
- Download the Terraform binary that needs to be installed (you need to copy this link from the HashiCorp downloads URL):
wget https://releases.hashicorp.com/terraform/1.7.3/terraform_1.7.3_linux_amd64.zip
- Extract the downloaded file archive:
unzip terraform_1.7.3_linux_amd64.zip
- Move the extracted file into a directory as defined in the
PATH variable:mv terraform /usr/local/bin/
- Test the installation:
terraform version
- If you get the version details, Terraform is installed successfully.
Compile from Source
The compile from source option is typically used for operating systems that are not directly supported by Terraform, but where you still want to install it.
The steps to compile the Terraform from source remain the same across the Linux OS. You will have to make sure you use an appropriate package manager to install go. The following steps are done on Ubuntu:
- To compile the Terraform binary from source, clone the HashiCorp Terraform repository:
git clone https://github.com/hashicorp/terraform.git
- Navigate to the new directory:
cd terraform
- Install
go, which is required to compile the binary:sudo snap install go
- Now compile the binary by running the following command. The compiled binary is stored in
$GOPATH/bin/terraform:go install
- Move the compiled Terraform binary file into a directory searched for executables. You will first have to navigate to the
bin folder of the go installation and run the following command:mv terraform /usr/local/bin/
- Test the installation:
terraform version
- If you get the version details, Terraform has been installed successfully.
Windows
You can install Terraform on Windows using the Chocolatey package manager. You do not have to add the location of the Terraform binary in the PATH variable when installed through Chocolatey. The following steps will help you install Terraform in Windows using Chocolatey:
- Open the PowerShell CLI as an administrator.
- Enter the following command, which will install the Chocolatey package manager. This has been tested on Windows Server 2022 for the installation of Chocolatey. Please make use of the command appropriate for your version of Windows to install Chocolatey:
Set-ExecutionPolicy Bypass -Scope Process -Force; [System.Net.ServicePointManager]::SecurityProtocol = [System.Net.ServicePointManager]::SecurityProtocol -bor 3072; iex ((New-Object System.Net.WebClient).DownloadString('https://chocolatey.org/install.ps1')) - Once the installation succeeds, test it by running the following command:
choco version
- Output like that in Figure 0.8 confirms the successful installation of Chocolatey:
Figure 0.8: Chocolatey installation validation
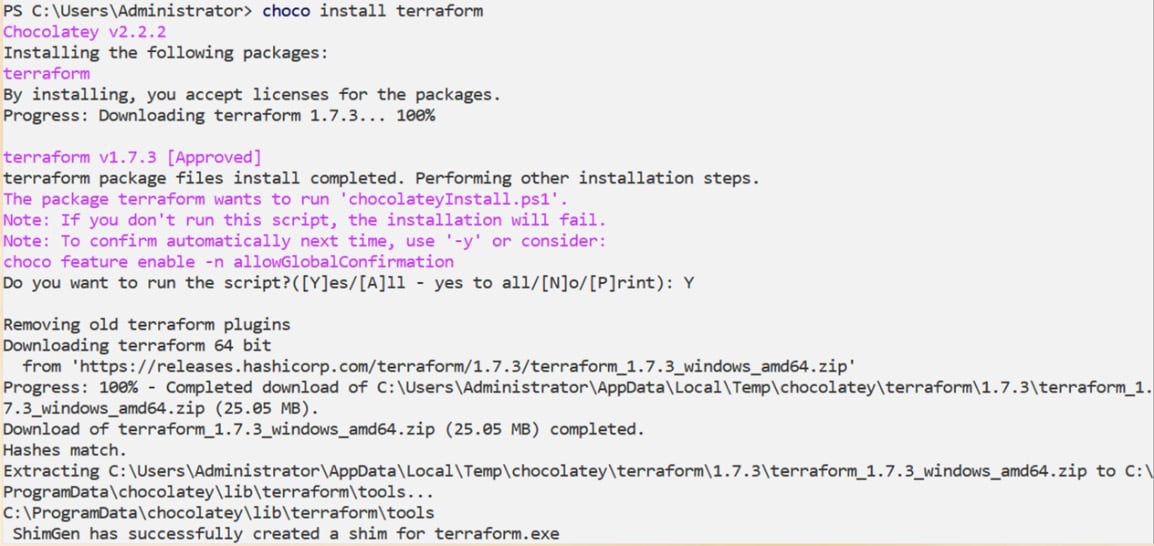
- Use Chocolatey to install Terraform by running the following command:
choco install -y terraform
The output will look like Figure 0.9 when Terraform is successfully installed:
Figure 0.9: Terraform installation via Chocolatey
- Test the installation:
terraform version
- If you get the version details as output, then Terraform has been installed successfully.
Pre-Compiled Binary Download
The following steps will help you install Terraform on Windows using a pre-compiled binary:
- Depending on your operating system’s CPU architecture, download either the 386 or AMD64 binary from the following HashiCorp URL:
https://developer.hashicorp.com/terraform/install
- The file you download will be in ZIP format. Extract the contents of the archive to get the
terraform.exe file.
- Create a new folder named
terraform under C:\Program Files (x86) and move this terraform.exe file into that folder (i.e., to C:\Program Files (x86)\terraform).
- You will have to add the Terraform binary file’s location in the
PATH environment variable to make it available for the command line.
- Open the command line and execute
SystemPropertiesAdvanced. This should open the System Properties window on the Advanced tab, as shown in Figure 0.10. (Alternatively, you can search for advanced system settings in the search bar.)
Figure 0.10: System properties
- Click on Environment Variables. This should open a new window.
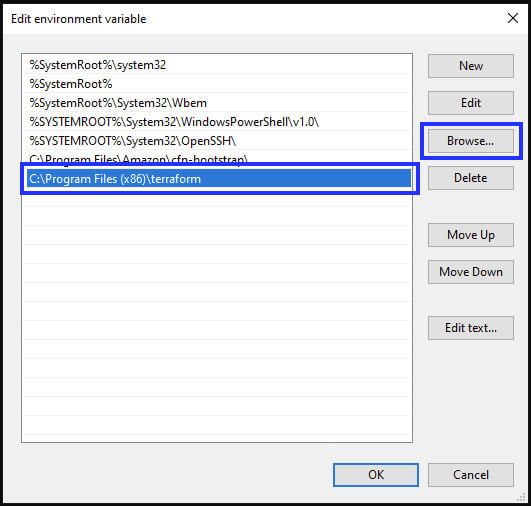
- Select Path under System variables and click Edit as shown in Figure 0.11. This should open another screen.
Figure 0.11: Modifying the PATH environment variable
- On the new screen, either add the
terraform.exe file’s location manually as shown in Figure 0.12, or browse to the location of the terraform.exe file to select it. Once the new location appears on the screen, click OK to save it.
Figure 0.12: Adding the Terraform location to the PATH environment variable
- In the command line, run the following command, which should show the Terraform version if the configuration was successful:
terraform version
Configure Terraform for AWS
For Terraform to manage the resources in any platform, it must first authenticate against the platform. The following steps will help you in configuring Terraform to interact with AWS to manage the resources:
- Make sure you have installed Terraform and the AWS CLI. You can follow the steps given at the following URL to install the AWS CLI:
https://docs.aws.amazon.com/cli/latest/userguide/getting-started-install.html
- Terraform can authenticate against AWS using the following methods:
- Parameters in the provider configuration (access key and secret access key in given in the provider config)
- Environment variables (access key and secret access key passed through environment variables)
- Shared credentials files (credentials are taken from
$HOME/.aws/credentials) - Shared configuration files (credentials are taken from
$HOME/.aws/config) - Container credentials (credentials are taken from the container’s
task role) - Instance profile credentials (only if you are running Terraform on EC2 with an IAM role associated)
- Assuming an IAM role (very useful for AWS multi-account login)
In the following steps, you will learn how to configure the Terraform to authenticate to AWS via Shared credentials files:
- Log in to the AWS Management Console and create an IAM user with enough permissions to manage the required resources. Detailed instructions to create an IAM user are provided at https://packt.link/7afrg.
- Generate the access key and secret access key for this IAM user from the IAM dashboard. Copy the access key and secret access key, as they will be required in later steps.
- Configure the AWS CLI to use the credentials that were copied in the previous step by running the following command:
aws configure
- You will be prompted for the access key, secret key, Region, and output format. Paste these details according to the prompt as shown in Figure 0.13.
Figure 0.13: Configuring the AWS CLI
- Once you enter the details, the credentials get stored in the
~/.aws/credentials file in Linux and macOS.
- You can use the following block to finish the final configuration required for Terraform to talk to AWS. Create a file named
provider.tf containing the following code:terraform {
required_providers {
aws = {
source = "hashicorp/aws"
version = "~> 5.0"
}
}
}
provider "aws" {
region = "ap-south-1"
}
Note
Note that we have not made any reference to the file where the credentials are stored or the profile used by the AWS CLI. If we are using the default options, we do not have to explicitly specify this as Terraform will automatically detect and use them.
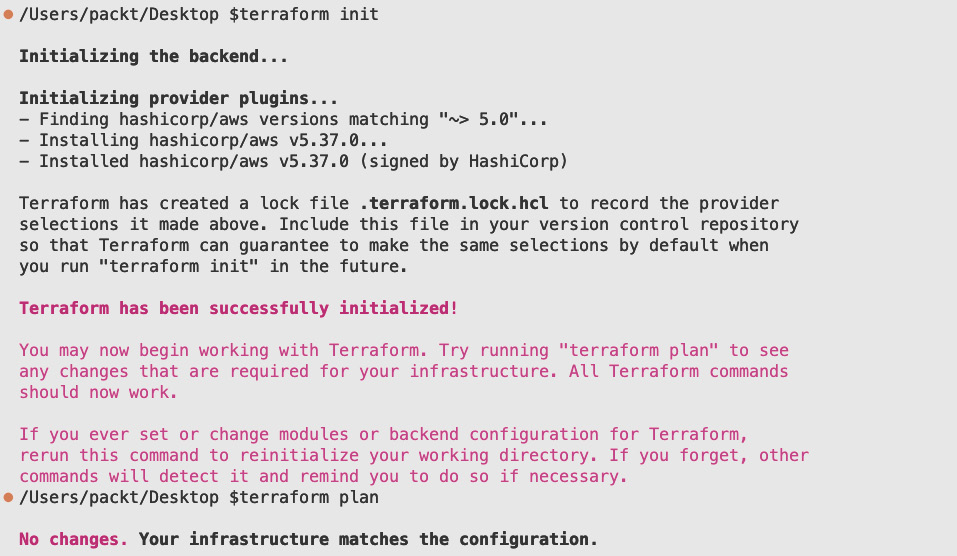
When you run terraform init and terraform plan with the provider code, it should go through without any issues as shown in Figure 0.14:
terraform init
terraform plan
Figure 0.14: Configuring AWS provider
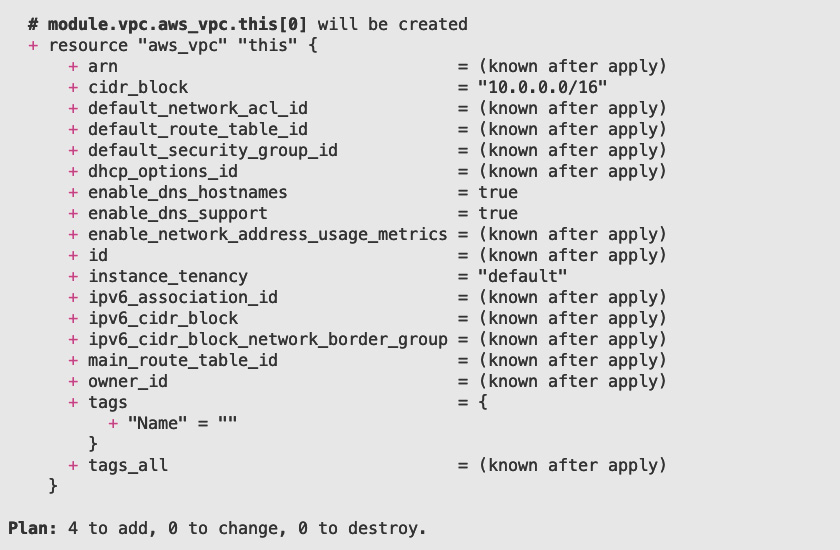
You can test the connectivity to AWS by adding a simple VPC creation code from the public module either in the same provider.tf file or by creating a new file named vpc.tf (make sure both files are in the same folder) and then running terraform plan:
module "vpc" {
  source  = "terraform-aws-modules/vpc/aws"
  version = "5.5.2"
}
You will see terraform plan trying to create four resources (NACL, security group, route table, and VPC). Only the VPC plan is shown in Figure 0.15 for brevity, but note that the plan shows the overall addition of four resources.
Figure 0.15: Terraform plan for VPC creation in AWS
The terraform plan output confirms that we have successfully configured Terraform to communicate with AWS to manage the resources.
Note
There are multiple editors that can be used for writing Terraform code. The choice of editor is very subjective. However, the most common ones are Visual Studio Code (VSCode), Atom, and PyCharm. Irrespective of the editor you choose, make sure you install the Terraform plugin/extension, which helps a lot when writing Terraform code.


 Free Chapter