-
Book Overview & Buying
-
Table Of Contents

-
Feedback & Rating

Cisco ACI Cookbook
By :
Cisco ACI Cookbook
By:
Overview of this book
Cisco Application Centric Infrastructure (ACI) is a tough architecture that automates IT tasks and accelerates data-center application deployments.
This book focuses on practical recipes to help you quickly build, manage, and customize hybrid environment for your organization using Cisco ACI. You will begin by understanding the Cisco ACI architecture and its major components. You will then configure Cisco ACI policies and tenants. Next you will connect to hypervisors and other third-party devices. Moving on, you will configure routing to external networks and within ACI tenants and also learn to secure ACI through RBAC. Furthermore, you will understand how to set up quality of service and network programming with REST, XML, Python and so on. Finally you will learn to monitor and troubleshoot ACI in the event of any issues that arise.
By the end of the book, you will gain have mastered automating your IT tasks and accelerating the deployment of your applications.
Table of Contents (11 chapters)
Preface

 Free Chapter
Understanding Components and the ACI Fabric
Configuring Policies and Tenants
Hypervisor Integration (and Other Third Parties)
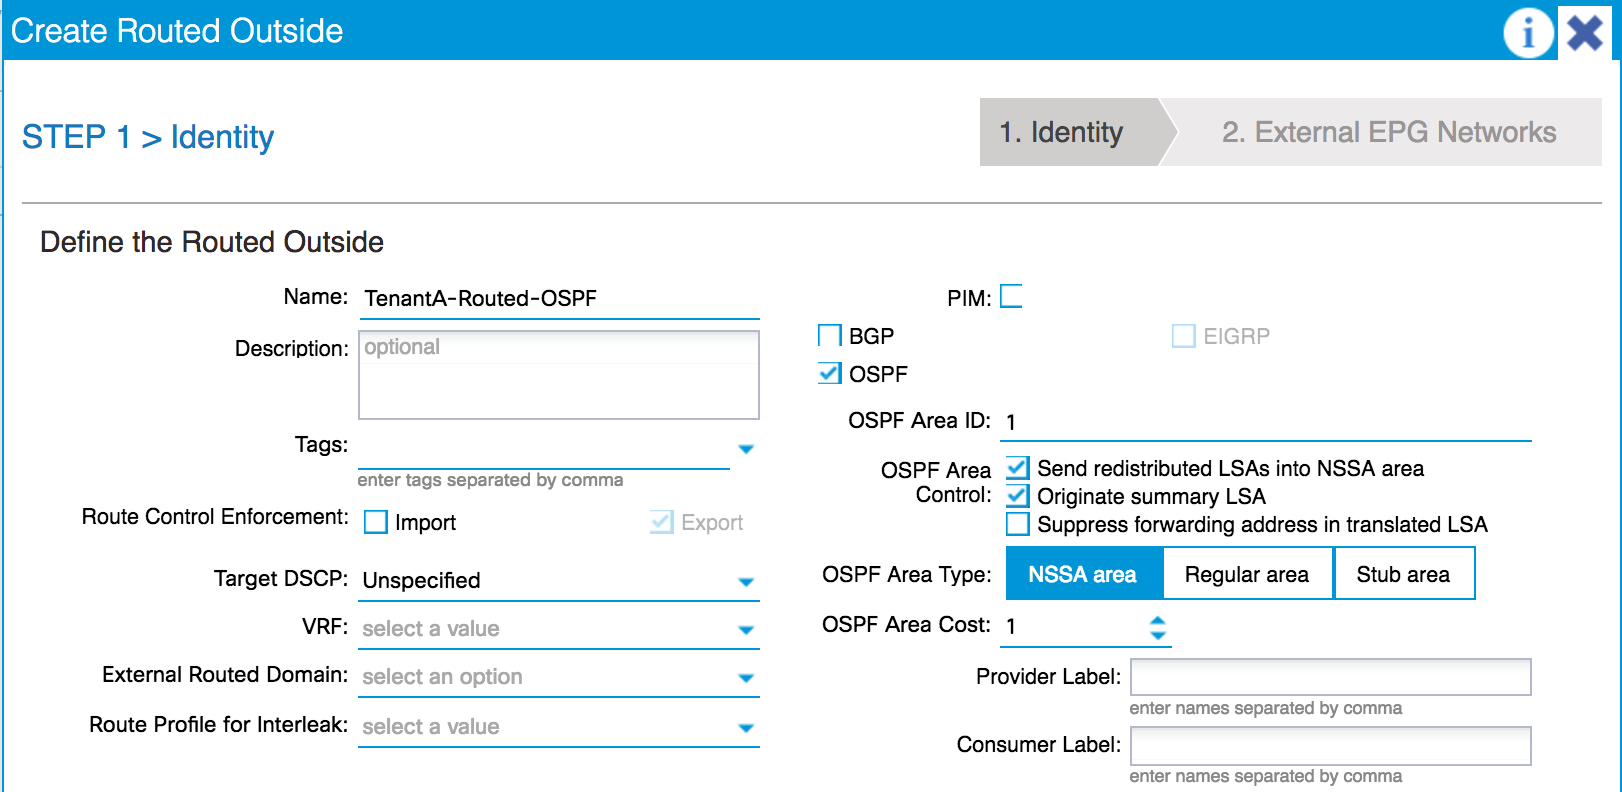
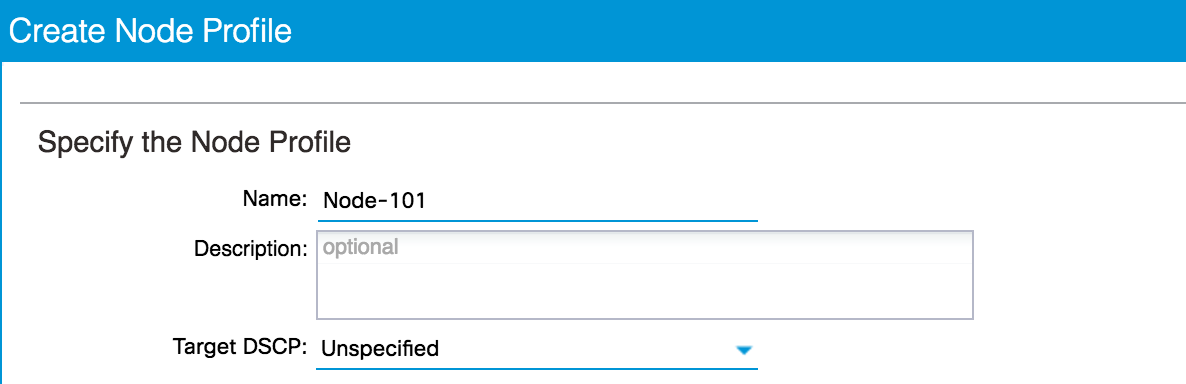
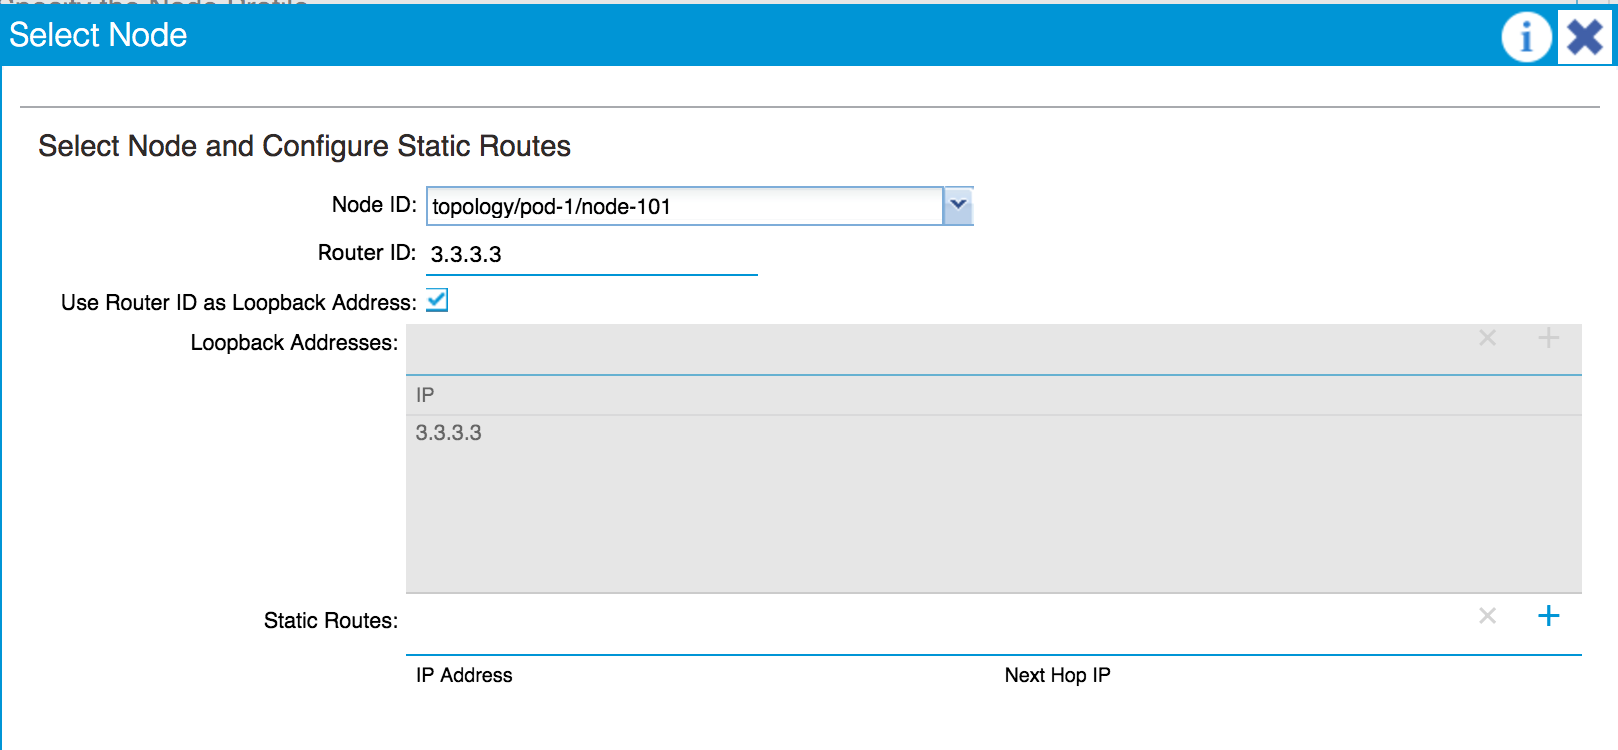
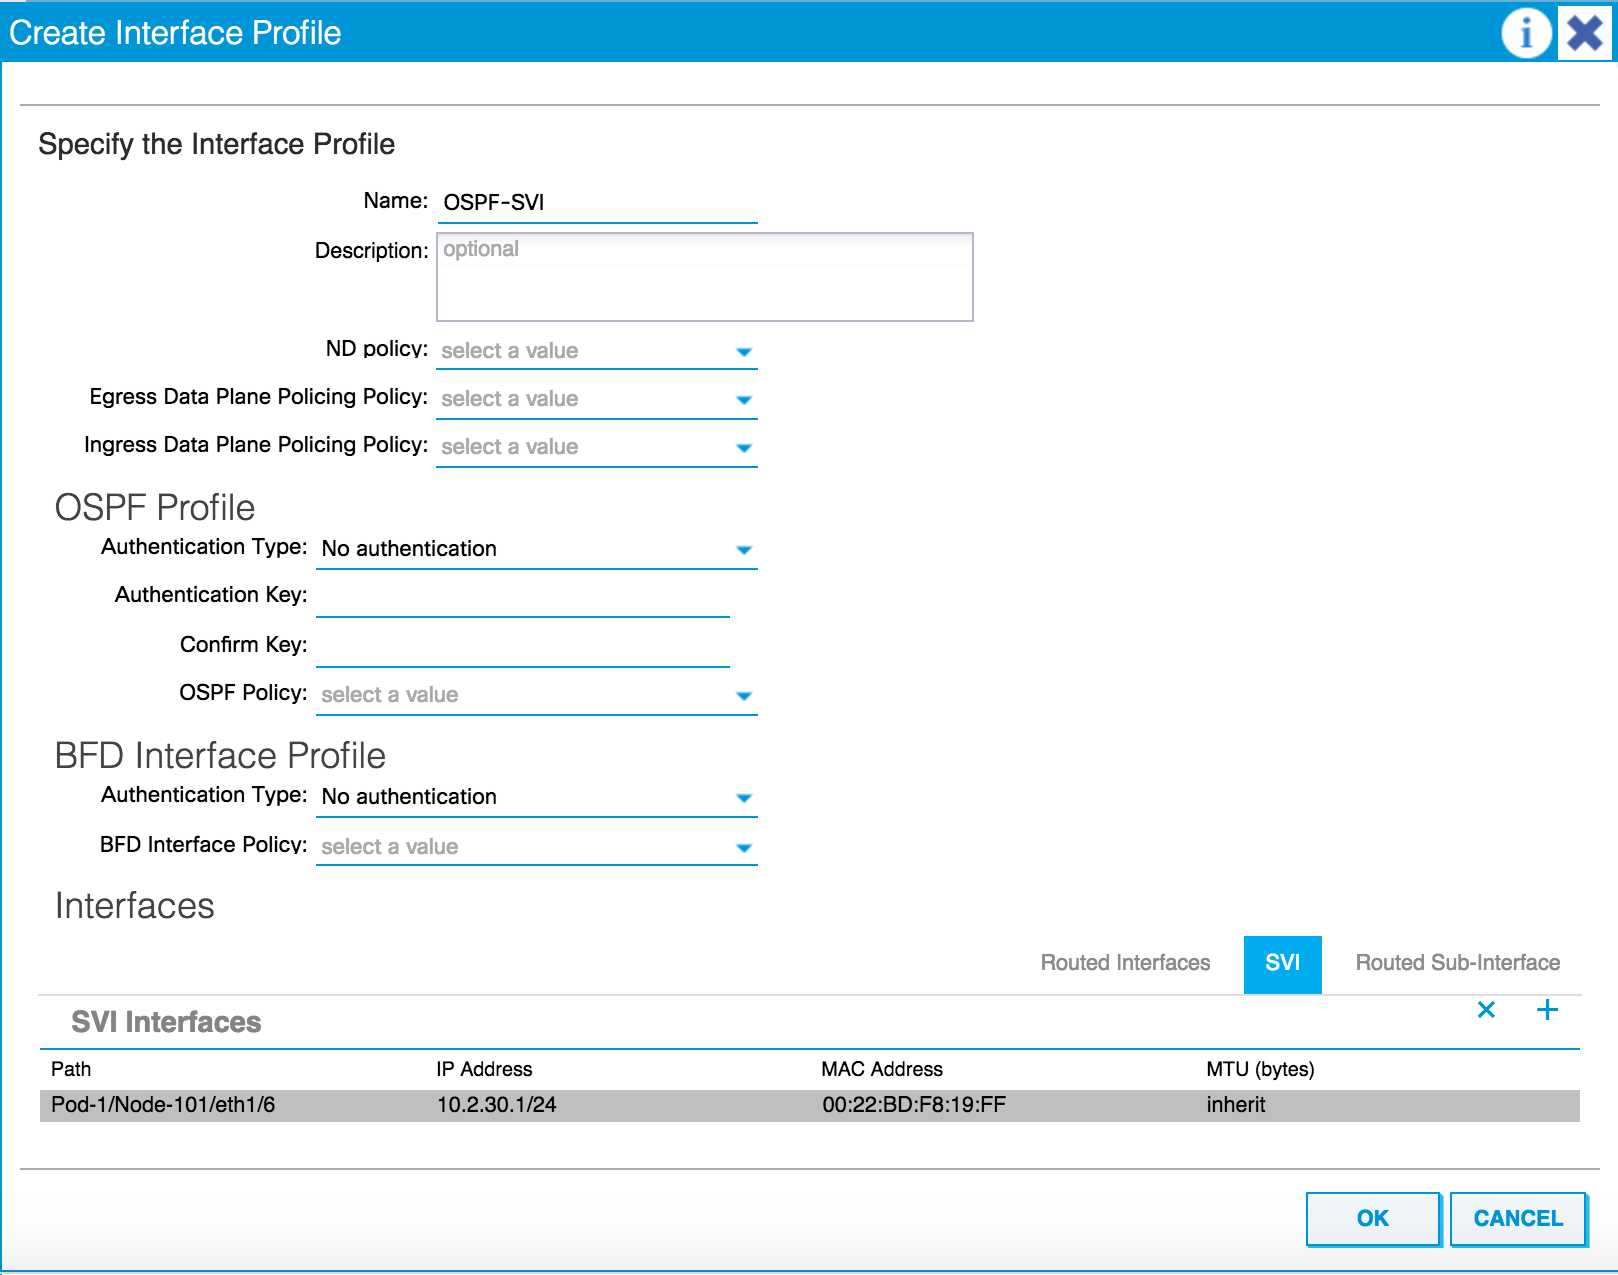
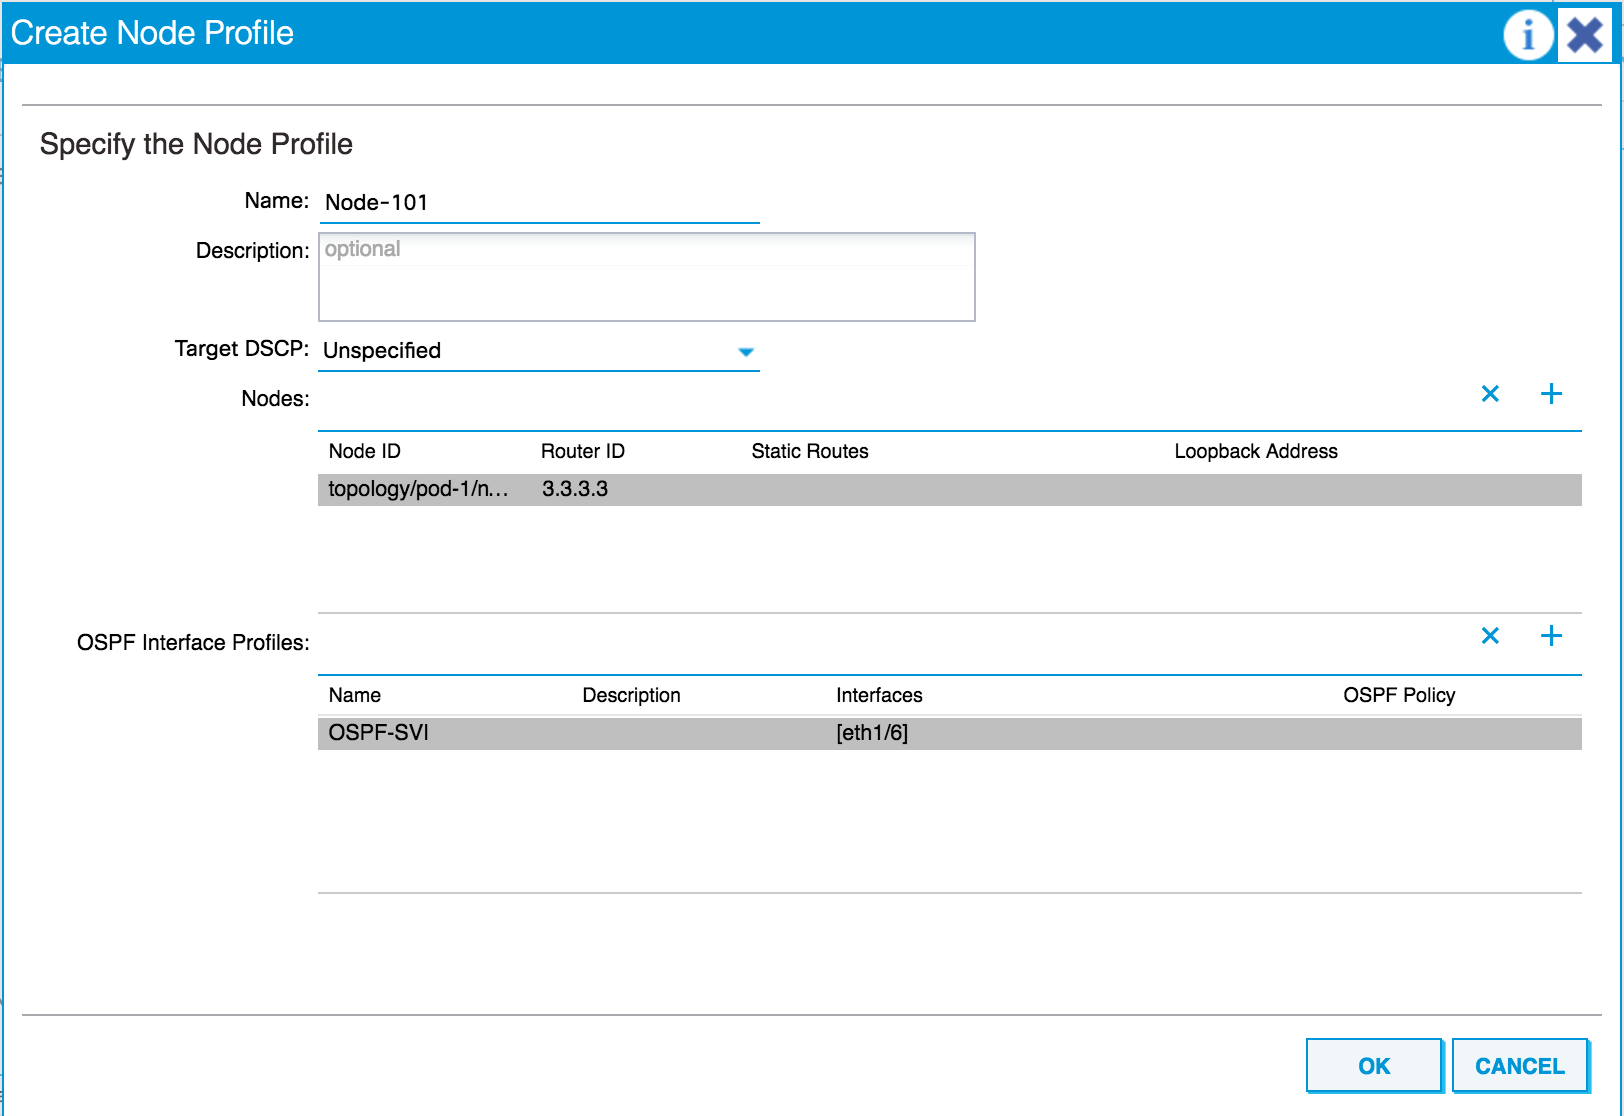
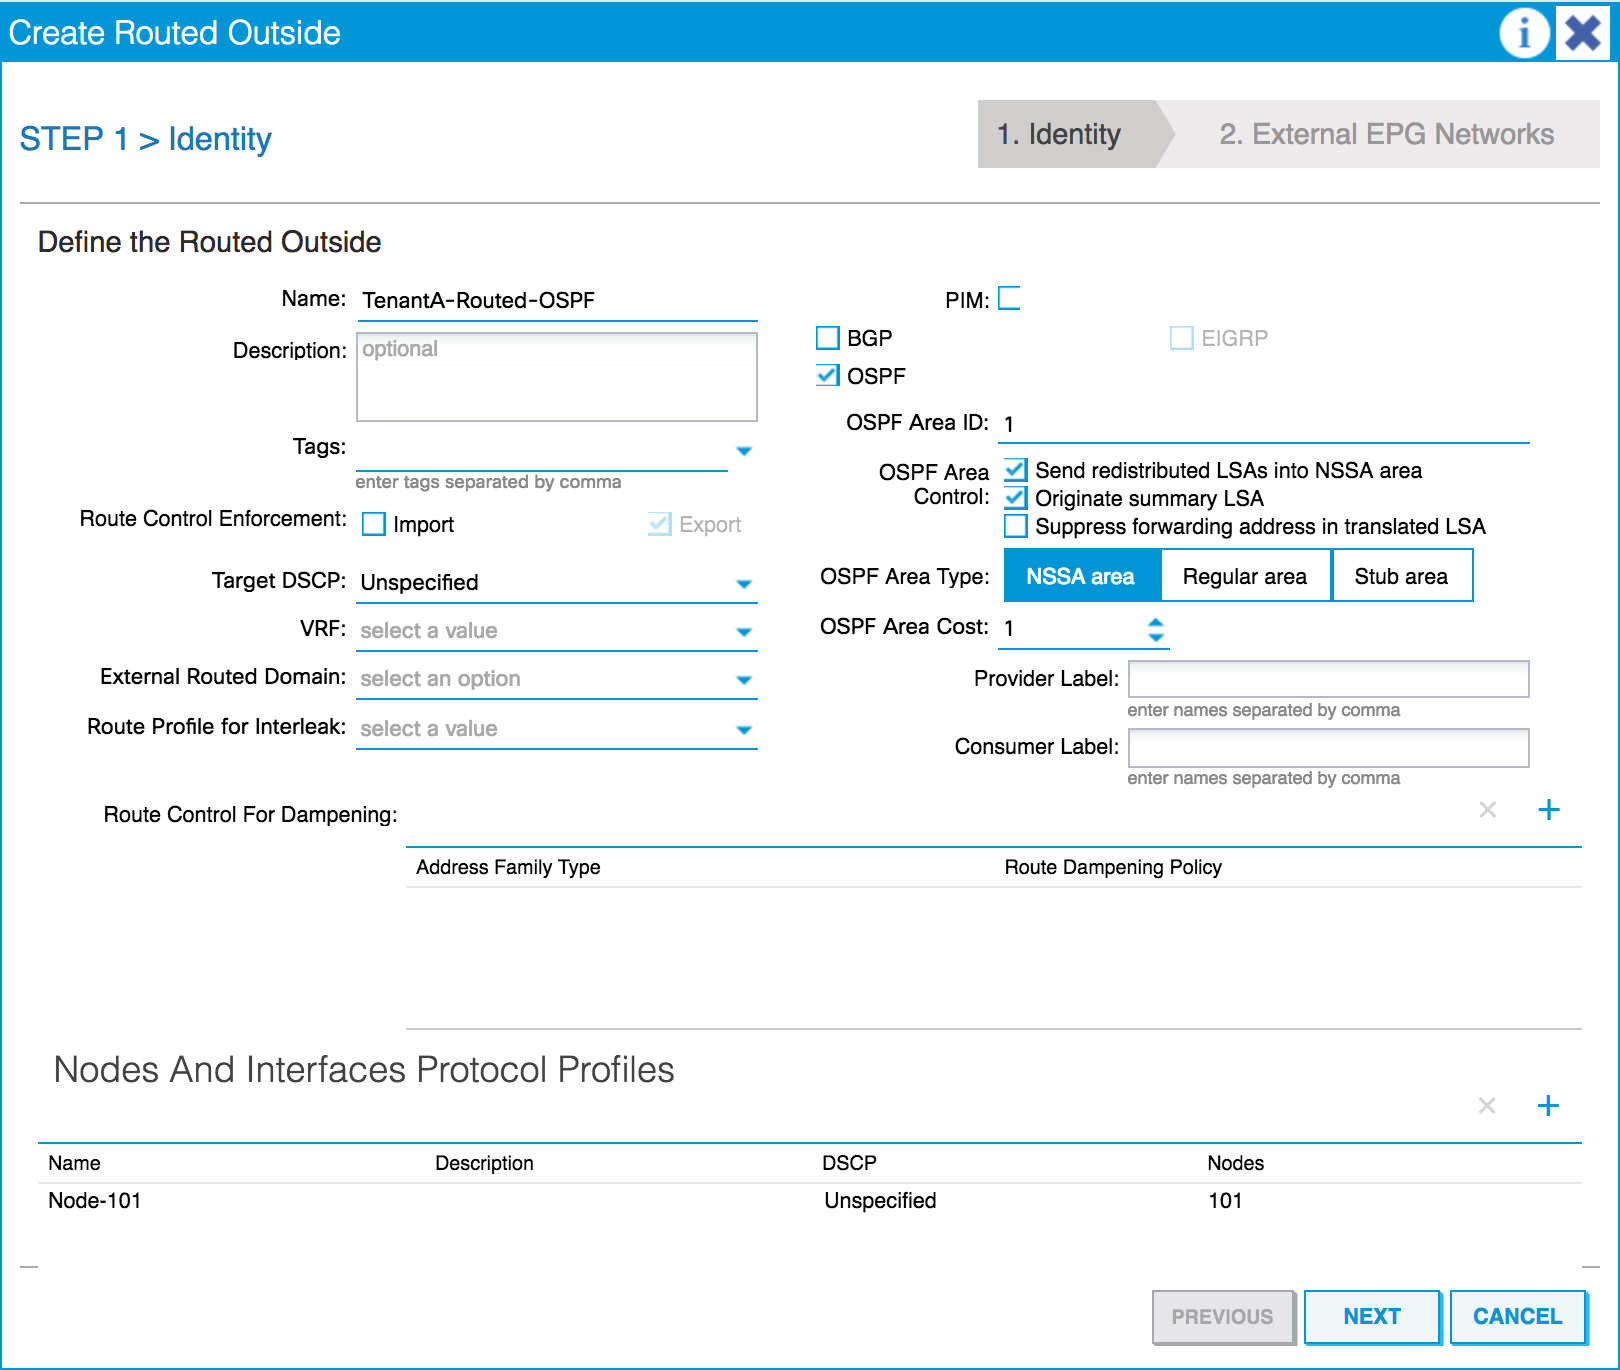
Routing in ACI
ACI Security
Implementing Quality of Service in ACI
Network Programmability with ACI
Monitoring ACI
Troubleshooting ACI
An End-to-End Example Using the NX-OS CLI
Customer Reviews